Step-by-Step Instructions
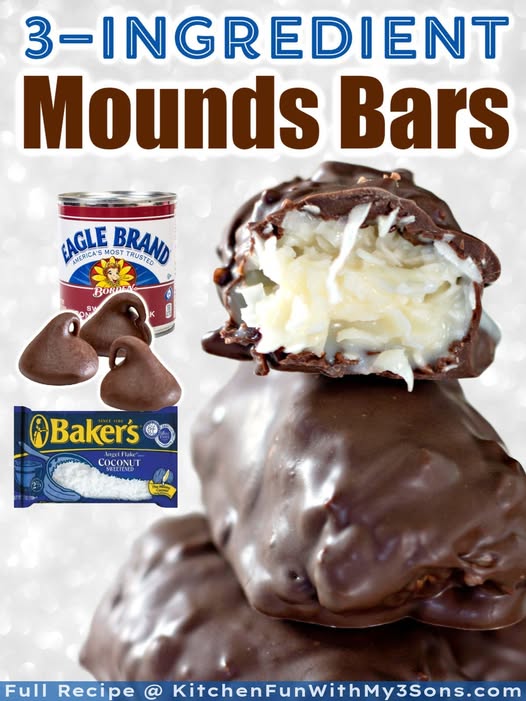
First, we make the iconic coconut center. In your mixing bowl, combine the three cups of sweetened shredded coconut with the entire can of sweetened condensed milk. You’ll want to mix and fold it with a spatula until every single strand of coconut is thoroughly coated and glossy. The mixture will be very thick and sticky, which is exactly what you want. Press this firmly and evenly into your parchment-lined 8×8 dish. I mean really press it down—use the bottom of a measuring cup to compact it into a uniform layer. This step is crucial for getting bars that hold their shape and don’t crumble later. I learned this the hard way when my first batch was too loose! Pop the pan into the freezer for at least 2 hours; don’t rush this. It needs to be rock-solid for easy cutting and dipping.
Once your coconut slab is frozen solid, use the parchment paper to lift the entire block out onto a cutting board. Using a sharp knife, cut it into your desired bar or square shapes. Pro tip: wipe your knife clean with a warm, damp cloth between cuts for super clean edges. Now, return these cut pieces to a parchment-lined tray and back into the freezer while you melt your chocolate. This keeps them firm and makes the dipping process infinitely easier. For the chocolate, set up your double boiler. Keep the water at a gentle simmer, not a rolling boil, and stir the chocolate chips constantly as they melt until perfectly smooth. Remove it from the heat once melted.
Here’s the fun, slightly messy part: dipping! Working with one frozen coconut bar at a time, drop it into the melted chocolate. I use a fork to flip it, ensuring it’s completely coated, then lift it out, letting the excess chocolate drip back into the bowl for a few seconds. Carefully place the coated bar onto a fresh sheet of parchment paper. If you want that classic Mounds bar look, use the tines of your fork to make a wavy line across the top before the chocolate sets. Repeat with all bars, working relatively quickly. You’ll likely need to re-warm your chocolate gently if it starts to thicken. Let the chocolate set completely at room temperature—this gives it a nicer snap than setting in the fridge, which can cause blooming (those white streaks).
Pro Tips for Best Results
The single most important tip I can give you is to be patient with the freezing stages. I was impatient during my first test and only froze the slab for an hour. When I went to cut and dip, the coconut center was too soft, leading to messy shapes and a filling that wanted to ooze out in the warm chocolate. A full two hours, or even three, makes the process seamless. Another game-changer is to keep the cut pieces frozen right up until the moment they hit the chocolate. I leave the tray in the freezer and pull out just one piece at a time. This keeps the center firm, so the chocolate sets around it quickly, creating a perfect shell.
When melting your chocolate, ensure absolutely no water or steam gets into the bowl. Even a single drop can cause the chocolate to “seize,” turning it into a grainy, stiff mess. I learned this lesson early on in my cooking adventures, and it’s a heartbreaking one! Also, resist the urge to add oil to thin the chocolate unless it’s truly too thick. A perfectly melted chocolate should coat nicely. If you must thin it, add just a tiny bit of refined coconut oil (not unrefined, unless you want a coconut flavor boost) or vegetable shortening, about ½ teaspoon at a time.
Finally, for the prettiest bars with a professional-looking chocolate coating, dip each bar twice. After the first coat sets (which happens quickly because the bars are frozen), I give them a quick second dip. This builds a thicker, more robust chocolate shell that mimics the store-bought version and provides that fantastic “crack” when you bite into it. It’s an extra step, but I’ve tried it both ways, and trust me, the double-dip is worth it for texture and appearance.
(See the next page below to continue…)