Pro Tips for Best Results
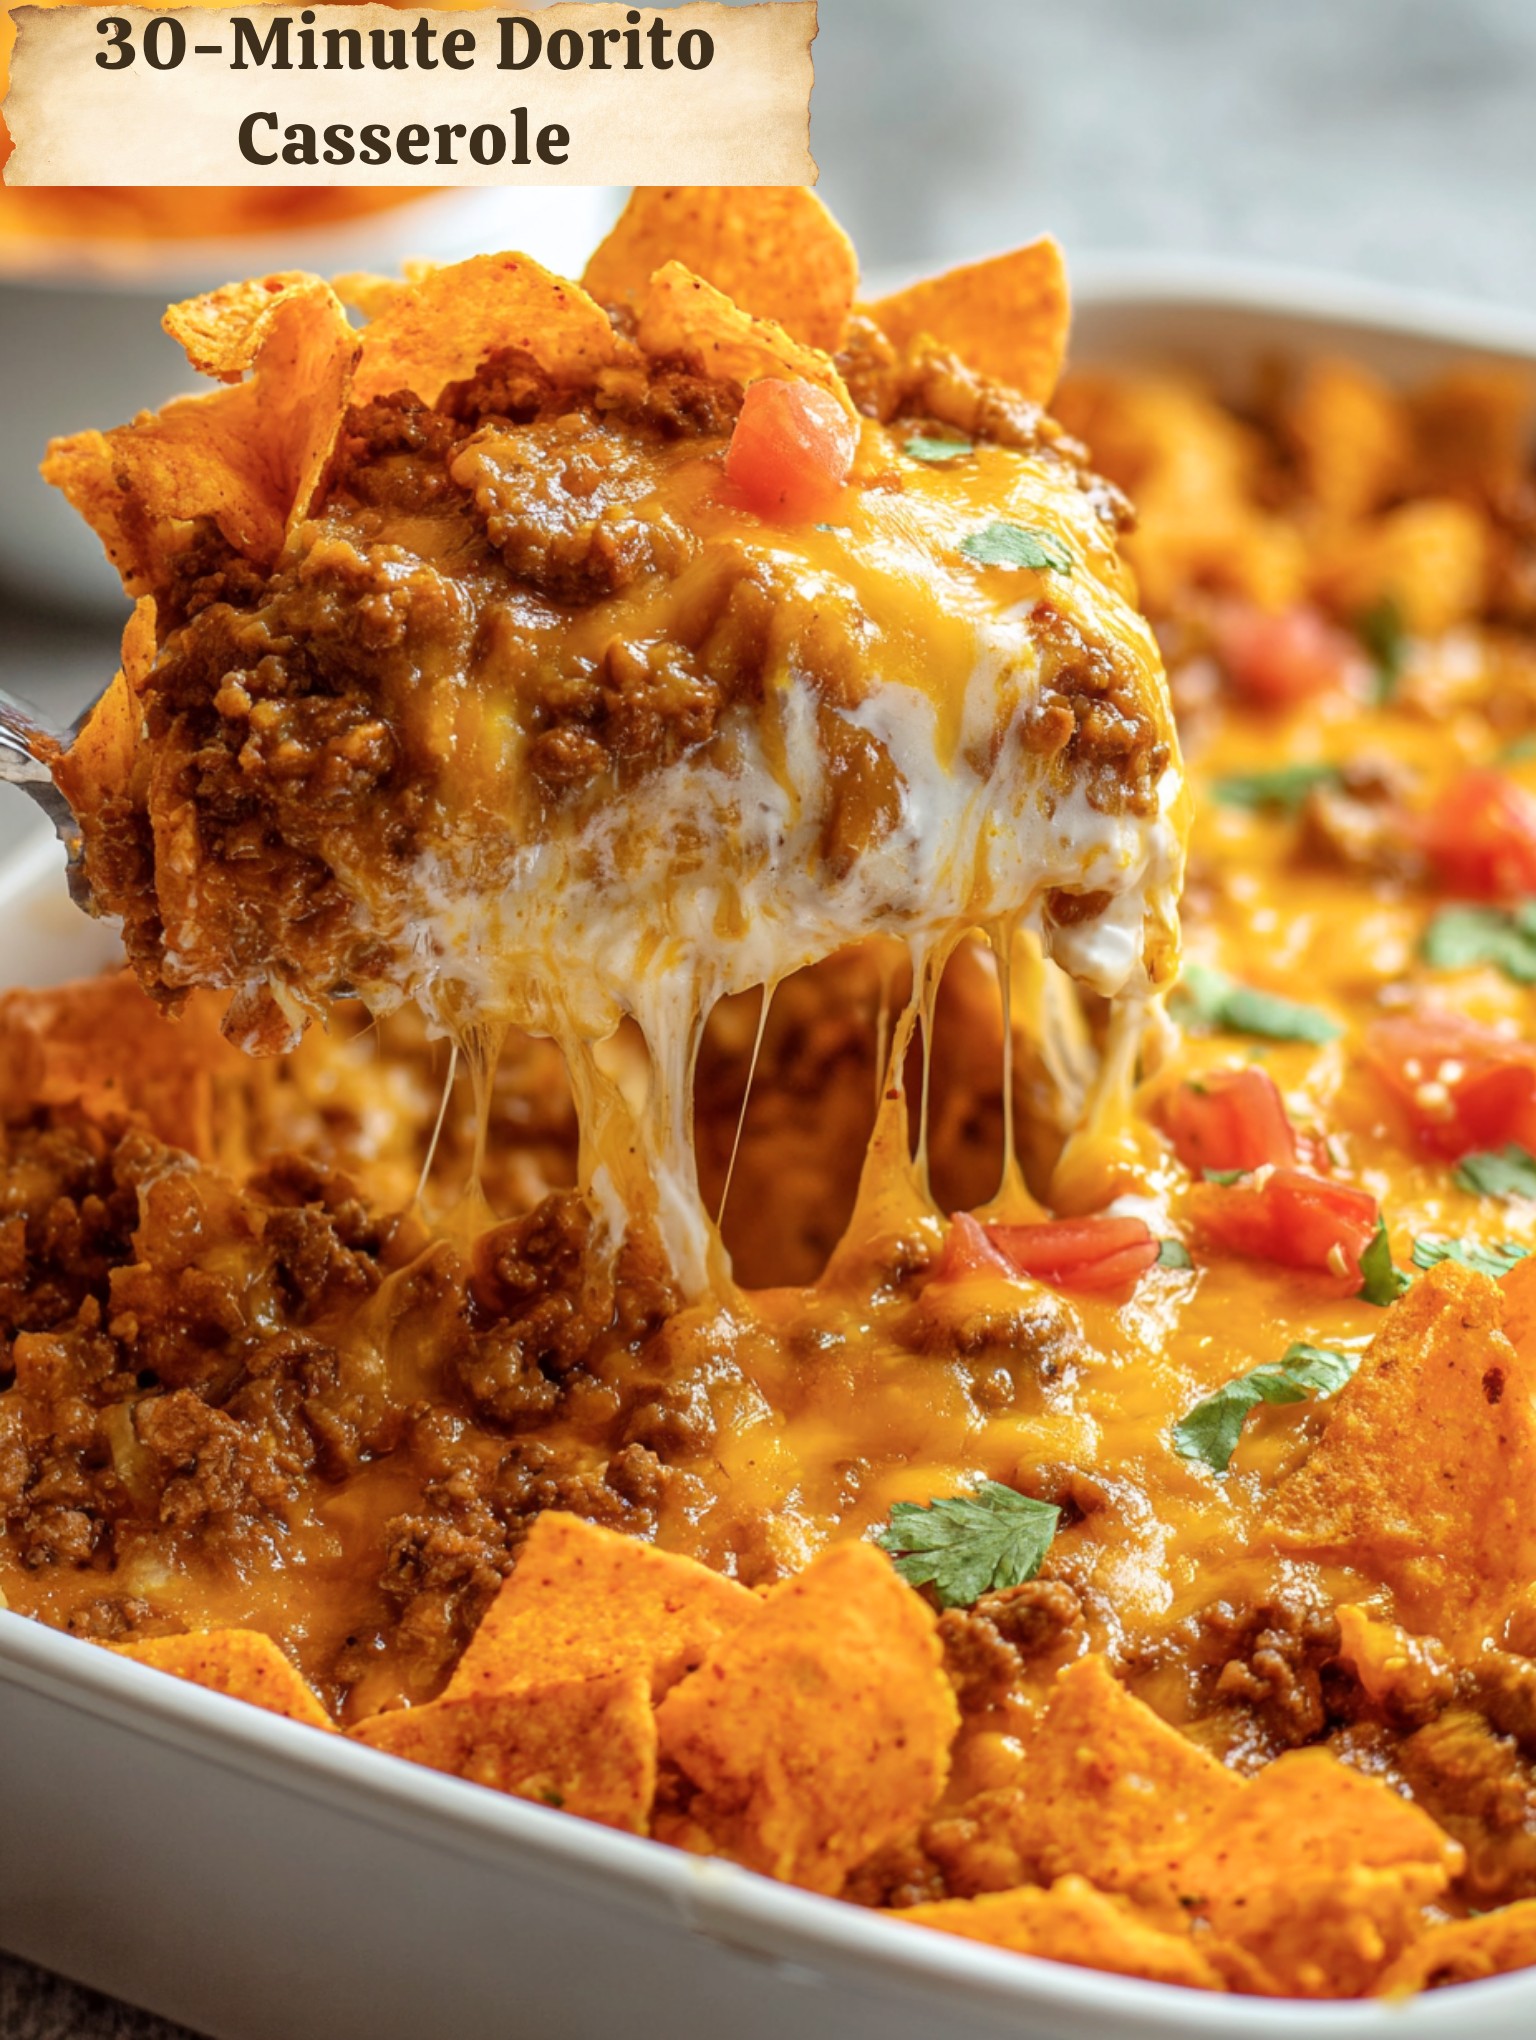
I tested the Dorito layering three different ways. Crushing them all into the bottom made for a solid, soggy base. Mixing them into the meat made them lose all crunch. The method here—a crushed base, topped with whole chips—gives you the ideal textural contrast: a slightly softened foundation with a crispy, cheesy top. It’s the winning combo, I promise.
Timing is everything with this bake. That 20-minute mark is your sweet spot. I left it in for 25 minutes once, and while still delicious, the bottom layer of chips lost all structure. You’re just heating it through and melting the cheese, not cooking a custard. Watch for that bubble around the edges—that’s your visual cue.
Letting the meat mixture cool for a minute or two before assembling is a small step with a big impact. If you pour it piping hot directly onto the crushed chips, it starts steaming them immediately, leading to a mushier base. A brief cooldown prevents that instant sogginess and protects your crucial crunch.
Common Mistakes to Avoid
The biggest mistake I made the first time was not draining the beef well enough. I was in a rush and just spooned out most of the grease. Big mistake. That residual fat made the entire casserole feel heavy and oily. Now, I drain it thoroughly in a colander. It takes an extra 30 seconds and makes a world of difference in the final texture and taste.
Another pitfall is over-crushing the Doritos for the top layer. You want those recognizable, whole chip shapes up there for maximum visual appeal and crunch. If you crush them into crumbs for the top, they just burn. Save the serious crushing for the base layer in the bottom of the pan, and be gentle with the ones destined for the top.
Serving Suggestions
I love serving this casserole straight from the dish, family-style, with a big basket of extra Doritos on the side for those who want an extra crunch. It’s a complete meal in one pan, but I always make a quick side to cut through the richness. A simple, crisp romaine lettuce salad with a bright lime vinaigrette is my go-to. The acidity is the perfect counterpoint.
For a real party vibe, I set up a topping bar! I put out small bowls of diced fresh tomatoes, sliced black olives, pickled jalapeños, a big dollop of sour cream, guacamole, and fresh chopped cilantro. Letting everyone customize their scoop makes it interactive and fun. My friend Sarah always goes for the “everything but the kitchen sink” approach.
If I’m keeping it super simple, I just dollop each serving with a cool spoonful of sour cream and a sprinkle of fresh cilantro or green onions. That little bit of green makes it look instantly more polished and adds a fresh flavor note. Sometimes, I’ll even squeeze a tiny bit of lime juice over the top—it’s a game-changer.
Variations & Customizations
This recipe is a fantastic canvas. I’ve made a fantastic “Fiesta Ranch” version by swapping the taco seasoning for a packet of ranch seasoning and using Cool Ranch Doritos. It’s a totally different, herby, tangy flavor profile that’s equally addictive. For a spicier kick, use Hot & Spicy Doritos and add a diced fresh jalapeño to the beef while it cooks.
For a lighter take, you can absolutely use ground chicken or turkey. Just add a tablespoon of olive oil to the pan before cooking, as they’re leaner. I’ve also successfully used a can of black beans, rinsed and drained, in place of half the meat for a hybrid version. It bulks it up and adds fiber.
The cheese is your playground, too. A sharp cheddar gives a more grown-up bite, while a pepper jack cheese blend brings the heat. One time, I was out of the Mexican blend and used a mozzarella and Monterey Jack mix—it was milder but still wonderfully gooey. Don’t be afraid to use what you have!
How to Store, Freeze & Reheat
For leftovers, I let the casserole cool completely, then cover the baking dish tightly with foil or transfer portions to an airtight container. It keeps in the fridge for up to 3 days. Now, reheating is key: the microwave will make the chips very soft. To preserve some texture, I reheat individual portions in my air fryer at 350°F for 4-5 minutes, or in a conventional oven until hot through. It won’t be as crunchy as day one, but it’s the best method.
You can freeze this before baking! Assemble the casserole right up to the point of adding the final cheese layer, then wrap the entire dish very tightly in a layer of plastic wrap followed by a layer of heavy-duty foil. Freeze for up to 2 months. To cook, thaw overnight in the fridge, add the final cheese, and bake as directed, adding maybe 5-10 extra minutes since it will be cold. I don’t recommend freezing after baking, as the Doritos will become hopelessly soggy upon thawing and reheating.
Conclusion
So there you have it—my beloved 30-Minute Dorito Casserole, born from a hungry Tuesday and perfected through (very tasty) trial and error. It’s the kind of recipe that feels like a hug in a dish, proving that incredible comfort food doesn’t have to be complicated. I hope it brings as much joy and saved-weeknight sanity to your table as it has to mine. Now, go preheat that oven and get crushing. Dinner’s waiting, and it’s delicious