The first time I pulled a tray of these HERSHEY’S S’mores Cupcakes from my oven, the smell that hit me was pure, unadulterated magic. It was like my kitchen had transformed into a cozy campfire under the stars. The rich, deep scent of cocoa melded with the sweet, caramelizing sugar of the marshmallows I’d just torched, and I swear, for a moment, I could hear the crackle of a fire. I’d been chasing that nostalgic taste of summer s’mores all year, and seeing that golden, toasty topping perched on a moist, dark chocolate cupcake… I knew instantly this recipe was going to become a permanent fixture in my baking repertoire. It’s not just a dessert; it’s an experience, a delicious little hug that brings everyone back to their happiest memories.
Ingredients
- 1 3/4 cups all-purpose flour
- 1 1/2 cups granulated sugar
- 3/4 cup HERSHEY’S unsweetened cocoa powder
- 1 1/2 teaspoons baking powder
- 1 1/2 teaspoons baking soda
- 1 teaspoon salt
- 2 large eggs
- 1 cup whole milk
- 1/2 cup vegetable oil
- 2 teaspoons pure vanilla extract
- 1 cup boiling water
- 1 1/2 cups graham cracker crumbs (about 12 full sheets)
- 1/3 cup unsalted butter, melted
- 1/4 cup granulated sugar
- 1 jar (7 oz.) marshmallow creme or fluff
- 1 cup unsalted butter, softened
- 2 cups powdered sugar
- 1 teaspoon vanilla extract
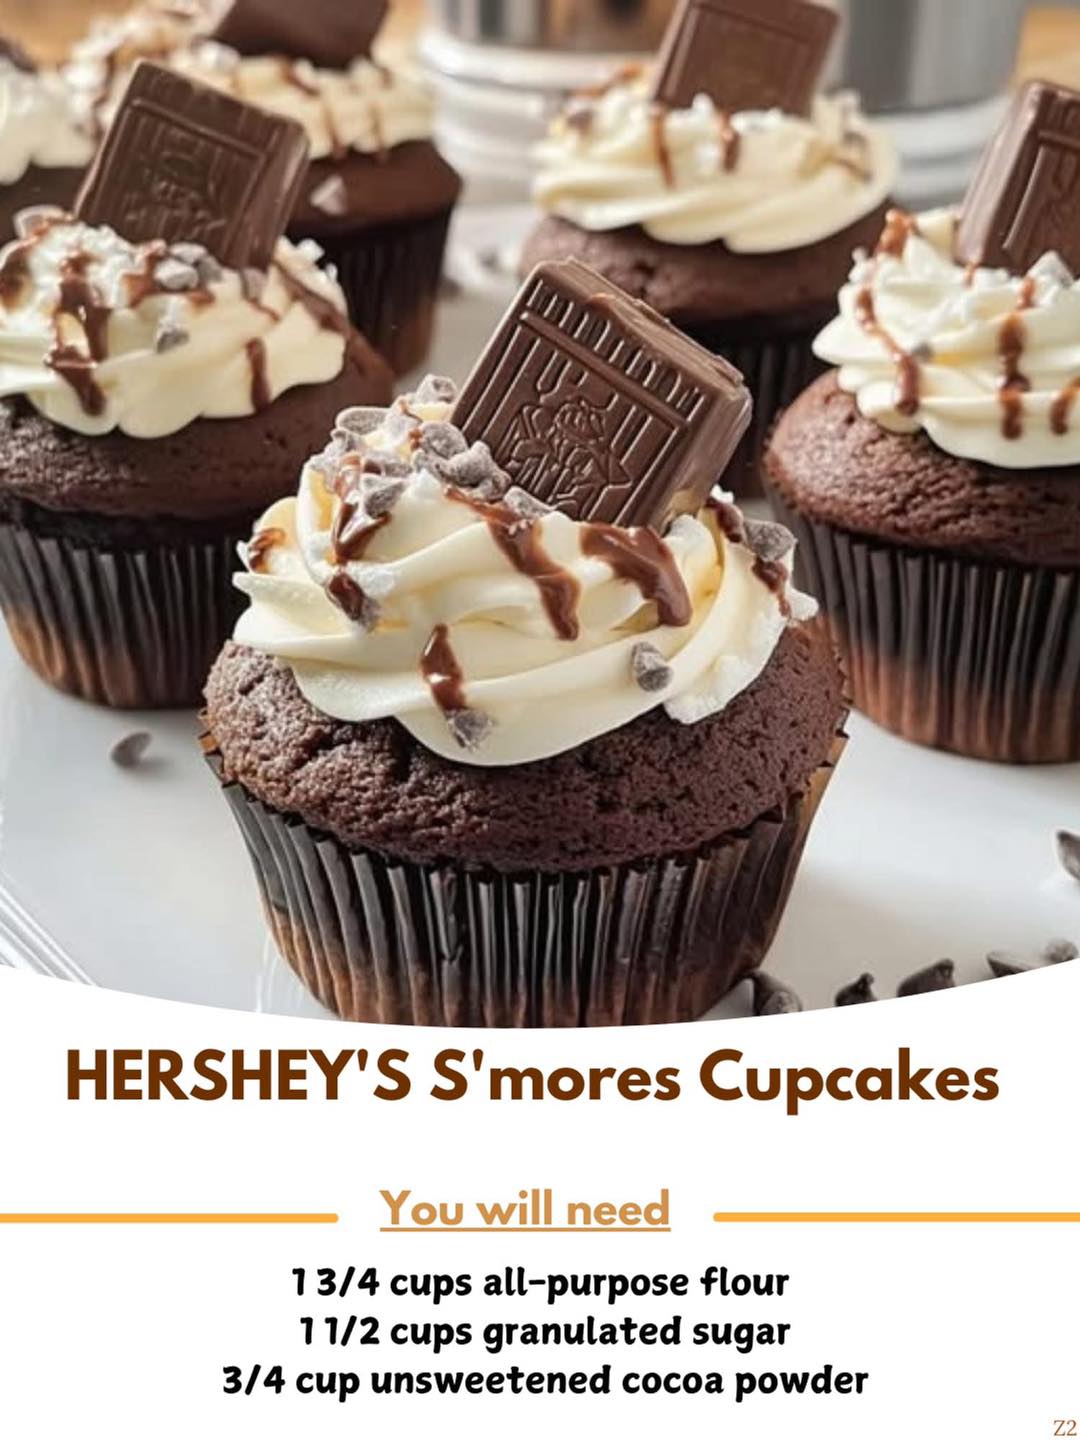
- Mini marshmallows, for garnish
- HERSHEY’S Milk Chocolate Bars, broken into small pieces, for garnish
Let’s talk ingredients, because I’ve learned a few things here. First, that boiling water is non-negotiable; it “blooms” the cocoa powder, intensifying the chocolate flavor in a way cold liquid just can’t achieve. For the cocoa, I’m fiercely loyal to HERSHEY’S in this recipe—its distinct flavor is the soul of a classic s’more. Don’t swap the vegetable oil for butter in the batter; the oil guarantees an incredibly moist, tender crumb that stays that way for days. And for the graham cracker crust, take the extra minute to pulse your crackers in a food processor until they’re fine sand. I’ve tried chunkier crumbs, and they make the base harder to cut and eat neatly.
Equipment Needed
- 12-cup muffin pan
- Cupcake liners
- Two mixing bowls (one large, one medium)
- Whisk
- Hand mixer or stand mixer
- Spatulas
- Measuring cups and spoons
- Small bowl (for graham mixture)
- Cookie scoop or ice cream scoop (for batter)
- Piping bag with a large round or star tip (optional, but helpful)
- Kitchen torch
You don’t need anything overly fancy, but a few tools make life easier. A stand mixer is wonderful for the frosting, but a trusty hand mixer works perfectly—I’ve used both. The real game-changer is a kitchen torch. I tried broiling the topped cupcakes once, and it was a stressful, 30-second dance with disaster that led to burnt marshmallows. A torch gives you beautiful, even, golden control. If you don’t have a piping bag, a simple zip-top bag with the corner snipped off will do for the frosting. And that cookie scoop? It’s my secret for perfectly even cupcakes with minimal mess.
Step-by-Step Instructions
First, we build our foundation. Preheat your oven and line your muffin pan. In that medium bowl, mix the melted butter, graham cracker crumbs, and 1/4 cup sugar until it resembles wet sand. This is your “campfire ground.” I press a heaping tablespoon firmly into the bottom of each liner—really pack it down with the back of a spoon. This creates a solid, crunchy layer that holds up against the batter. I baked just the crusts for 5 minutes alone to set them, which I found prevents them from migrating up the sides of the cupcakes during baking.(See the next page below to continue…)