I’ll never forget the first time I made Christmas Crack. It was a chaotic December evening, my kitchen already dusted with flour from failed cookie attempts, and I needed a guaranteed win. Within minutes of the butter and brown sugar hitting the pan, my whole house transformed. That rich, caramel scent wrapped around me like a holiday hug, promising something magical. When I finally broke into the shiny, chocolate-topped slab, the symphony of salty, sweet, buttery crunch made me an instant believer. This isn’t just a recipe; it’s a mood, a memory, and the easiest showstopper you’ll ever gift or gobble.
Ingredients
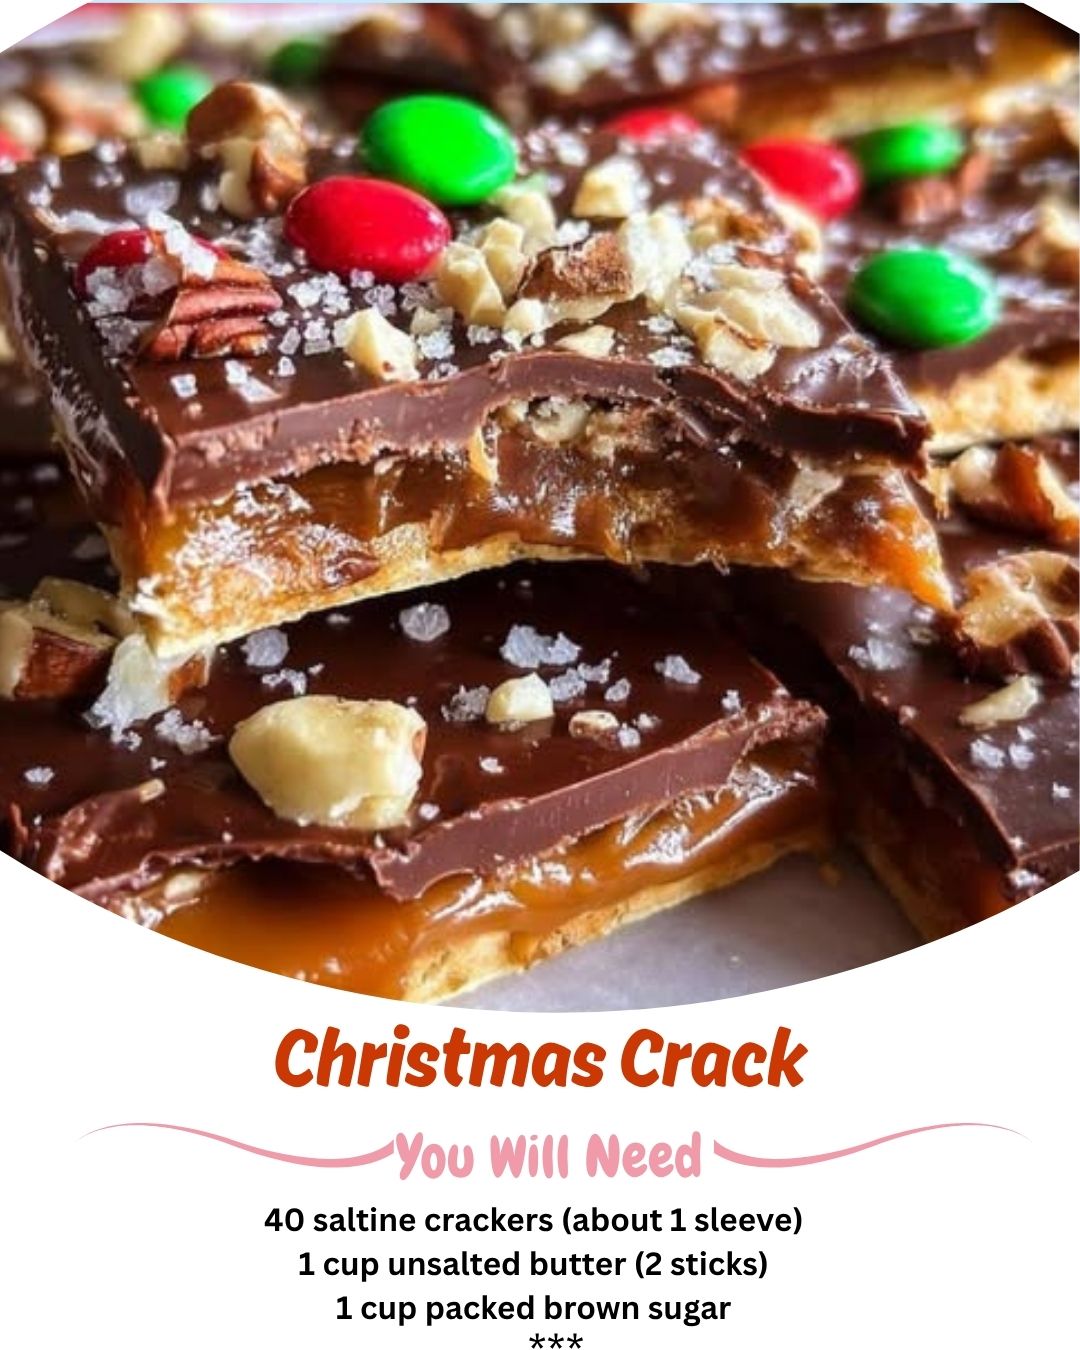
- 40 saltine crackers (about 1 sleeve)
- 1 cup unsalted butter (2 sticks)
- 1 cup packed brown sugar
- 2 cups semi-sweet chocolate chips
- 1 cup chopped nuts (optional, but pecans or walnuts are fantastic)
- Flaky sea salt for finishing (optional, but highly recommended)
Let’s talk about these ingredients, because I’ve learned they each play a starring role. The saltines are non-negotiable—their bland saltiness is the perfect canvas. I tried it once with fancy crackers and it was a disaster. Use unsalted butter so you control the salt level. For the brown sugar, pack it firmly into your measuring cup; this isn’t the time for light and fluffy. That moisture is crucial for the caramel. And trust me, do not skip the flaky sea salt at the end. It’s the tiny detail that elevates this from “great” to “absolutely addictive.”
Equipment Needed
- A rimmed baking sheet (half-sheet pan, approx. 13×18″)
- Parchment paper or a silicone baking mat
- Medium saucepan
- Wooden spoon or heatproof spatula
- Measuring cups
- Oven mitts
- Wire cooling rack (helpful but not mandatory)
Your baking sheet is your foundation—a rimmed one is vital to contain the bubbling caramel. I line mine with parchment paper for foolproof release; a silicone mat works too. The saucepan should be heavy-bottomed if you have it, to prevent hot spots and burning. I used a thin pot once and scorched the sugar, so learn from my mistake! That wooden spoon becomes your best friend for stirring. You don’t need fancy gadgets here, just solid, reliable tools.
Step-by-Step Instructions
First, heat your oven to 350°F (175°C) and line that baking sheet. Lay out your saltines in a single, snug layer, breaking a few to fill gaps. It’s like edible tile work. Now, the magic part: in your saucepan, melt the butter and brown sugar together over medium heat. Stir constantly with your wooden spoon until it comes to a rolling boil. Once boiling, set a timer for exactly 3 minutes. Don’t wander off! I did that the first time, answering a text, and the mixture went from perfect caramel to a grainy, separated mess in seconds. You want it bubbling vigorously and smelling like butterscotch dreams.
After your three-minute boil, immediately and carefully pour the hot toffee mixture evenly over the saltines. It will be lava-hot, so please use caution. Tilt the pan or use the back of your spoon to spread it into every nook. This is where speed matters. Slide the pan into the oven and bake for 5 minutes. You’ll see the toffee bubble and settle into the crackers. When it comes out, it will look gloriously molten. Without delay, scatter the chocolate chips evenly over the top. I wait about 2 minutes to let the heat from the toffee soften the chips perfectly before spreading them into a smooth, glossy layer with an offset spatula.(See the next page below to continue…)