Next, I crack in the egg and mix everything until it forms a cohesive dough. If you find your dough is a bit crumbly, just a splash of water should help bring it together. Now, comes the fun part! I take my rolling pin and roll the dough out between two sheets of parchment paper until it’s about ¼ inch thick. This prevents sticking, and I love how the dough feels silky in my hands.
Once rolled out, I use a cookie cutter to create fun shapes or just a knife for squares—whatever tickles my fancy that day! I place them on the baking sheet, making sure there’s a little space between each cracker. Then, I pop them into the oven for about 10-12 minutes, or until they’re golden brown and crispy. The aroma that fills my kitchen at this stage is pure bliss!
Pro Tips for Best Results
I tested this recipe in three different ways to ensure it worked for everyone. The first time, I used only cheddar cheese, and the flavor was amazing but a bit one-dimensional. The second time, I added a blend of parmesan and gouda, which elevated the taste profile significantly. Trust me; cheese variety matters! If you’re feeling adventurous, consider mixing different cheeses for that unique twist.
Next, don’t skimp on the seasoning. The garlic and onion powder are just the start; you can sprinkle some Italian herbs or chili powder for a flavorful punch. I once forgot the spices, and the crackers turned out bland. Lesson learned: flavor is key!
Finally, be mindful of baking time. Every oven is different, and I’ve had my crackers bake perfectly at 10 minutes in one trial but took longer another day. Keep an eye on them to avoid a burnt snack disaster.
Common Mistakes to Avoid
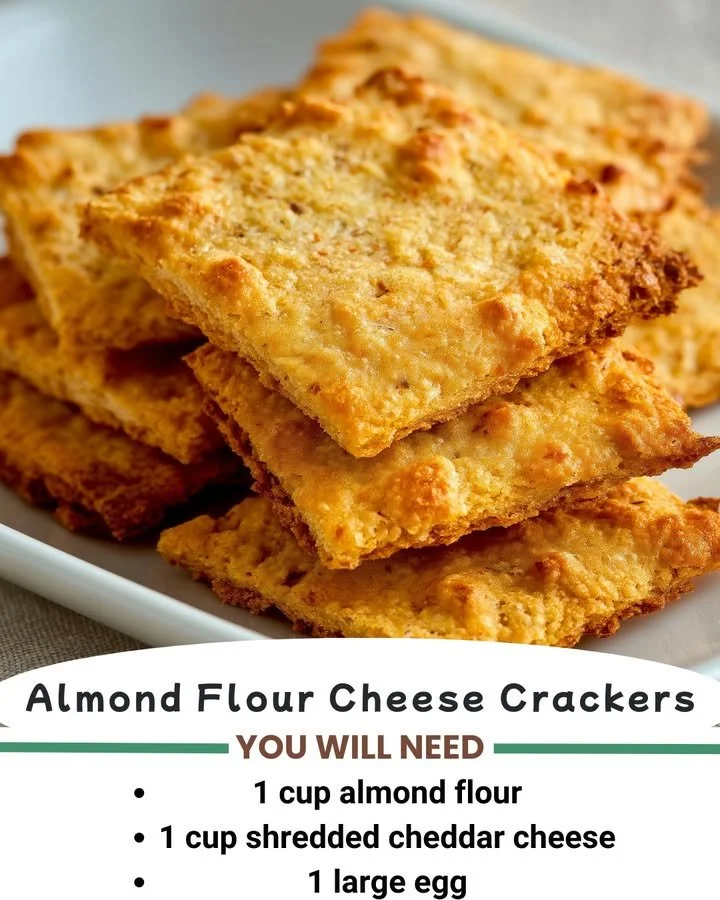
One mistake I made early on was rolling the dough too thick. The crackers ended up chewy instead of crispy, which isn’t what I was going for. I recommend sticking to the ¼ inch thickness for that perfect crunch. (See the next page below to continue…)
Another common error is on the temperature and baking time. I found that everyone’s oven varies, and if you leave them in too long, they will quickly go from nice and crispy to burnt. Set your timer and check them a minute or two early—it makes all the difference!
Also, be careful when mixing the dough. If you overwork it, the crackers can become tough. I find just mixing until everything is combined gives the best texture. Remember, it’s all about that satisfying crunch!
Finally, skipping the parchment paper is a no-go. I tried to save a step once by placing the dough directly on the baking sheet, and let me tell you, it was a sticky mess. Always line your baking sheet for easy removal and cleanup.
Serving Suggestions
These almond flour cheese crackers are delightful on their own, but I love serving them with a homemade dip or some flavored hummus. The creamy contrast to the crunchy texture is simply divine. I often whip up a quick avocado dip or pimento cheese spread, and it pairs perfectly with these crackers!
You can also use them as a topping for soups or salads. Just crumble a few on top to add a wonderful crunchy texture that makes the meal that much more enjoyable. My guests always compliment this clever twist!
Lastly, I enjoy serving them at gatherings. They disappear quickly from the table, and people love that they’re gluten-free. I love watching my friends and family munch away, and the whole batch never lasts long in my home!
Variations & Customizations
If you want to shake things up, I suggest adding some herbs directly into the dough. Chopped fresh rosemary or thyme can give these crackers an aromatic touch that elevates their flavor. I once added rosemary, and it transported the taste to a whole new level!
You can also experiment with different flours. While almond flour is my go-to, I’ve had success with a mixture of almond and coconut flour if you’re looking for a slightly sweeter cracker. Just remember that coconut flour absorbs more moisture, so adjust the egg accordingly.
Another fun variation is to make these into a sweet treat. By leaving out the savory spices and adding a bit of cinnamon and sweetener, I created a sweet almond cracker that pairs beautifully with tea. The options are endless!
How to Store, Freeze & Reheat
These crackers can be stored in an airtight container for up to a week, although I doubt they’ll last that long! I love how they maintain their crispiness when sealed well. Just remember to let them cool completely before storing to avoid moisture buildup.
If you want to make a big batch, they freeze really well too! I freeze them by laying them out on a baking sheet and placing them in the freezer for about an hour. Once frozen, I transfer them to a freezer bag and pop them back into the freezer. This way, I can pull out just what I need at any time!
When reheating, I recommend popping them back in the oven at a low temperature for just a few minutes to restore their crispiness. Microwave reheating tends to make them chewy, which is a bummer. A little oven warmth works wonders!
Conclusion
I hope you enjoy making these almond flour cheese crackers as much as I do! They’re easy to whip up, perfect for snacking, and sure to impress your friends and family. With a bit of creativity, you can personalize them to suit your taste buds! Happy baking, and let the delicious aroma fill your kitchen!