Here’s the magic moment. I scatter the diced apples evenly over the filling, then sprinkle on every last bit of that buttery oat crisp topping. It will look like a lot, but it bakes down into the most glorious golden crown. I place my foil-wrapped pan into a larger roasting pan, pour hot water into the roasting pan until it comes halfway up the springform’s sides, and carefully transfer it to the oven. This water bath is your insurance policy for gentle, even heat. It bakes for about 70-80 minutes until the edges are set but the very center still has a slight, gentle jiggle. Then, I turn the oven off, crack the door, and let it cool inside for a full hour. This slow cooldown is the final guard against cracks.
Pro Tips for Best Results
Patience is not just a virtue here; it’s the main ingredient you won’t find listed. After that hour in the turned-off oven, I run a thin knife around the edge of the pan to release the cheesecake from the sides—this prevents it from sticking and pulling as it contracts, another crack-prevention step. Then, I let it cool completely on a rack before even thinking about putting it in the fridge. Rushing this stage will cause condensation on top and a too-dense texture. I chill it, uncovered, for at least 6 hours, but honestly, overnight is best. The flavors marry and the texture becomes absolute perfection.
I tested the mixing process three different ways. The first time, I added all the filling ingredients at once and mixed on high. The result was a grainy, over-aerated mess that puffed and fell. The slow, sequential method I outline above gives you complete control. Also, when measuring your flour for the crisp topping, spoon it into the cup and level it off. Scooping directly from the bag packs it down, and you’ll end up with a dry, floury topping instead of a crumbly one.
Don’t be tempted to open the oven door to check on it during the first hour of baking. The rush of cold air can cause the surface to contract too quickly and split. Trust the process, trust the timer, and trust the jiggle test. That slight wobble in the center is your sign of creamy success—it will firm up as it chills. If you bake it until it’s completely firm in the center, you’ve overdone it.
Common Mistakes to Avoid
The first time I made this, I was impatient and used cool cream cheese straight from the fridge. I figured a few extra minutes of beating would smooth it out. Wrong. I beat and beat, incorporating way too much air, and ended up with a cheesecake that rose like a soufflé in the oven and then collapsed into a sunken, dense disk with a giant crack right down the middle. Lumps were the least of my problems. Letting your dairy ingredients truly warm up is the single most important step for a flawless texture.
Another “learning the hard way” moment: skipping the water bath because I thought it was fussy. Without that gentle steam environment, the heat is too direct and harsh. My cheesecake’s edges overcooked and pulled away from the sides before the center was done, leading to severe cracking and a less creamy bite. The foil wrap and water bath might seem like extra work, but they are non-negotiable for professional-level results at home. Don’t do what I did—just take the two minutes to wrap the pan.
Serving Suggestions
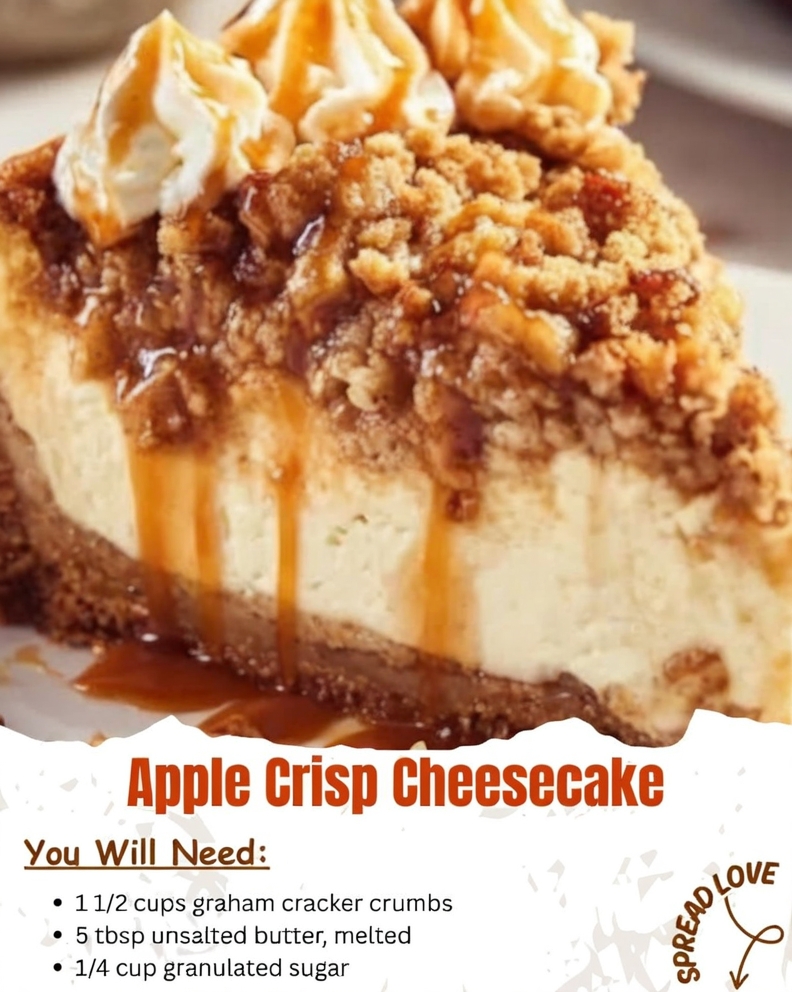
I like serving this cheesecake straight from the fridge, cold and firm. A thin, sharp knife run under hot water and wiped clean between each slice gives you picture-perfect portions. On its own, it’s sublime, but a dollop of freshly whipped cream or a small scoop of vanilla bean ice cream takes it over the top. The warm-cold contrast is incredible. For a pretty touch, I sometimes drizzle a little caramel sauce over the plate before setting the slice down, or sprinkle a few extra apple slices sautéed in butter and cinnamon on the side.(See the next page below to continue…)