Pro Tips for Best Results
I tested the pasta cook time three different ways, and the winner is clear: always undercook your pasta by a solid 2 minutes. The first time I made this, I used fully cooked pasta, and it absorbed too much liquid in the bake, leaving the final dish a bit dry. Undercooking guarantees a perfectly al dente bite after its time in the oven. Also, don’t be shy with the salt in your pasta water—it’s the only chance you get to season the pasta itself from the inside out.
Here’s what I learned the hard way about the ricotta layer: you must mix in the egg and Parmesan. I once skipped the egg thinking it was unnecessary, and the ricotta baked into dry, crumbly pockets instead of creamy, velvety ones. The egg acts as a stabilizer and emulsifier, creating a lush, cohesive layer that holds its own against the robust meat sauce. It’s a simple step that makes a monumental difference in the final texture.
Let the baked ziti rest for a full 15-20 minutes after pulling it from the oven. I know it’s hard—the cheese is calling your name—but this patience pays off. Resting allows the layers to set, making it infinitely easier to cut clean squares that hold their shape on the plate. If you cut in immediately, it will be a delicious but soupy mess. Use this time to toss a quick salad or finish setting the table; your future self serving neat portions will thank you.
Common Mistakes to Avoid
I made this mistake the first time: I used lean ground beef like 93/7 and didn’t adjust for the lack of fat. The result was a sauce that tasted a bit lean and lacked savoriness. Now, I stick with 85/15. The bit of fat renders out and carries all those beautiful garlic and herb flavors, creating a richer, more luxurious sauce. If you only have lean beef, no worries—just add an extra tablespoon of olive oil to the pan when cooking your onions.
Another classic error is overmixing the ricotta layer directly into the pasta. When I first started making baked zits, I’d stir the ricotta into the pasta with the sauce, thinking it would distribute evenly. What happens is it disappears entirely, and you lose those wonderful, distinct pockets of creamy cheese. Layering it, as directed, ensures you get that fantastic textural contrast in every single bite. Trust the process and keep it as a dedicated middle layer.
Serving Suggestions
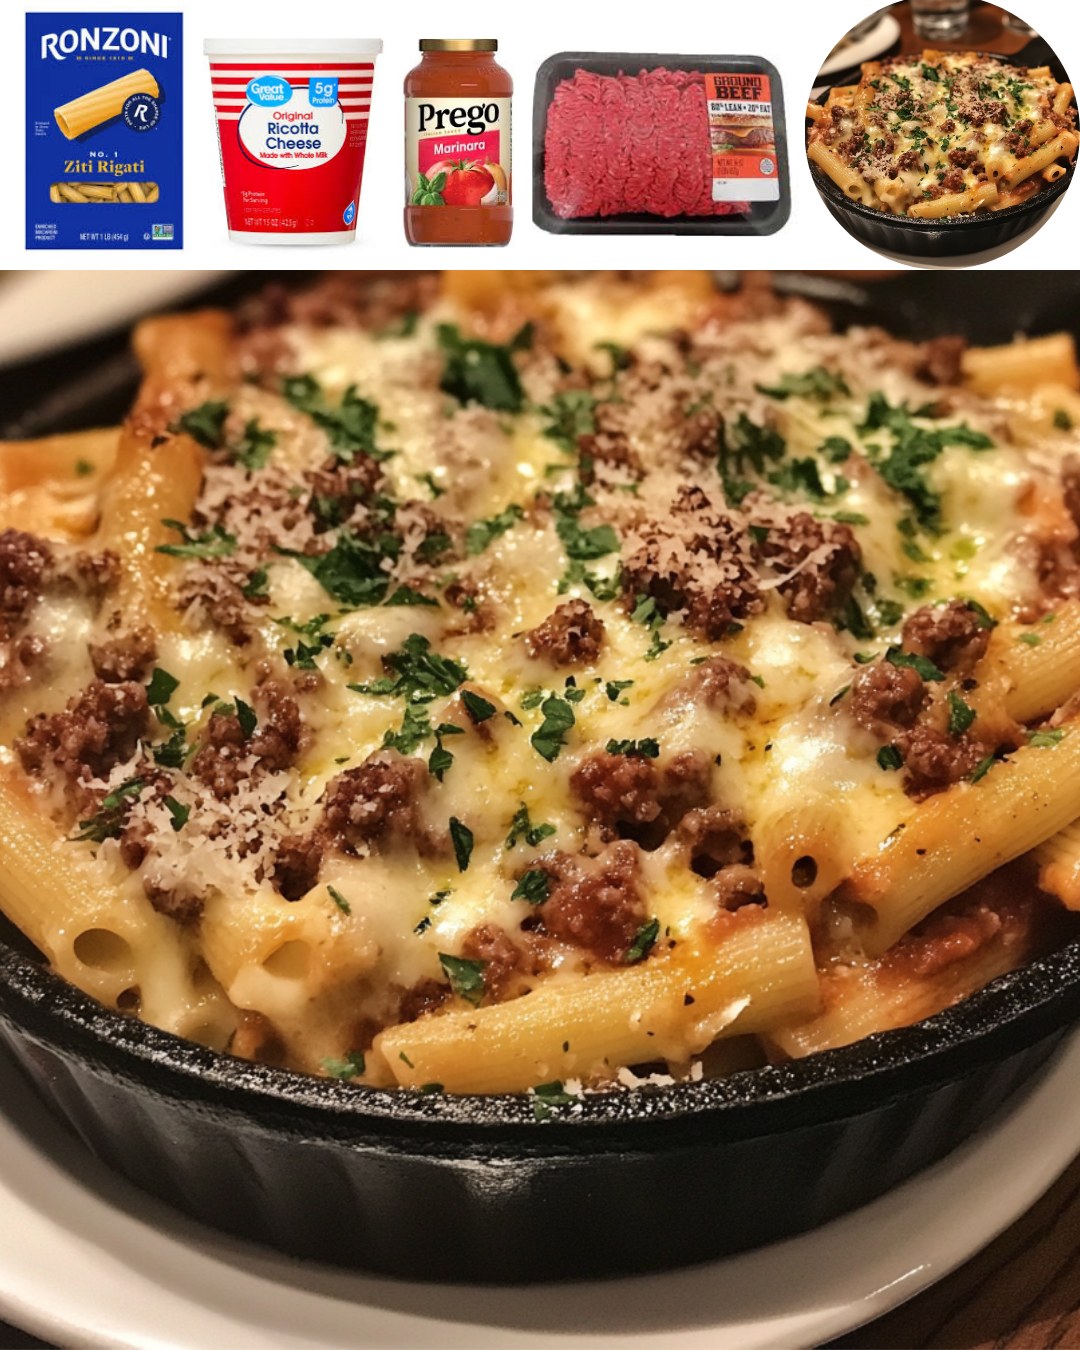
I like serving this baked ziti straight from the dish at the table, with a final sprinkle of fresh parsley or basil on top for a pop of color and freshness. The visual of that golden, bubbly cheese top is part of the experience! For sides, a simple, crisp green salad with a sharp vinaigrette is non-negotiable for me—it cuts through the richness of the pasta perfectly. A classic Caesar or an arugula salad with lemon also works wonderfully.
Garlic bread is practically its legal companion. I’ll often slice a baguette, slather it with garlic butter, and toast it while the ziti is resting. The crunch and garlic flavor are the ideal vehicles for scooping up any stray sauce and cheese on the plate. For a lighter option, roasted vegetables like broccoli or asparagus with a squeeze of lemon make a fantastic, colorful accompaniment.
When it comes to drinks, I find a medium-bodied red wine like a Chianti or a Sangiovese stands up to the hearty flavors beautifully. For a non-alcoholic pairing, sparkling water with lemon or a slightly sweet iced tea balances the savory, tomato-based dish. Honestly, though, this meal is so satisfying that it shines all on its own, needing little more than good company to be complete.
Variations & Customizations
This recipe is a wonderful canvas. I’ve made a fantastic “Italian Sausage & Pepper” version by swapping the ground beef for a mix of sweet and hot Italian sausage and adding a diced bell pepper to the onion sauté. The fennel seeds in the sausage add a whole new layer of flavor. For a veggie-packed twist, I’ve stirred a couple of handfuls of fresh spinach into the ricotta mixture or layered slices of roasted eggplant.
For my friends who prefer no red meat, ground turkey or a plant-based meat alternative work well—just bump up the seasonings a bit, as turkey can be milder. I’ve also done a “white” version, skipping the marinara and using a béchamel sauce mixed with the pasta, along with shredded chicken and broccoli. It’s a completely different dish but equally beloved in my house.
If you’re a cheese fanatic like I am, feel free to experiment with the blend. Adding a handful of sharp provolone or fontina to the mozzarella creates a more complex cheesy flavor. For a little tang, some grated Pecorino Romano can replace half of the Parmesan. The core method remains the same, so don’t be afraid to make it your own based on what you love or have on hand.
How to Store, Freeze & Reheat
To store leftovers, I let the ziti cool completely, then cover the baking dish tightly with plastic wrap and foil, or transfer portions to airtight containers. It keeps beautifully in the refrigerator for 3-4 days. For reheating, the microwave is quick for a single portion, but it can make the pasta a bit soft. My preferred method is to reheat it in the oven at 350°F (175°C) in a covered oven-safe dish until warmed through, which takes about 20-30 minutes. If the top looks dry, I’ll add a tiny sprinkle of water or extra sauce before covering it.
This dish freezes exceptionally well, which is why I often make a double batch. I assemble it completely in a disposable aluminum pan, cover it tightly with a layer of plastic wrap pressed directly on the surface, then a layer of heavy-duty foil. I label it and freeze for up to 3 months. To bake from frozen, I don’t thaw it first—I just remove the plastic wrap, re-cover with the foil, and bake in a 375°F (190°C) oven for about 1 hour and 15 minutes, then uncover and bake for another 15-20 minutes until hot and bubbly. The texture holds up amazingly.
Conclusion
This baked ziti with ground beef and ricotta is more than just a recipe in my book; it’s a reliable source of comfort and joy. It has seen me through casual family dinners, last-minute potlucks, and cozy nights when only a big plate of cheesy pasta would do. I hope it finds a similar place in your kitchen, becoming a trusted dish you can make with confidence and serve with pride. Give it a try this week, and get ready for your kitchen to smell like happiness. Happy cooking