I’ll never forget the moment I first pulled these out of the freezer. My kitchen smelled like a dreamy mash-up of a bakery and an ice cream parlor—vanilla wafting through the air with the sweet promise of ripe bananas. I’d been craving the nostalgic comfort of banana pudding but wanted something more playful and portable for a summer get-together. That’s when the idea hit me: why not combine the creamy, tangy bliss of cheesecake with the classic flavors of banana pudding, all served in a crispy cone? The result was pure magic, and after a few tweaks (and happy taste-testers), I knew I had to share this joy with you.
Ingredients
- 16 oz cream cheese, softened
- 1 cup powdered sugar
- 1/2 cup heavy whipping cream
- 1 box (3.4 oz) instant banana pudding mix
- 1 teaspoon pure vanilla extract
- 2 large, ripe bananas
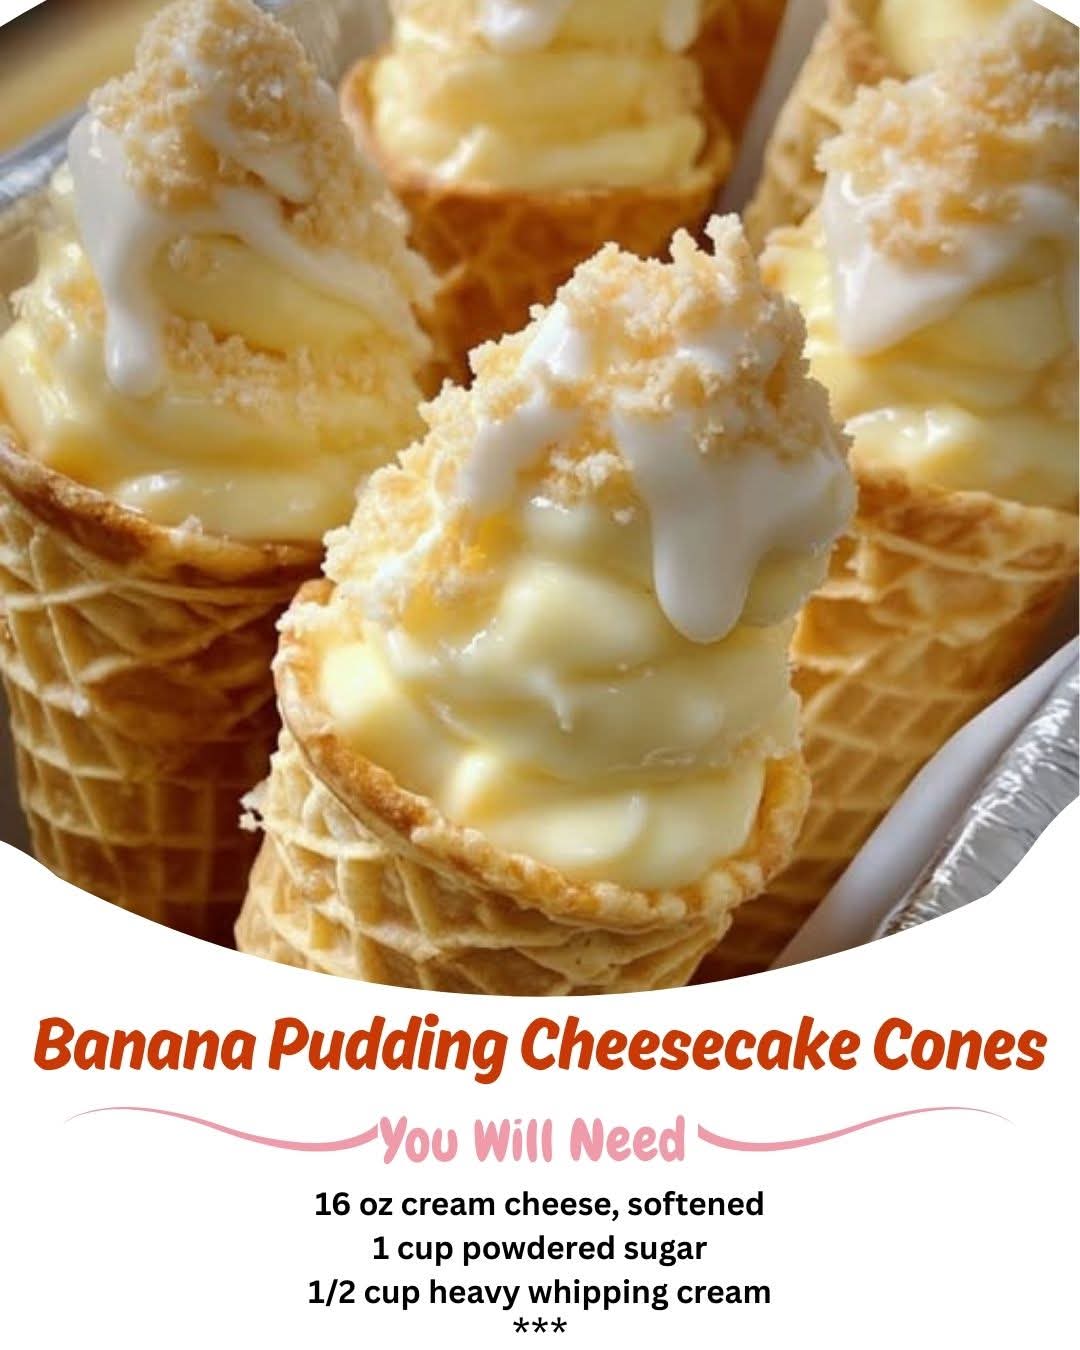
- 1 cup Nilla Wafers, crushed, plus extra for topping
- 12 flat-bottom wafer ice cream cones
- Whipped cream, for garnish
Let’s talk ingredients, because I’ve learned the hard way that quality and state matter here. First, that “softened” cream cheese is non-negotiable. I once tried to mix it straight from the fridge, and my arm got a workout while still ending up with lumpy filling. Leave it on the counter for a good two hours. For the bananas, don’t use raw, yellow ones—wait until they’re beautifully speckled with brown spots. That’s when they’re at their peak sweetness and flavor, and they’ll meld into the filling perfectly instead of tasting starchy. And trust me, do not substitute the heavy whipping cream with milk or a lower-fat option; that fat content is what gives our filling its lush, pipeable, cheesecake-like body.
Equipment Needed
- Electric hand mixer or stand mixer
- Large mixing bowl
- Spatula
- Measuring cups and spoons
- Piping bag with a large star tip (or a large zip-top bag)
- Baking sheet or muffin tin (for holding cones upright)
- Small bowl (for crushing wafers)
You don’t need any fancy equipment, but a few tools make this process a breeze. An electric mixer is essential for getting that filling silky smooth and the whipped cream perfectly stiff. I’ve tried whisking by hand in a moment of misplaced optimism, and my wrist regretted it for days. The piping bag and star tip aren’t strictly necessary, but they make filling the cones so neat and give you that gorgeous, professional swirl on top. If you don’t have one, a large zip-top bag with a corner snipped off works just fine. And here’s my little hack: use a muffin tin to hold your cones upright while you fill and freeze them! It prevents any tragic tipping and spillage.
Step-by-Step Instructions
The first step is all about building our creamy base. In my large bowl, I beat the softened cream cheese until it’s completely smooth and there’s not a single lump in sight. This takes a good minute or two. Then, I slowly add the powdered sugar and the box of instant banana pudding mix, beating until fully incorporated. The smell at this stage is incredible—that instant banana pudding scent is pure childhood. Finally, I pour in the vanilla and the heavy cream. Now, I turn the mixer up to medium-high and watch the magic happen. I let it whip for 2-3 minutes, until the mixture is thick, luscious, and holds stiff peaks. It should look like a cloud of banana cheesecake dreams.
Now for the fun part: assembly! I take my ripe bananas and mash one and a half of them with a fork until they’re basically a smooth puree. I fold this gently into the cheesecake filling with a spatula, being careful not to deflate all that air we whipped in. Then, I fold in one cup of the crushed Nilla Wafers. The remaining half banana, I slice thinly for garnish later. I spoon all the filling into my piping bag fitted with a star tip. Using my muffin tin to hold the cones steady, I pipe the filling into each cone, starting at the bottom and swirling up to a nice peak at the top. The texture should be thick enough to hold its shape beautifully.(See the next page below to continue…)