Pro Tips for Best Results
First, invest in an oven thermometer. I learned my oven runs 25 degrees hot, and my first batch came out crisp because of it. Knowing your true oven temperature is a game-changer for perfect baking. Second, when rolling, use as little extra flour as possible. I keep a small bowl of flour to dust my rolling pin and the top of the dough lightly, tapping off the excess. Too much incorporated flour makes the cookies tough.
My final pro tip is about timing. I always bake one test cookie first. That way, I can adjust the bake time or thickness before committing a whole tray. It saves so many cookies from being overdone. Also, let your baking sheets cool completely between batches. Placing dough on a warm sheet causes it to start melting before it even hits the oven, leading to spread.
Common Mistakes to Avoid
The biggest mistake I made early on was over-baking. We’re so trained to look for golden brown, but with these, that means they’re overdone. Take them out when they look puffed and set but still pale. They firm up as they cool. Trust the process! I also once used margarine instead of butter, trying to be thrifty. The flavor was completely off, and the texture was waxy. For the true, rich, holiday flavor, real unsalted butter is non-negotiable.
Another pitfall is not letting the dough chill long enough. A rushed, warm dough is sticky and frustrating to roll, and your cookies will lose their definition. I now always make the dough the night before. It makes the actual baking day so much more peaceful and successful. Trying to do it all in one frantic afternoon is a recipe for stress.
Serving Suggestions
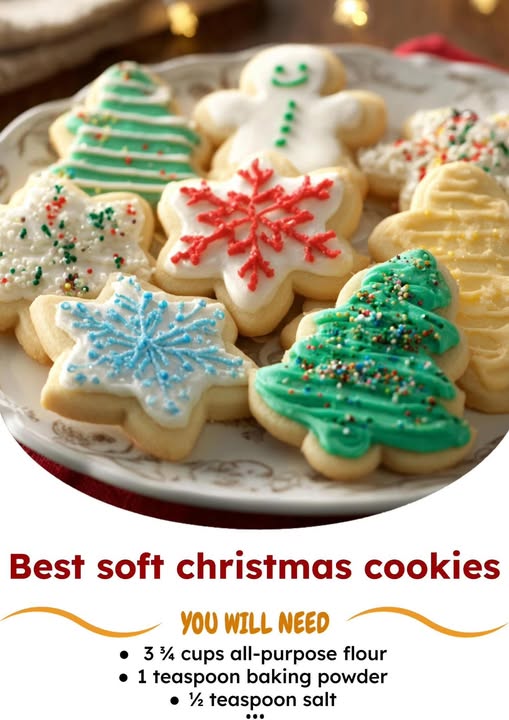
I love serving these cookies on a big, festive platter with varying shapes and icings. A simple glaze of powdered sugar, milk, and vanilla is my go-to—it sets nicely and lets the cookie’s flavor shine. For a more decadent touch, a classic buttercream flavored with peppermint or orange extract is heavenly. I always put out a few small bowls of sprinkles, sanding sugar, and edible glitter so guests can decorate their own.
With a cup of coffee or hot chocolate, they are pure comfort. I also like to package them in clear cellophane bags tied with a ribbon as heartfelt homemade gifts for neighbors and friends. They stay soft for days, so they travel well. For a beautiful holiday dessert table, I stack them in tiers or arrange them around a cake for a stunning, edible centerpiece.
Variations & Customizations
The beauty of this base recipe is its versatility. For a citrus twist, I’ve added the zest of one lemon or orange to the dough, which is wonderfully bright. My friend adds a ½ teaspoon of almond extract with the vanilla for a classic, nostalgic flavor that smells amazing. If you want a little spice, whisking 2 teaspoons of ground cinnamon or a pumpkin pie spice blend into the dry ingredients creates a wonderfully warm cookie.
You can also play with the roll-out. After chilling, I sometimes roll half the dough in colored sugar before cutting shapes—it gives a gorgeous, sparkly edge. For a filled cookie, place a small dollop of jam or a chocolate kiss in the center of one shape, top with another, seal the edges, and bake. They become delightful little cookie pockets. The possibilities are endless, so make the recipe your own!
How to Store, Freeze & Reheat
To store, I place completely cooled cookies in an airtight container with a slice of bread. The bread keeps the cookies soft by releasing moisture. They’ll stay perfect at room temperature for up to 5 days. For longer storage, the unfrosted cookies freeze beautifully. I layer them between sheets of parchment in a freezer bag; they’ll keep for up to 3 months. Thaw at room temperature before decorating.
The dough itself can also be frozen. I wrap the discs tightly in a double layer of plastic wrap and freeze for up to 2 months. Thaw overnight in the refrigerator before rolling. I do not recommend freezing frosted cookies, as the icing can become sticky and messy when thawed. From my experience, keeping the components separate until serving gives you the best texture and appearance.
Conclusion
This recipe is more than just a list of ingredients and steps; it’s my favorite way to create edible holiday memories. The process is as joyful as the result, filling your home with warmth and anticipation. I truly hope these soft Christmas cookies bring as much happiness to your kitchen as they have to mine. Gather your sprinkles, put on some festive music, and bake a batch of pure, soft Christmas magic. Happy baking, friends