Once your cake has cooled, it’s time to make the creamy cheesecake layer. In a separate bowl, with an electric mixer, beat the softened cream cheese until it’s smooth and creamy. Gradually add the powdered sugar, mixing until well combined. Then, add the eggs and vanilla extract, and finally, stir in the sour cream. This cheesecake mixture should be velvety and heavenly! Pour it over the cooled cake layer in the springform pan, and spread it evenly. Bake again for about 45-50 minutes, or until the edges are set but the center still has a slight jiggle.
After the cheesecake has baked, let it cool in the pan for about an hour, then transfer it to the refrigerator to chill for at least 4 hours, or overnight if you can wait! Meanwhile, you can prepare the chocolate ganache. In a small saucepan over low heat, combine the heavy cream and chocolate chips. Stir continuously until the chocolate melts and the mixture is smooth and shiny. Let the ganache cool slightly before pouring it over the chilled cheesecake. Your kitchen will smell divine!
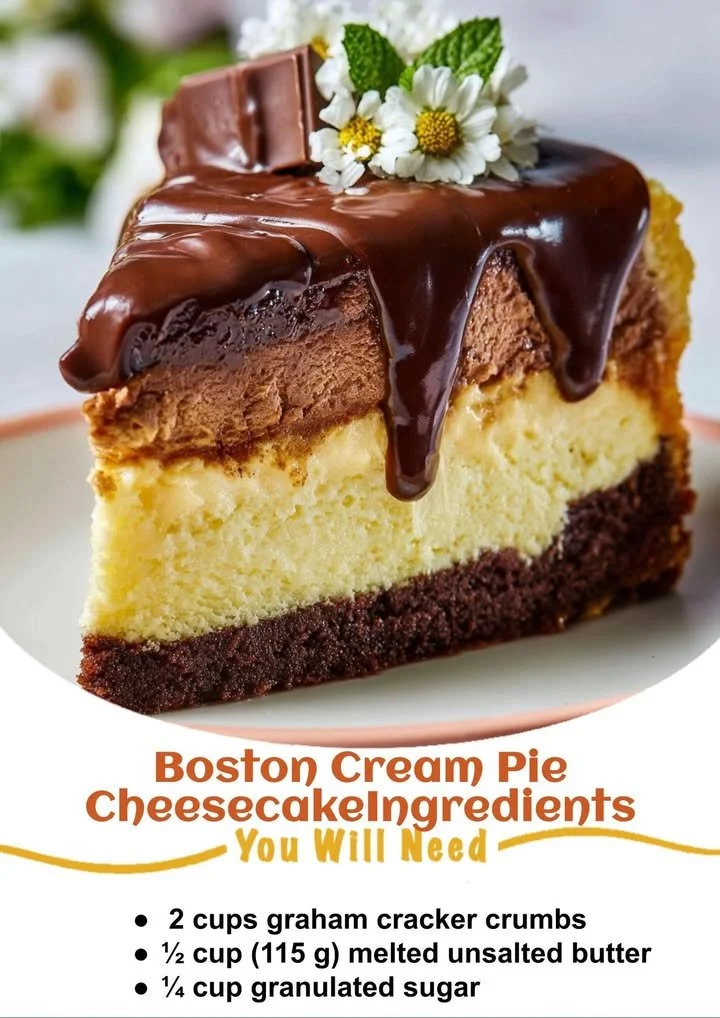
Finally, once the ganache is set, release the springform pan and slice into this beautiful creation. I can never wait to dive in as soon as I see those creamy, layered slices. Enjoy every bite!
Pro Tips for Best Results
When I first made this recipe, I baked the cake layer too long and it turned out dry, so make sure you keep an eye on it! Using an oven thermometer can be a game changer to ensure your oven is at the right temperature. I also recommend using room temperature ingredients, especially the cream cheese. This makes it much easier to blend everything smoothly and results in a better texture.
If you want to add a little extra flavor to the cheesecake layer, you can mix in a teaspoon of lemon zest or a splash of almond extract. I tried both, and they add a lovely twist without overpowering the classic flavor! And if you find yourself short on time, you can opt for a pre-made cake base, though there’s something satisfying about making it from scratch.
Finally, always allow the cheesecake to chill for at least four hours. Trust me, the flavors meld together beautifully when it has time to set. I once tried to cut into it too early, and it just didn’t hold its shape well. Patience is key here!
Common Mistakes to Avoid
One common mistake I’ve seen many people make is not properly greasing the springform pan. This step is crucial to ensure that your cheesecake comes out beautifully without any sticking. I learned the hard way, cleaning bits of cake off my cheesecake while losing some of that delightful top layer!
Another mistake is getting the temperature right. If your oven is too hot, it can cook the cheesecake too quickly, leading to cracks. I solved this by placing a shallow pan with water on the lower rack while baking to keep the moisture in the oven. It worked wonders!
A frequent issue with the ganache is overheated chocolate. Always melt the chocolate over low heat and stir constantly. If it seems to clump or seize, don’t panic! I once panicked, but you can often add a bit more cream to smooth it out again.
Lastly, remember to slice your cheesecake with a warm knife for cleaner edges. I learned this tip after serving some less-than-perfectly shaped slices at a family gathering. It definitely brought a smile to my face when I made these adjustments!
Serving Suggestions
This Boston Cream Pie Cheesecake is a showstopper on its own, but I love serving it with a dollop of freshly whipped cream on the side for an extra touch of indulgence. Sometimes I even sprinkle a few chocolate shavings on top for that wow factor! It adds a nice texture and elevates the presentation beautifully.
I also like to accompany it with a scoop of vanilla ice cream, especially in the warmer months. The contrast of the cold ice cream against the rich cheesecake is delightful! My friends and family always rave about this combination, and it feels so festive.
Lastly, if you’re looking for a little extra color, fresh berries like strawberries or raspberries are a fantastic addition. They add a refreshing burst of flavor that balances the richness of the cheesecake. Plus, they make for a stunning visual appeal on the plate!
Variations & Customizations
One of the great things about this recipe is how easily it can be customized. For a pumpkin-spice twist, I’ve substituted half the cream cheese with pumpkin puree and added pumpkin pie spice. It creates a delicious fall dessert that my friends could not resist!
If you’re a chocolate lover (and who isn’t?), consider swirling some melted chocolate into the cheesecake layer before baking. It gives the cheesecake an incredible marbled effect while deepening the flavor. It may not look as traditional, but the taste definitely knocks it out of the park!
And for those who love a bit of crunch, you can add a layer of crushed cookies or nuts in between the cake and cheesecake layers. I’ve experimented with both Oreo crumbs and pecans, creating textures that add an exciting twist while keeping the flavors intact.
How to Store, Freeze & Reheat
After making this cheesecake, you might have some leftovers (if you’re super lucky!). I always store mine in an airtight container in the refrigerator, where it can last up to a week. It’s perfect for dessert any night of the week when you need a sweet pick-me-up!
If you’d like to store it for a longer period, you can freeze the cheesecake! I recommend slicing it into individual portions and wrapping them tightly in plastic wrap before placing them in a freezer-safe bag. It can be stored for up to three months. When you’re ready to enjoy, just let it thaw in the refrigerator overnight.
Reheating isn’t really necessary since cheesecake is delicious served cold, but if you prefer it slightly warmed, I suggest using the oven. Just place a slice on a baking sheet and warm it at a low temperature, around 200°F (93°C), for about 10 minutes. This keeps it creamy without overcooking it.
Conclusion
I hope you feel inspired to try your hand at making this Boston Cream Pie Cheesecake. It’s a delightful mix of flavors and textures that truly brings smiles to faces. From family gatherings to cozy nights at home, this dessert never disappoints! Enjoy every slice and the joy it brings to your loved ones; it’s a sweet treat that deserves a place in your kitchen! Happy baking!