Equipment Needed
- 9×13 inch baking pan
- Parchment paper
- Large microwave-safe bowl or saucepan
- Medium microwave-safe bowl
- Hand mixer or sturdy wooden spoon
- Spatula
- Measuring cups and spoons
Step-by-Step Instructions
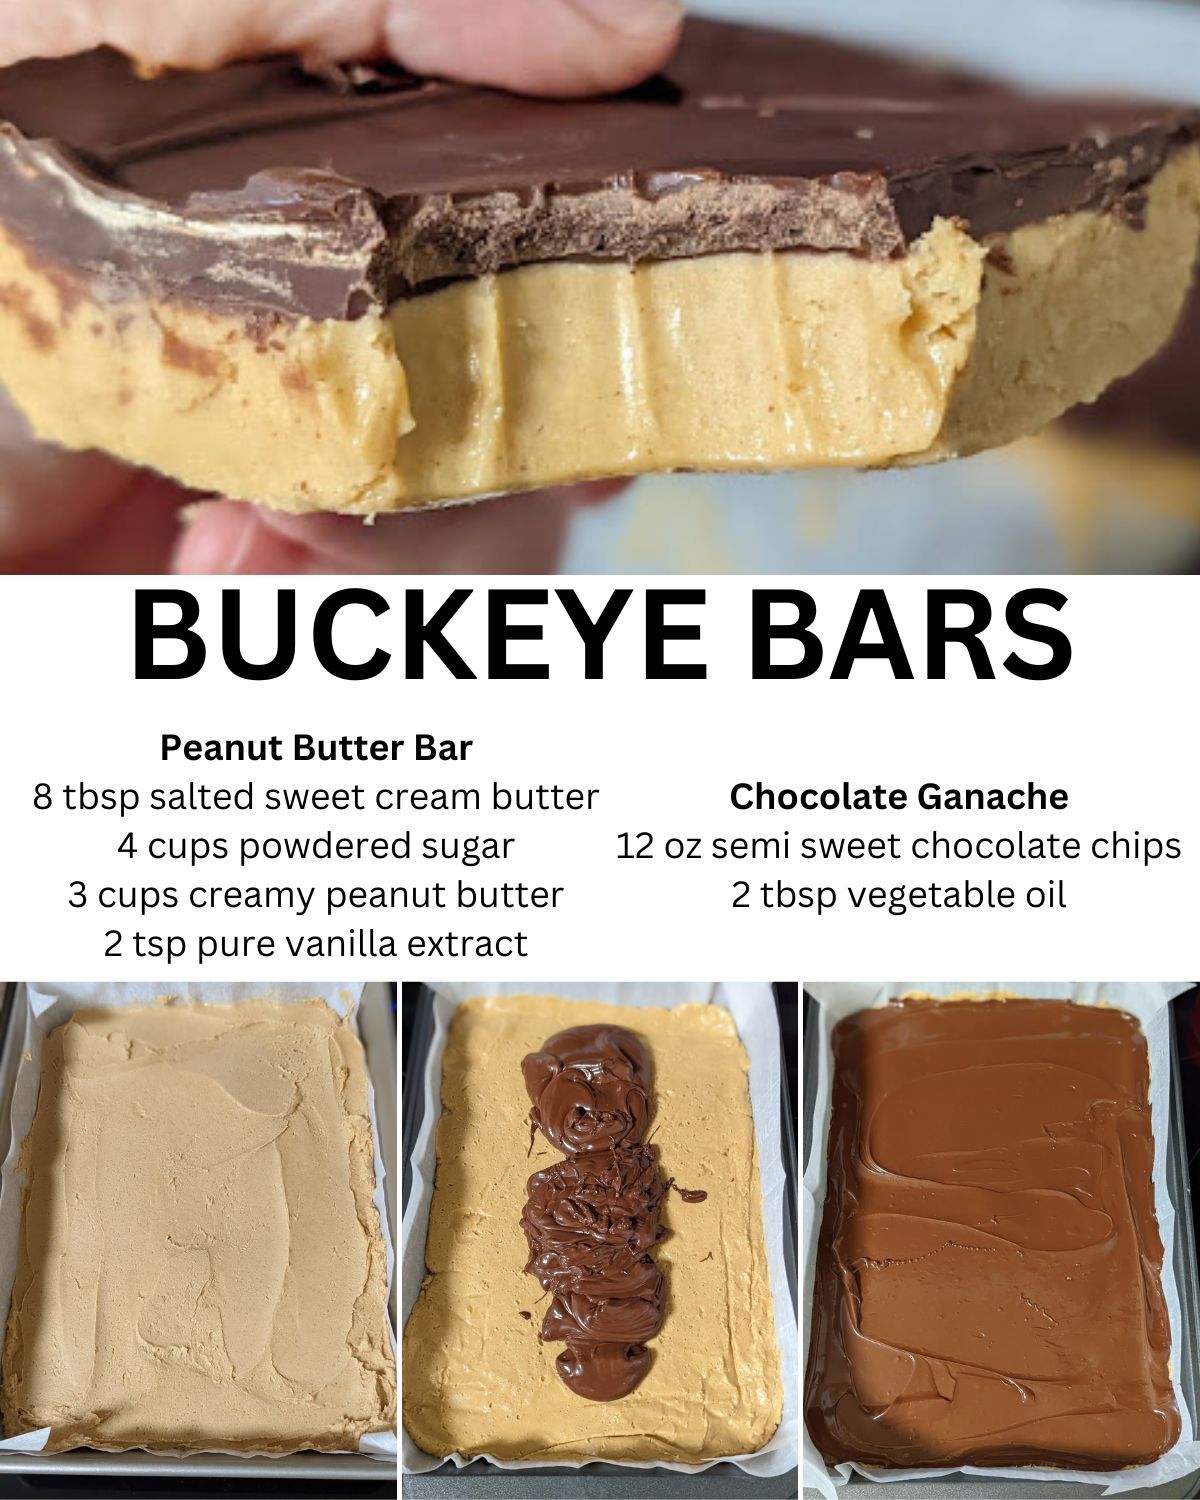
First, I line my 9×13 pan with parchment paper, leaving some overhang on the sides. This is my best friend for easy removal later—trust me, trying to pry these dense bars out of a bare pan is a nightmare. Then, I melt the stick of butter in my large microwave-safe bowl. I do it in 30-second bursts because it’s easy to explode butter in the microwave, and cleaning that up is no one’s idea of fun. Once it’s just melted, I immediately stir in the three cups of peanut butter and the vanilla extract. The mixture will be wonderfully smooth and fragrant.
Now for the arm workout! I gradually add the four cups of powdered sugar to the peanut butter mixture. I start with a wooden spoon, but once it gets thick, I switch to my hands. Yes, my hands. It’s messy, but it’s the only way to fully incorporate all that sugar. You’ll end up with a dense, pliable dough that holds together when you squeeze it. I then press this mixture firmly and evenly into my prepared pan. I mean really press it down—this prevents crumbly bars later. I use the bottom of a measuring cup to get it perfectly smooth and compact.
While that base is setting up in the fridge for about 20 minutes, I make the simple ganache. I combine the chocolate chips and vegetable oil in a medium bowl and microwave them in 20-second intervals, stirring vigorously after each one. The oil is my secret for a shiny, sliceable topping that doesn’t crack into a million pieces. Once it’s completely smooth and fluid, I pull the chilled base from the fridge and pour the chocolate right over the top, tilting the pan to help it spread into an even, gorgeous layer.
The final, most crucial step is patience. I carefully place the pan back in the refrigerator and let it chill for at least two hours, or until the chocolate is completely set. I’ve tried to shortcut this before, and slicing into soft chocolate is a messy disaster. Once it’s firm, I use the parchment paper sling to lift the entire slab onto a cutting board. I warm a sharp knife under hot water, dry it, and make clean cuts into bars or squares. Wiping the knife between cuts gives you those beautiful, professional-looking edges.(See the next page below to continue…)