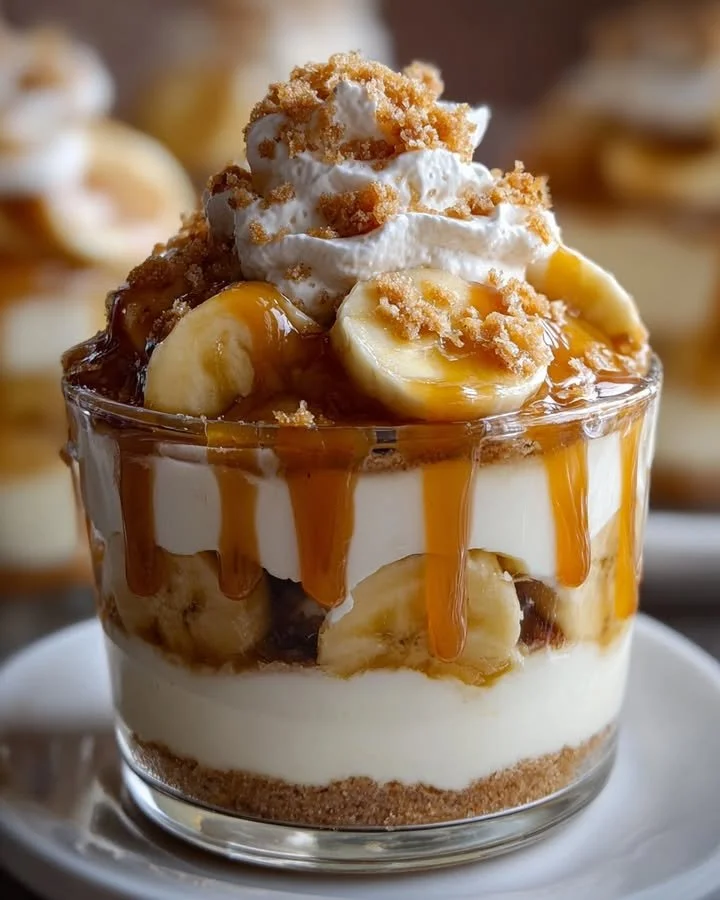
Next, once the pudding has thickened, I take it off the heat and let it cool for a few minutes. This is when I like to get my layers ready. I start by placing a few vanilla wafers at the bottom of each cup, followed by a generous layer of the creamy pudding. I then sprinkle a handful of banana slices on top, creating a lovely three-layer preparation. The colors and textures are starting to come together beautifully!
After assembling the first layers, I repeat this process until the cups are filled—two to three layers should do it! A finishing touch is a drizzle of warm caramel sauce on top of each pudding cup, along with a dollop of whipped cream if I’m feeling extra indulgent. Finally, I pop them in the fridge for at least an hour, allowing the flavors to mingle and the dessert to chill to perfection. My family always anticipates this part; the waiting makes it all the more rewarding!
Pro Tips for Best Results
One of my favorite tips is to use overly ripe bananas for the best flavor. I’ve tried it with bananas that were just on the verge of being ripe, but letting them get a bit too soft adds that signature sweetness and enhances the overall taste of the pudding. Trust me, the bananas will elevate the dish!
Also, be sure not to skip the whisking when preparing the pudding. I found that neglecting this step can leave lumps in the mixture, which isn’t what we’re going for here. Keeping a steady hand and stirring consistently leads to that silky texture we all love.
Lastly, I recommend letting the assembled cups chill overnight if you can. This allows all the layers to set perfectly and meld together, which makes each bite utterly delightful. The waiting, though sometimes painful, is well worth the final product!
Common Mistakes to Avoid
One mistake I made during my first go at these cups was using cold milk straight from the fridge. This resulted in a lumpy pudding that was not pleasant at all. It’s best to allow your milk and cream to sit out for a while, bringing them to room temperature before you begin the cooking process. It really helps in achieving that nice, smooth texture.
Another pitfall is using less sugar than recommended. In my early attempts, I thought I could cut back on sugar to make it healthier, but what I ended up with was a bland dessert. Trust me, I learned this the hard way. The sweetness of the sugar enhances the flavors of the bananas and caramel, so stick to the measurements!
Lastly, be cautious with your caramel sauce. Overheating it or using one that’s too thick can lead to a sticky mess on top of your cups. I’ve found that warming the caramel slightly makes it easier to drizzle, creating that visually appealing layer. (See the next page below to continue…)