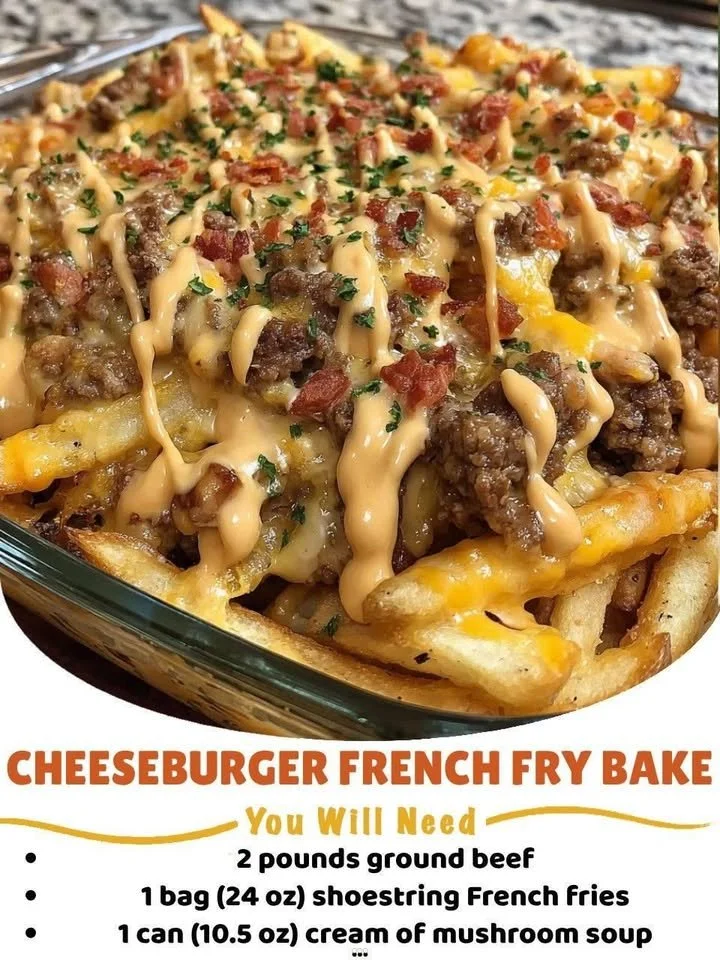
Now, in a mixing bowl, combine the beef mixture with the chopped pickles, if using, and set this aside. In your greased 9×13 inch baking dish, spread an even layer of the frozen French fries across the bottom. Pour the beef and pickles mixture on top of the fries, making sure to spread it out evenly. Finally, sprinkle the cheddar and mozzarella cheese generously over the top. The cheese gets all melty and bubbly, creating this tantalizing crust that I absolutely adore!
Once your masterpiece is assembled, pop it into your preheated oven and bake for about 25-30 minutes or until the fries are golden and crispy, and the cheese is bubbling delightfully. I always check it around the 20-minute mark because every oven can be a bit different, and you don’t want to miss that perfect cheese melt.
Once it’s out of the oven, let it cool for about 5 minutes before diving in. The anticipation is real, and that first bite is always the best! It really does taste like a cheeseburger wrapped in a cozy blanket of fries and cheese.
Pro Tips for Best Results
One tip I’ve learned through lots of experimentation is to season your ground beef with a bit more than just salt and pepper. I sometimes add a dash of garlic powder or even a splash of Worcestershire sauce to enhance the flavor. It really takes the dish to the next level!
Another thing that I’ve tested is layering the fries. Instead of just a single layer, I’ve tried adding an additional layer of fries in between the beef mixture and cheese, which creates an extra crispy texture while allowing each bite to remain juicy and satisfying.
Lastly, don’t be shy with the cheese! I always use a mix of shredded cheddar and mozzarella because the cheddar offers a strong cheese flavor while the mozzarella provides that great gooey stretch. You can never go wrong with too much cheese, in my opinion!
Common Mistakes to Avoid
One common mistake I’ve made in the past is not letting the dish cool before serving. I know it’s tempting to dig right in, but the flavors settle and meld together beautifully if you give it a few minutes. Plus, it saves you from burning your tongue!
Another mistake is overcooking the beef. It’s easy to get distracted while multitasking in the kitchen, but be sure to keep an eye on your beef as it cooks, so it doesn’t become dry. Remember, it will continue to cook while it bakes in the oven.
I’ve also witnessed some folks putting the fries on top of the beef mixture instead of below. While it may seem like it’d work, the fries cook more evenly on the bottom, soaking up all those great flavors! So trust me, bottom layer is best!
Lastly, keep an eye on the cheese! It’s all about that perfect moment when the cheese begins to bubble without burning. Set a timer, and check on it often—the mouthwatering aroma will let you know when it’s almost ready to take out!
Serving Suggestions
I usually serve my Cheeseburger French Fry Bake hot right out of the oven, and I love to add a side of fresh green salad. The crispness of the salad balances the richness of the bake and adds a refreshing note that everyone enjoys. You can toss together some cherry tomatoes, cucumbers, and a simple vinaigrette for a quick and satisfying side!
Another fun idea is to set up a toppings bar. I like to lay out items like extra pickles, tomatoes, onions, and even some sliced jalapeños for those who enjoy a bit of heat! This way, everyone can customize their portions, making it interactive and exciting.
If I’m serving this dish for a casual gathering or a game day, I like to serve it with some dipping sauces—think ranch dressing or even a tangy barbecue sauce. It’s all about creating a relaxed atmosphere and satisfying everyone’s tastes.
Variations & Customizations
One of the coolest things about this recipe is how easy it is to customize. If you’re a fan of bacon, consider adding some crispy crumbled bacon to the beef mixture for that smoky flavor that takes it right over the top. Everyone in my house loves anything with bacon!
You can also switch up the cheeses based on your own preferences. A pepper jack cheese could add a nice kick to the dish, or even a sharp white cheddar for an interesting twist. It’s always fun to experiment with different flavors to see what you like best!
For a healthier spin, you might want to try swapping the regular fries for sweet potato fries or even zucchini fries. I’ve done this, and while it changes the flavor a bit, it’s a fun way to sneak in some veggies and still enjoy a comforting meal.
How to Store, Freeze & Reheat
Once you’ve enjoyed your Cheeseburger French Fry Bake, any leftovers can be stored in an airtight container in the refrigerator for about 3-4 days. Just be sure to let it cool completely before sealing it up. I love reaching for leftovers during a busy week!
If you want to save this dish for another day, you can freeze it after it has cooled. Just portion it out into freezer-safe containers, and it should keep well for about 2-3 months. When you’re ready to eat, just let it thaw in the fridge overnight before reheating.
To reheat, I recommend placing it back in the oven at 350°F (175°C) for about 20-25 minutes, ensuring the cheese is bubbly again. You can also pop it in the microwave, but the oven really gives you that crispy texture back that makes this dish shine.
Conclusion
I hope this Cheeseburger French Fry Bake becomes a favorite in your home as it has in mine! There’s something so satisfying about all those flavors coming together in one dish, making it a versatile recipe that fits perfectly into any family meal. Give it a try, and I’d love to hear how it turns out for you. Happy cooking!