Pro Tips for Best Results
I tested the potato thickness three different ways: thick slices, grated, and thin slices. The thin slices, about the thickness of a coin, won by a mile. They cook through perfectly and meld with the sauce. Thick slices stayed too firm, and grated potatoes almost vanished into the sauce. A mandoline is the best tool for this job, but a sharp knife and patience work too.
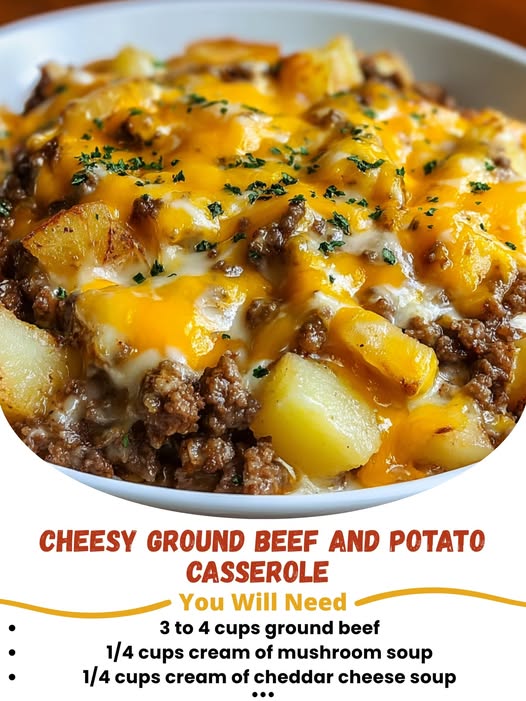
Here’s what I learned the hard way about the cheese: don’t add it all at the beginning! If you mix cheese into the sauce or add it before the long bake, it can separate and become greasy. Sprinkling it on top for the final uncovered bake gives you that perfect, cohesive, melty blanket we all dream of. Also, using a block of cheese you shred yourself makes a noticeable difference in meltiness compared to pre-shredded bags, which have anti-caking agents.
Letting the casserole rest after baking is non-negotiable in my book. I know it’s tempting to dive right in, but those 10-15 minutes allow the furious bubbles in the sauce to settle and the whole dish to set up. When you cut into it too soon, it’s soupy. When you wait, you get beautiful, clean scoops of layered comfort. It’s a lesson in delayed gratification that pays off.
Common Mistakes to Avoid
I made a big mistake the first time: I didn’t brown the beef enough. I just cooked it until the pink was gone. Don’t do what I did! Take an extra few minutes to get some good, caramelized brown bits on the meat. That fond (the browned bits stuck to the pan) is pure flavor gold. When you add the soups and liquids, make sure to scrape all those bits up—they’ll dissolve into your sauce and give the whole casserole a deeper, richer taste.
Another pitfall is under-seasoning the beef layer. The potatoes and sauce need a flavor foundation. Be generous with your salt and pepper when cooking the onions and beef. Remember, you’re seasoning the entire dish right there. I also once used ultra-lean beef to be “healthier,” and the result was a bit dry. The 80/20 blend has enough fat to keep things moist and flavorful, and you can drain any excess after browning if you prefer.
Serving Suggestions
I love serving this casserole straight from the dish at the table—it’s a beautiful, bubbling centerpiece. For a simple, perfect meal, I pair it with a crisp green salad dressed with a bright vinaigrette. The acidity and freshness of the greens cut through the richness of the beef and cheese beautifully. It’s a contrast that makes both the salad and the casserole taste even better.
On colder nights, I go for steamed green beans or roasted broccoli on the side. Something about those green veggies alongside the creamy potatoes feels just right. A slice of crusty bread is also wonderful for mopping up any extra sauce on the plate—my family never lets that go to waste.
If I’m bringing this to a potluck or serving it for a casual gathering, I keep the sides even simpler: maybe some pickles, olives, and a basket of dinner rolls. It’s such a complete meal in one dish that you don’t need to overcomplicate things. A light, fizzy drink like sparkling water with lemon or a simple red wine are my beverage choices.
Variations & Customizations
This recipe is a fantastic canvas. One of my favorite variations is the “Southwest” version. I add a drained can of Rotel tomatoes with green chiles to the beef mixture and swap the cheddar for a pepper Jack blend. A sprinkle of cumin and chili powder in with the paprika takes it in a totally different, zesty direction. It’s fantastic topped with a dollop of sour cream and some fresh cilantro.
For a “Shepherd’s Pie” vibe, I sometimes mix a cup of frozen peas and carrots into the beef layer. It adds color, sweetness, and makes me feel like I’ve snuck in some extra veggies. You could also use ground turkey or chicken instead of beef, though I’d recommend using broth instead of milk and adding an extra pinch of herbs like thyme to boost the flavor.
I’ve seen friends make a fantastic “Breakfast Casserole” version by using ground breakfast sausage instead of beef, adding a layer of thawed frozen hash browns, and mixing a few beaten eggs into the soup mixture. They bake it just the same and serve it for brunch. It’s brilliant! Don’t be afraid to make this recipe your own.
How to Store, Freeze & Reheat
From my experience, leftovers keep beautifully. Once completely cooled, I cover the baking dish tightly or transfer portions to airtight containers. It will last in the fridge for 3-4 days. To reheat, I find the microwave works fine for single portions, but for the best texture, I reheat larger portions in the oven at 350°F until warmed through, sometimes with a tiny sprinkle of water or broth to keep it moist.
This casserole freezes exceptionally well—a lifesaver for future busy nights. I let it cool completely, then wrap the entire dish (or portion it into freezer-safe containers) tightly in plastic wrap and then foil. It can be frozen for up to 3 months. To cook from frozen, I don’t even thaw it. I just remove the plastic wrap, cover it with the foil, and bake it at 375°F for about 1.5 hours, then remove the foil, add a little fresh cheese on top, and bake for another 15-20 minutes until bubbly and hot in the center.
Conclusion
This Cheesy Ground Beef and Potato Casserole is more than just a recipe in my house; it’s a memory maker, a weeknight warrior, and a guaranteed smile on a plate. It represents the kind of cooking I love most—unpretentious, heartwarming, and deeply delicious. I hope it finds a regular spot in your kitchen rotation and brings as much comfort and joy to your table as it has to mine. Now, go preheat that oven—your new favorite dinner awaits.