Pro Tips for Best Results
Grating the onion on a box grater is my number-one tip. I learned this the hard way after trying finely diced onion—the little pieces can create pockets of steam and make the meat mixture harder to seal around the cheese. Grating it creates almost an onion paste that blends seamlessly into the meat, adding incredible flavor and moisture without texture interference. It’s a game-changer.
I tested chilling the stuffed bites before baking versus baking them right away. Giving them a 15-minute chill in the fridge after shaping helps them hold their perfect round shape in the oven. If you’re in a rush, you can skip it, but if you have the time, I highly recommend it. They just come out looking more picture-perfect.
Resist the urge to press down on the bites with your spatula when you take them out of the oven! I did that once, thinking I was checking for doneness, and I squeezed out a river of precious cheesy goodness. Just trust the timer and look for that firm, caramelized exterior. They will continue to cook a bit from residual heat as they rest.
Common Mistakes to Avoid
The biggest mistake I made early on was using cheese that was too wet. Fresh mozzarella packed in water will weep way too much liquid as it bakes, causing your beautiful meatball to potentially burst open and the cheese to leak out. It creates a steamy pocket that prevents proper browning. Stick with a block of low-moisture, whole-milk mozzarella. It melts perfectly and stays contained in its delicious meaty pocket.
Another pitfall is over-mixing the meatloaf base. When you add the egg and breadcrumbs, mix with a light hand just until everything is incorporated. I used to knead it like bread dough, thinking I needed it perfectly uniform, and ended up with dense, tough little hockey pucks. Mix it until you stop seeing visible streaks of egg or dry breadcrumbs, then stop immediately. Your texture will be so much more tender.
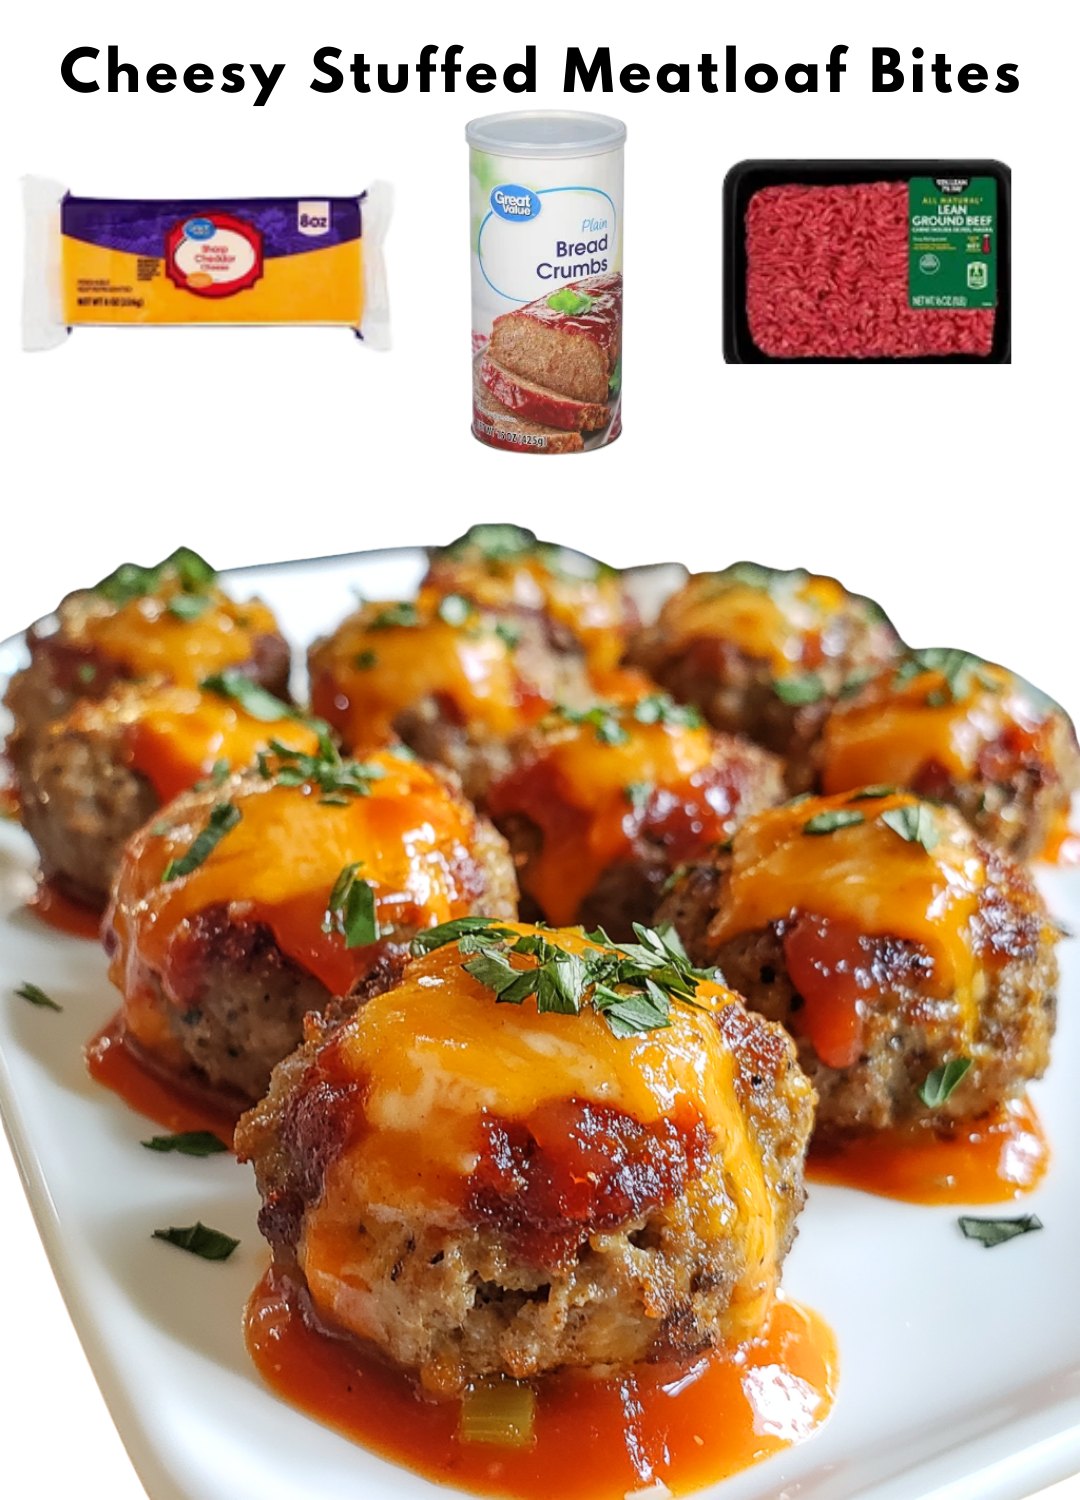
Serving Suggestions
I love serving these bites straight from the oven on a big platter with some extra glaze for dipping and a sprinkle of fresh chopped parsley for a pop of color. They are the ultimate party appetizer and are always the first thing to vanish. For a heartier meal, I’ll serve them alongside a big, crisp green salad and some creamy mashed potatoes—it’s like deconstructed meatloaf night, but way more fun.
They’re also fantastic as a main dish for a casual family dinner. I’ll make a double batch and serve them over a bed of simple buttered noodles or with some roasted vegetables like green beans or broccoli. My kids absolutely adore them, and I love that they’re getting a well-rounded meal in a fun, bite-sized package.
Don’t forget the dipping sauces! While the glaze is fantastic, I often put out a few small bowls with different options. A cool, creamy ranch or blue cheese dressing is classic. For a kick, I mix a little sriracha into some mayonnaise. And for something herby, a quick aioli with lemon and dill is divine. Letting people customize their dip really makes the meal interactive and special.
Variations & Customizations
This recipe is wonderfully adaptable. If you’re not a beef fan, I’ve had great success using a 50/50 mix of ground beef and Italian sausage. The sausage adds fantastic fennel and herb notes. For a turkey version, use ground turkey (preferably a mix of light and dark meat) and add an extra tablespoon of olive oil or ketchup to the mixture to combat dryness.
The cheese center is your playground, too. While mozzarella is the classic, a sharp cheddar gives a more pronounced cheesy flavor. For a real treat, use a cube of pepper jack and a small slice of jalapeño inside the meatball for a spicy surprise. I’ve even seen a friend use a small chunk of cream cheese wrapped in a bit of cooked, crumbled bacon before being enclosed in the meat—absolutely decadent.
You can play with the glaze as well. A BBQ sauce glaze (thinned with a touch of vinegar) is fantastic. Or, for a tangier, less sweet option, I sometimes use a mix of ketchup and yellow mustard with a dash of smoked paprika. The basic meat mixture is your perfect, flavorful canvas, so don’t be afraid to get creative with what you stuff inside or slather on top.
How to Store, Freeze & Reheat
To store leftovers (if you have any!), let the bites cool completely and store them in an airtight container in the refrigerator for up to 3 days. To reheat, I never use the microwave—it makes the meat rubbery and overheats the cheese into an oily mess. Instead, I place them on a baking sheet and warm them in a 350°F oven for about 10 minutes, or until heated through. They regain nearly all of their just-made glory.
These freeze beautifully for future quick meals or appetizers. After baking and cooling, flash-freeze the bites on a parchment-lined tray until solid, then transfer to a freezer bag. They’ll keep for 2-3 months. You can reheat them straight from frozen on a baking sheet in a 375°F oven for 15-20 minutes. It’s such a lifesaver to have a bag of these ready to go for unexpected guests or a easy weeknight dinner.
Conclusion
These Cheesy Stuffed Meatloaf Bites are more than just a recipe; they’re a little bundle of joy I get to share with people I care about. They represent everything I love about cooking: the process of creating something with your hands, the anticipation as wonderful smells fill your home, and the pure happiness of watching people enjoy what you’ve made. I hope you give them a try and that they bring as much warmth and cheer to your table as they have to mine. Happy cooking