Pro Tips for Best Results
My number one tip, born from a slightly soupy first attempt, is to ensure everything is cold. Use ice-cold water for the pudding base, and chill your mixing bowl and beaters before whipping the cream. A cold start helps everything set up faster and creates a sturdier, more voluptuous final product. I even pop my can of sweetened condensed milk in the fridge for 30 minutes beforehand if I remember.
I tested the whipping cream step three different ways. First with a whisk (my arm was sore, and the peaks weren’t stiff enough), then with a hand mixer on too high a speed (it splattered everywhere), and finally, with my stand mixer fitted with the whisk attachment on medium-high. The stand mixer method was effortless and perfect. If you only have a hand mixer, use a deep bowl and start on medium speed.
For the ultimate flavor and texture, do not skip the chilling time. I know it’s tempting to dig in after an hour or two, but the four-hour minimum—or better yet, an overnight rest—is crucial. This waiting period allows the Nilla Wafers to soften into that iconic cake-like layer and lets all the flavors marry perfectly. The pudding firms up, making it sliceable and dreamy.
Common Mistakes to Avoid
The first time I made this, I was impatient and used barely-ripe bananas. Big mistake. They were starchy, didn’t blend well with the sweetness, and their texture was off. The ripe, spotted bananas practically melt into the pudding, creating a harmonious flavor. So, don’t do what I did—wait for those brown speckles. It makes a world of difference.
Another common pitfall is rushing the folding process. If you’re too vigorous or use a mixer to combine the pudding and whipped cream, you’ll deflate all the air you just whipped in. The result is a denser, heavier pudding. I’ve tried this step both ways, and trust me, gentle folding with a spatula is the only way to go. It preserves that light, mousse-like quality we’re after.
Serving Suggestions
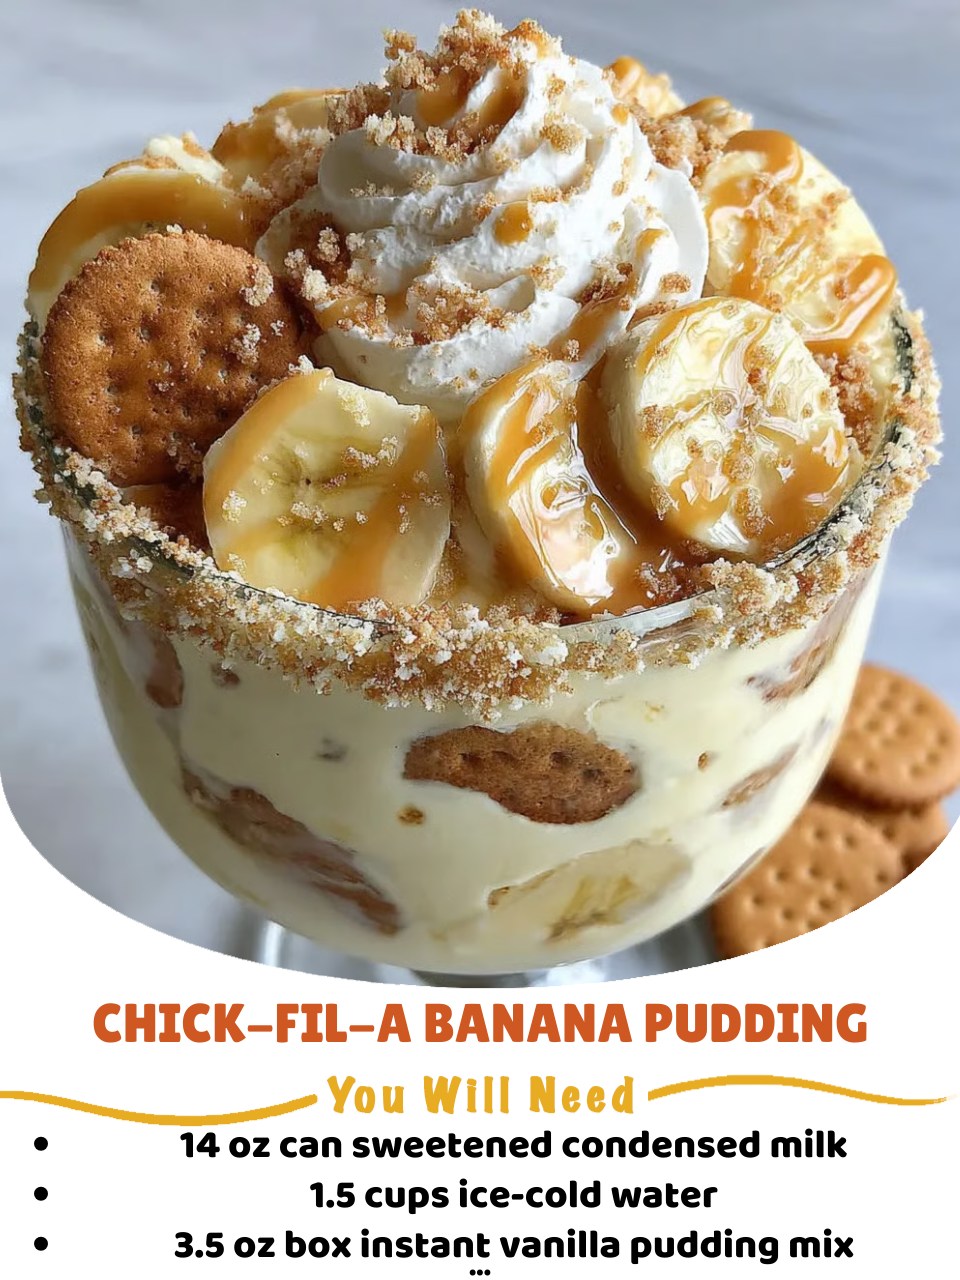
I love serving this pudding straight from the fridge in the baking dish, letting everyone scoop out their own generous portion. It’s perfect for a casual family dinner. For a more elegant presentation, I layer it in a clear glass trifle bowl. Seeing all those distinct layers of cream, golden wafers, and bananas is part of the fun and always gets “oohs” and “aahs.”
If I’m feeling fancy, I’ll garnish individual servings with a final flourish. A few extra crushed Nilla Wafers on top add a nice crunch, a thin slice of fresh banana, or even a tiny dollop of whipped cream and a drizzle of caramel sauce. It takes it from a humble pudding to a restaurant-worthy dessert with just seconds of extra effort.
This dessert is a potluck and party superstar. I bring it to summer barbecues, holiday gatherings, and book club meetings. It’s universally loved and travels like a dream. Just keep it in a cooler if you have a long drive. I can’t tell you how many times I’ve been asked for this recipe before the event is even over.
Variations & Customizations
If you’re a chocolate and peanut butter lover like I am, try this fun twist: use instant chocolate pudding mix instead of vanilla, and layer in mini peanut butter cups along with the bananas. It’s decadent and incredible. I’ve also made a “Tropical” version using coconut cream in place of some of the heavy cream and adding toasted coconut flakes between the layers.
For a fun, individual serving idea, layer the components in small mason jars or clear cups. This is great for parties—no serving utensils needed! I’ve even made a deconstructed version for a kids’ party, serving the cream in a bowl with separate bowls of wafers and banana slices for dipping. It was messy but a huge hit.
If you need to adjust for dietary needs, I’ve had success using gluten-free vanilla wafers and a gluten-free pudding mix. For a slightly lighter version, you can use half heavy cream and half well-chilled full-fat coconut milk, though the texture will be a touch less firm. The sweetened condensed milk, however, is harder to substitute without altering the core flavor and texture.
How to Store, Freeze & Reheat
To store, simply keep the pudding tightly covered with plastic wrap pressed directly onto the surface of the cream. This prevents a skin from forming and keeps the bananas from oxidizing too quickly. It will stay perfect in the fridge for 2-3 days. Honestly, it’s usually gone by then! The cookies will continue to soften the longer it sits, which I personally love.
I do not recommend freezing the fully assembled pudding. The cream-based filling can become grainy and separate when thawed, and the bananas will turn into an unappetizing, mushy brown mess. However, you can freeze the vanilla cream mixture on its own in an airtight container for up to a month. Thaw it overnight in the fridge and give it a gentle stir before assembling with fresh bananas and wafers. It’s a great make-ahead trick for the busy holiday season.
Conclusion
Making this Chick-fil-A Banana Pudding at home has brought so much joy to my kitchen and to the people I share it with. It’s more than just a copycat recipe—it’s a creation that sparks memories and creates new ones around the table. I hope you’ll give it a try and experience that same wonderful feeling. Grab those spotty bananas and get whipping. Trust me, your future self, with a bowl of this creamy perfection, will thank you. Happy cooking