Pro Tips for Best Results
Temperature is everything in this recipe. I cannot stress enough that your butter, cream cheese, and eggs must be at true room temperature. If your cream cheese is even slightly cool, it will chunk up in the dough and won’t incorporate smoothly. I take mine out about 2 hours before I plan to bake. To quickly bring eggs to room temp, I place them in a bowl of warm water for 10 minutes. This simple step makes the emulsion so much better.
The size of your dough balls directly impacts the bake. I use a #20 cookie scoop (about 3 tablespoons) for consistently large, bakery-style cookies. If you make them smaller, reduce the baking time by a few minutes. Also, always bake on parchment or a silicone mat. These cookies have a higher fat content and can spread and stick on a bare pan. The mats also promote more even browning on the bottom.
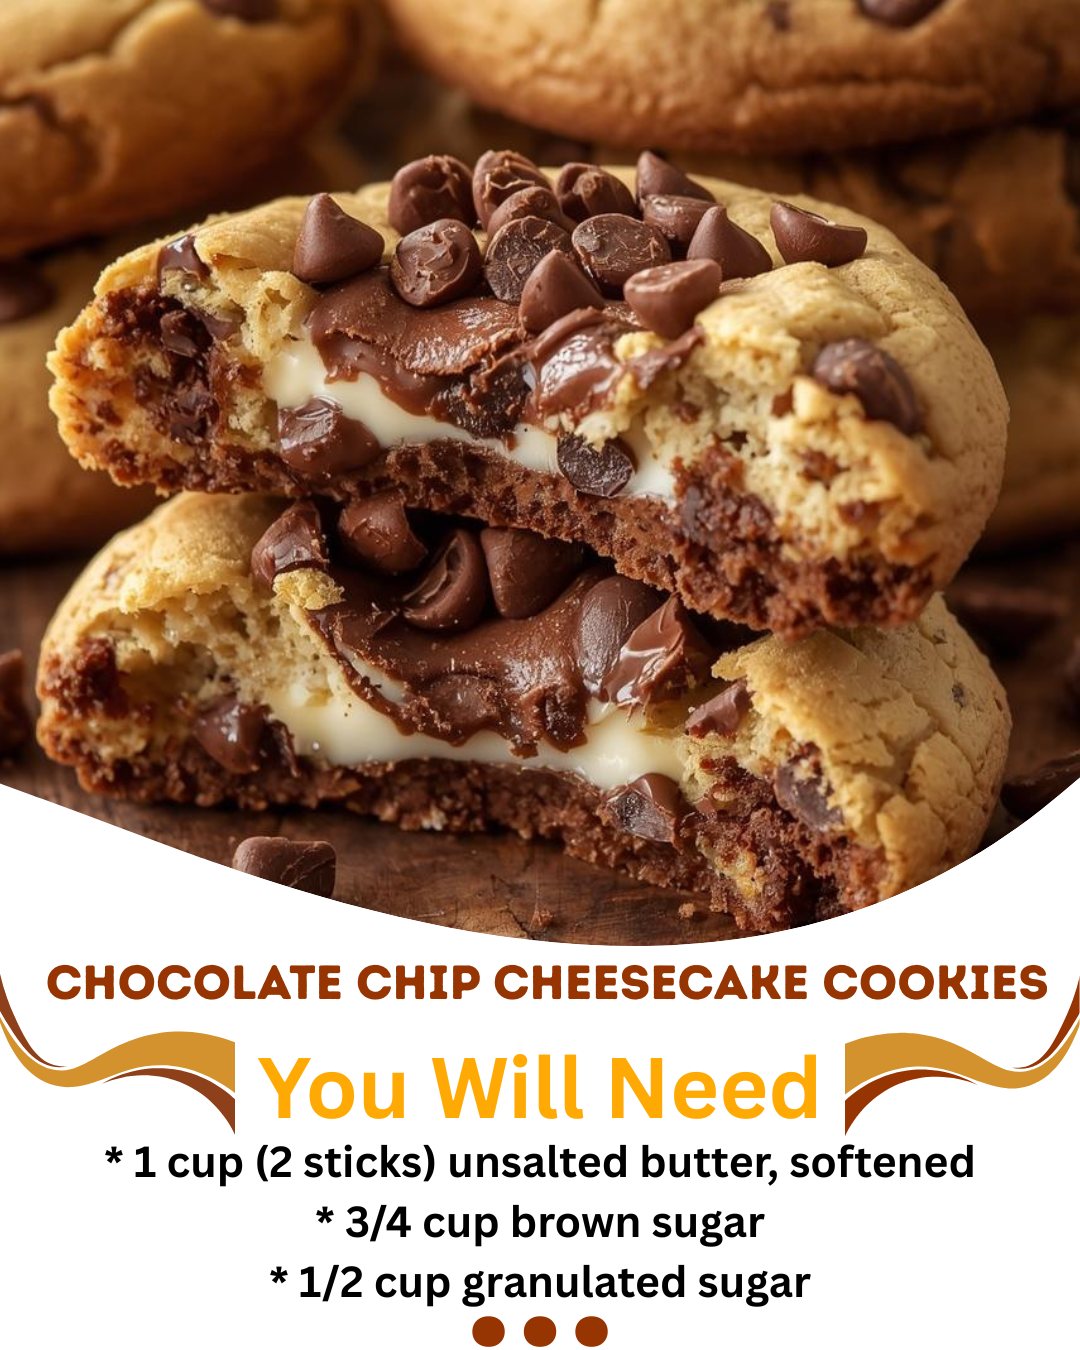
For that picture-perfect, craggy top, I do one extra thing after scooping the chilled dough: I tear each dough ball in half and smash the two ragged halves back together with the torn sides facing up. This creates more surface texture and nooks for the chocolate to peek through. It also helps them bake more evenly. It’s a little trick I picked up after my first few flat batches, and it makes a dramatic difference in the final appearance.
Common Mistakes to Avoid
The biggest mistake I made the first time was skipping the full chill time. I was impatient, and my cookies turned into sad, greasy puddles. The dough needs that time for the flour to hydrate and the fats to firm up. If you skip it, you’ll lose the thick, soft center we’re after. Even if you only have 30 minutes, chill it. But if you can plan ahead, do it overnight—the flavor development is worth the wait.
Another pitfall is overbaking. These cookies rely on a soft, almost slightly underbaked center to achieve that creamy cheesecake illusion. If you wait for the tops to brown all over, you’ve gone too far. Look for set edges and a puffy, matte center that still looks a bit wet. They will continue to cook from residual heat on the hot baking sheet. Pulling them at the right moment is the difference between a good cookie and a transcendent one.
Serving Suggestions
I love serving these cookies slightly warm, when the chocolate chips are still a little molten. A simple glass of cold milk is the classic, perfect pairing. For a more decadent treat, I’ll sometimes place one in a bowl and top it with a small scoop of vanilla bean ice cream, letting it melt into all the crevices. The contrast of temperatures and textures is absolutely heavenly.
For a casual get-together, I arrange them on a simple wooden board. Their rustic, chunky appearance speaks for itself. If I’m feeling fancy, I’ll dust a few with a very light shower of flaky sea salt right after they come out of the oven. The salty crunch against the sweet, creamy cookie elevates every single bite. It’s a five-second step that makes them look and taste professionally crafted.
On a cozy night in, my favorite way to enjoy them is alongside a cup of strong coffee or a mug of herbal tea. The slight tang from the cream cheese cuts through the sweetness beautifully, making them less cloying than a standard chocolate chip cookie. They feel like a complete dessert experience all on their own, no extra frills needed.
Variations & Customizations
If you’re a texture fanatic like me, try folding in 1/2 cup of toasted, chopped pecans or walnuts along with the chocolate chips. The nuttiness complements the brown sugar and cream cheese beautifully. I’ve also done a version with white chocolate chips and dried cranberries for a sweeter, tangier twist that feels a bit more festive, especially around the holidays.
For a fun seasonal spin, replace the chocolate chips with chopped peanut butter cups, or add a swirl of peanut butter to the dough itself. The peanut butter and cream cheese combination is unreal. Another hit in my house was a “s’mores” version: I used milk chocolate chips and folded in 3/4 cup of crushed graham crackers and a handful of mini marshmallows. Just be ready for extra gooeyness!
If you want to highlight the cheesecake flavor even more, you can create a simple glaze. I whisk together 2 ounces of softened cream cheese, 1/2 cup of powdered sugar, a splash of milk, and a bit of vanilla until smooth, then drizzle it over the cooled cookies. It’s over-the-top in the best possible way. You can also roll the dough balls in a cinnamon-sugar mixture before baking for a snickerdoodle-cheesecake hybrid.
How to Store, Freeze & Reheat
To keep them fresh, I store the completely cooled cookies in an airtight container at room temperature for up to 3 days. I place a piece of bread in the container with them—it sounds odd, but the bread gives up its moisture to the cookies, keeping them soft and chewy. The bread becomes hard, but the cookies stay perfect! I don’t recommend refrigerating them, as it can dry them out.
For longer storage, these cookies freeze beautifully. I freeze the baked, cooled cookies in a single layer on a sheet, then transfer them to a freezer bag for up to 3 months. You can also freeze the unbaked dough balls on a parchment-lined tray, then bag them once solid. When a craving hits, you can bake frozen dough balls directly from the freezer, adding just 1-2 minutes to the bake time. To revive a frozen baked cookie, I like to warm it in a 300°F oven for 5-8 minutes, which restores that fresh-from-the-oven magic.
Conclusion
Baking these Chocolate Chip Cheesecake Cookies has become one of my favorite kitchen rituals. They never fail to bring a smile, whether I’m making them for my family, sharing them with friends, or just treating myself after a long week. I hope this recipe finds its way into your kitchen and becomes a cherished, repeated favorite in your home, too. Happy baking, and don’t forget that glass of milk