Now, it’s time to add the dry ingredients. Sift together the flour, cocoa powder, and salt in a separate bowl to avoid any lumps, then gradually mix this into your wet mixture. You’ll want to fold it gently to maintain that lovely fudgy texture. When combined, stir in the chocolate chips for that extra melty goodness. Pour the batter into the prepared baking pan, spreading it evenly, and then pop it into the oven for about 25-30 minutes until a toothpick comes out with a few moist crumbs. The smell wafting through my kitchen at this point is heavenly!
While the brownies are baking, I like to melt the chocolate for the topping. Using either a microwave or a double boiler, melt your chocolate until smooth. Once the brownies are out and cooling, I recommend letting them sit for about 10 minutes before carefully transferring them to a cooling rack. After they’ve cooled completely, it’s time to slice them into squares. Now, dip each strawberry in the melted chocolate and arrange them beautifully on top of the brownies. To finish, drizzle a little extra chocolate over the strawberries for decoration!
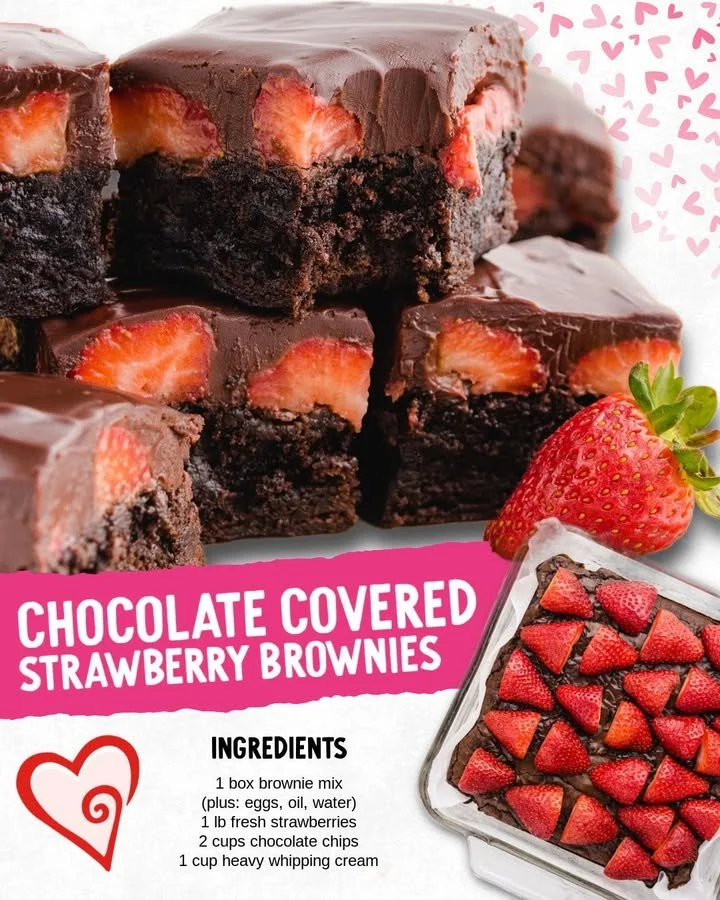
Pro Tips for Best Results
I tested this recipe three ways—once with semi-sweet chocolate chips, once with milk chocolate, and once with dark chocolate. Each provides a different level of sweetness, but I found that semi-sweet was just right for balancing out the strawberries’ natural tartness. I also like to use fresh, ripe strawberries, as they bring a juiciness that adds a delightful contrast to the dense brownies.
Another tip I swear by is allowing the brownies to cool fully before adding the strawberries. If you rush this part, you risk the strawberries wilting, which can take away from their beautiful appearance and flavor. I often let them cool in the refrigerator for an hour, and that also keeps the brownies nice and moist.
Lastly, don’t skimp on the chocolate drizzle. It’s not just for looks; it adds a nice layer of flavor and a little extra indulgence. In my experience, the more chocolate, the better—so be generous!
Common Mistakes to Avoid
One of the biggest mistakes I made initially was overmixing the brownie batter. When you combine your wet and dry ingredients, it’s important to fold gently to keep that fudgy texture. If you overmix, you might end up with a cakier brownie, which isn’t what we want here! (See the next page below to continue…)
Another misstep I’ve seen is pulling the brownies out of the oven too soon. I recommend sticking to the 25-30 minute range, but make sure to check them with a toothpick. If it comes out with wet batter, they need more time. If it comes out with a few moist crumbs, you’re golden!
I also learned the hard way not to skip the cooling step. If you try to add your strawberry topping while the brownies are hot, you’ll end up with melted, sad strawberries that just don’t look appealing. Patience is key, my friends!
Serving Suggestions
These Chocolate Covered Strawberry Brownies are perfect as a stand-alone dessert, but they can really shine when paired with a scoop of vanilla ice cream. The creaminess of the ice cream complements the rich chocolate so beautifully and adds a touch of indulgence. Trust me, serving them warm alongside ice cream is an experience in itself!
For special occasions like Valentine’s Day or anniversaries, I love to plate them up with some extra fresh strawberries and a drizzle of chocolate sauce. It not only looks great, but it makes the dessert feel so much more luxurious.
If you’re hosting a get-together, these brownies can be cut into smaller squares for bite-sized treats. Trust me, they’ll disappear quickly; they’re just that good!
Variations & Customizations
One fun variation I’ve tried is adding different flavors to the brownies. For a minty twist, I added peppermint extract to the batter, and it turned out fabulous! You can also mix in some crushed nuts, like walnuts or pecans, for a bit of crunch if that’s your thing.
Short on time? Consider using a box brownie mix! I won’t tell anyone if you won’t. Just follow the package instructions and layer with your chocolate-covered strawberries afterward. It’s a great shortcut that saves time without compromising flavor.
Lastly, you could get creative with your toppings! Instead of just strawberries, try raspberries or blackberries. You could even drizzle white chocolate over dark chocolate for a lovely contrast.
How to Store, Freeze & Reheat
If you have leftovers (which might be unlikely!), you can store the brownies in an airtight container at room temperature for up to three days. Keeping them stored properly ensures they stay moist and delicious. If you want to keep them longer, you can freeze them!
To freeze, individual wrap the brownies in plastic wrap and place them in a freezer bag. They can last up to three months in the freezer. When you’re ready to indulge again, just let them thaw at room temperature, or you can microwave them briefly for that fresh-baked warmth.
Reheating is super easy! I like to warm them for about 10-15 seconds in the microwave, just until they’re slightly warm. Pairing it with a dollop of whipped cream or ice cream at that moment turns a simple treat into something extraordinary!
Conclusion
I genuinely hope you enjoy making these Chocolate Covered Strawberry Brownies as much as I do! They’re the perfect way to satisfy that chocolate craving while also adding a pop of fruity freshness. Whether it’s for a special occasion or just a sweet night in, I know these brownies will be a hit. Happy baking, and enjoy every delicious bite!