Pro Tips for Best Results
The temperature of your ingredients matters more than you think. I tested this with cold eggs straight from the fridge, and my batter seized up and looked curdled. It baked okay, but the texture wasn’t as velvety. Room temperature eggs blend seamlessly into the butter and sugar, creating an emulsion that traps air and leads to that perfect, crackly top. Take the extra ten minutes to let them sit on the counter.
Let your melted butter cool for about 10 minutes before adding the sugar. If it’s too hot, it can start cooking the eggs when you add them, and we are not making scrambled egg brownies today. I pour mine into my mixing bowl and use that time to hull the strawberries. It’s the perfect little pause in the process.
For the cleanest, most professional slices, you must let the brownies cool completely—I mean, completely—before you even think about cutting them. I sometimes even pop the whole pan in the fridge for an hour after they’ve cooled on the counter. A hot brownie is a gooey, delicious mess. A cooled brownie holds its shape and shows off every beautiful layer and swirl you worked so hard to create.
Common Mistakes to Avoid
My biggest first-time mistake was using watery strawberry jam from the store instead of making a proper reduction. It sank to the bottom and created a soggy layer. The fresh reduction is thicker, more concentrated, and swirls like a dream without compromising the brownie’s structure. It takes a few extra minutes, but trust me, do not take this shortcut. The flavor and texture payoff is immense.
Another classic error is using the toothpick test as an absolute “clean = done” rule. For brownies, a clean toothpick means you’ve likely overbaked them into cakey territory. You want a few fudgy crumbs clinging to it. They will continue to set as they cool. I pull mine the second I see moist crumbs, and the center is always perfectly fudgy, not underbaked.
Serving Suggestions
I love serving these brownies slightly warmed, just for 10 seconds in the microwave, with a scoop of high-quality vanilla bean ice cream. The contrast of the cold, creamy ice cream melting into the rich, warm chocolate and tangy strawberry is an experience I dream about. It turns a simple brownie into a full-blown dessert event.
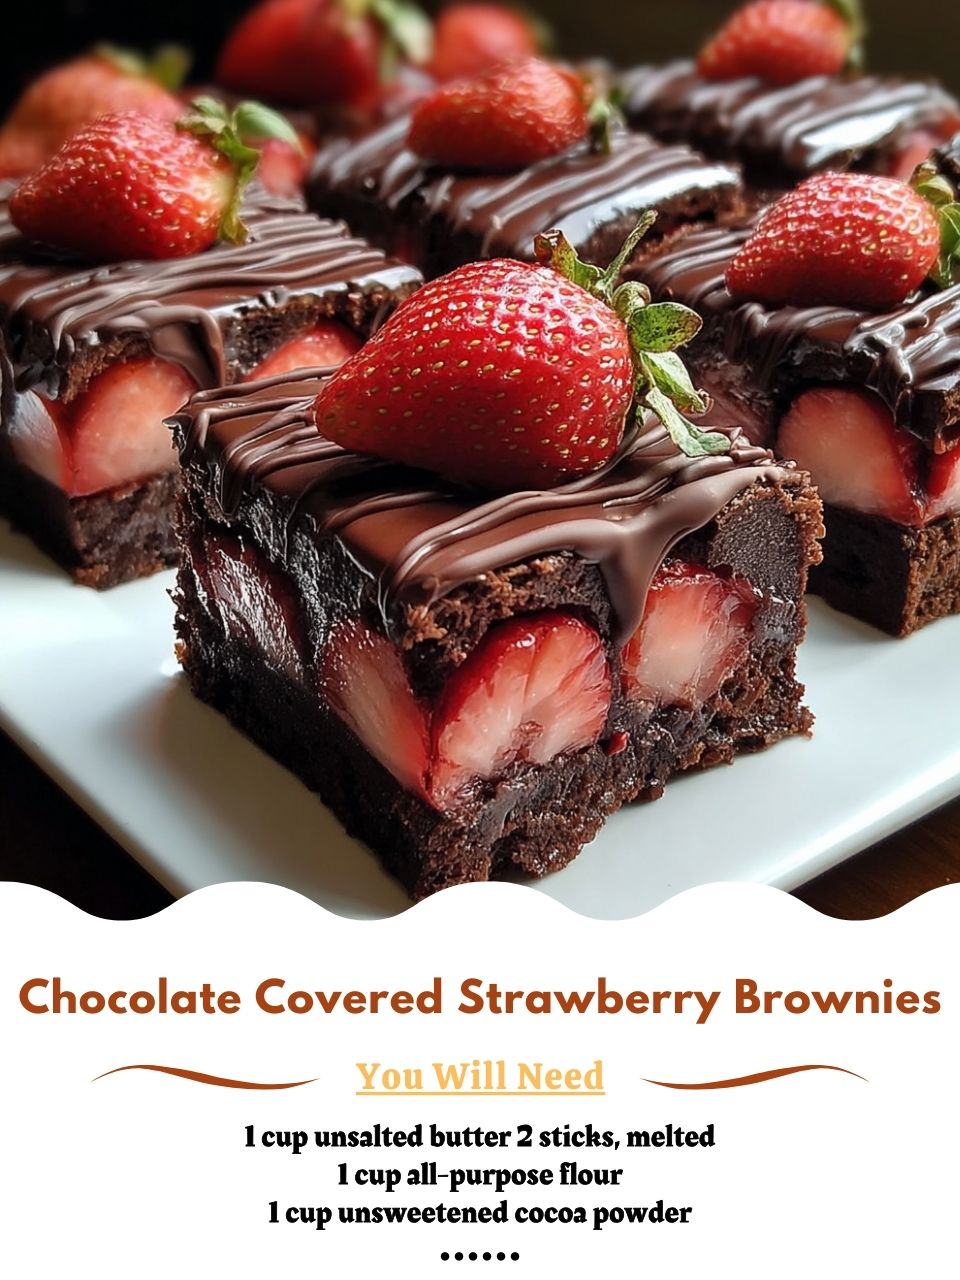
For a more elegant presentation, I cut them into smaller, bite-sized pieces and arrange them on a platter. A light dusting of powdered sugar or a drizzle of extra melted chocolate and a single fresh strawberry on top makes them look like they came from a fancy bakery. This is my go-to move when I need to impress at a dinner party or a potluck.
On a cozy night in, I keep it simple. A perfectly square piece on a plate, maybe with a dollop of freshly whipped cream, and a big cup of black coffee or a glass of cold milk. Sometimes, the best way to serve a masterpiece is to let it shine all on its own, with no distractions from its incredible flavor and texture.
Variations & Customizations
If you’re a white chocolate fan, this recipe welcomes a twist. Once, I swapped the semi-sweet chocolate chips for white chocolate chunks and added a teaspoon of almond extract to the batter. The almond paired beautifully with the strawberry, creating a flavor reminiscent of a fancy European pastry. It was a lovely, slightly sweeter variation that my book club devoured.
For a delightful textural surprise, try folding in a half cup of chopped, toasted pecans or hazelnuts into the batter. The nuttiness adds a wonderful crunch that contrasts with the fudgy base and the soft strawberry swirl. I brought this version to a family picnic, and my uncle, who claims not to like “fruity desserts,” ate three pieces.
Feeling adventurous? Swirl in a different fruit reduction! I’ve had great success with raspberries, which are naturally tart and seedy (in a good way), and even a spiced cherry reduction with a hint of cinnamon. The basic brownie recipe is a stellar canvas. Just remember to keep the fruit reduction thick, so don’t be afraid to cook it down until it’s very concentrated.
How to Store, Freeze & Reheat
To store, I keep the brownies right in the pan, covered tightly with plastic wrap or foil, at room temperature for up to 3 days. They stay perfectly fudgy. For longer storage, I individually wrap squares in plastic wrap and then place them in a freezer bag. They freeze beautifully for up to 3 months. I’ve been known to hide a few squares in the back of the freezer for a future me who needs a chocolate emergency fix.
When you’re ready to enjoy a frozen brownie, you don’t even need to thaw it fully. Just unwrap it and pop it in the microwave for about 30-45 seconds. It comes out tasting freshly baked, with a wonderfully gooey center. I do not recommend reheating the whole pan at once, as it can dry out the edges. The individual thaw-and-heat method has never failed me.
Conclusion
Baking these Chocolate Covered Strawberry Brownies is more than just following a recipe for me; it’s creating a little moment of joy. From the scent that fills my home to the quiet pride of slicing into that marbled masterpiece, every step feels special. I hope this recipe finds its way into your kitchen and becomes a cherished treat for you, too. Grab your whisk, pick the reddest strawberries you can find, and get ready to make something truly wonderful. Happy baking