Overfilling the ramekins is another misstep I made early on. I’ve found that they really need to be filled only about ¾ of the way to give the cake room to rise and create that gooey middle. And lastly, make sure your oven is at the right temperature. An oven thermometer is a great tool to ensure your baking temperature is accurate. Trust me; it can make all the difference!
Serving Suggestions
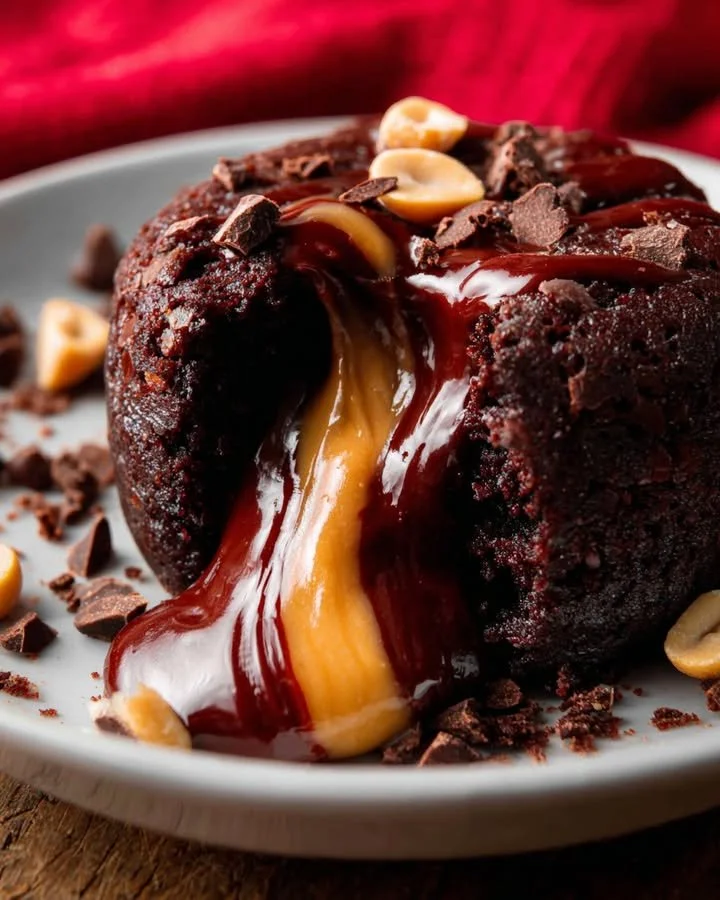
This Chocolate Peanut Butter Lava is stunning on its own, but I love to elevate it with some simple serving suggestions. A scoop of vanilla ice cream on the side creates a beautiful contrast in temperature and flavor; the cold ice cream melting into that warm lava is pure bliss. If I want something extra special, then I drizzle a bit of chocolate ganache on top, which really takes it over the top. You could even sprinkle some crushed peanuts for added texture!
A beautiful plate presentation can elevate your dessert even further. I love to dust a little powdered sugar on top and add a few fresh berries for a pop of color. Not only does it look lovely, but that tartness of the berries cuts through the richness of the lava, making each bite even better!
This dessert is perfect for sharing too. When I have friends over, I love serving it family-style with the ramekins arranged on a large platter and lots of napkins nearby. There’s something about dessert shared over conversation that makes it all the more enjoyable!
Variations & Customizations
One of the things I adore about this recipe is how easy it is to customize. For a fun twist, why not try adding a flavored extract to your batter? Almond or hazelnut extract can add a lovely depth of flavor and surprise! Alternatively, you can substitute the peanut butter with your favorite nut butters or even sunflower butter for a nut-free option. Each variation lends a unique taste, making it a versatile dessert to always come back to.
If you’re feeling festive, a dash of peppermint extract during the holidays can make your lava cakes feel seasonal. I’ve tried these with a touch of instant coffee mixed in for an earthy background flavor, and it was divine. Just a teaspoon is enough to give it that coffee punch without overpowering the chocolate and peanut butter flavors.
Finally, experiment with toppings! Sliced bananas, a drizzle of caramel, or a sprinkle of crushed graham crackers can transform your lava cake into a whole new treat every time you make it. You’ve got a blank canvas to work with, so have fun and see what delicious combinations you can come up with!
How to Store, Freeze & Reheat
If you happen to have leftover Chocolate Peanut Butter Lava (though I can’t imagine you would!), store them in the refrigerator covered in plastic wrap for up to 2 days. For me, I find them just as delightful cold, but to reheat, pop them in the microwave for about 15-20 seconds—just enough to warm them through without cooking them again.
You can also freeze these delightful cakes before baking. Just prepare them in the ramekins, wrap them tightly with plastic wrap, and then foil for up to 3 months. When you’re ready to bake them, there’s no need to thaw—just bake them straight from the freezer for an additional 2 minutes. It’s like having a gourmet dessert at your fingertips whenever the craving strikes!
For reheating after freezing, I suggest baking them from frozen rather than microwaving them. The oven will give them that perfect lava effect that we’re all aiming for. I often make a double batch just for this lovely convenience, so I always have a dessert waiting!
Conclusion
I hope you feel inspired to try making Chocolate Peanut Butter Lava! This dessert has become a staple in my kitchen—perfect for celebrations or a cozy movie night at home. With its gooey center and decadent flavors, it never fails to impress. Grab your ingredients, gather your loved ones, and enjoy this delightful treat. Happy baking!