Next, I beat the softened cream cheese in a large bowl until it’s smooth and creamy. Gradually, I add in the sugar and mix until well combined. The texture should be silky at this point. I then add the eggs one by one, mixing well in between. Now comes the fun part—mixing in the sour cream, vanilla extract, and that delicious melted chocolate until it’s smooth as a cloud.
Once everything is mixed, I pour that luscious filling over the crust and gently smooth the top with my spatula. Before I place it in the oven, I wrap the bottom of the springform pan in aluminum foil to prevent any water from seeping in during the water bath cooking method. After that, I bake it in a water bath for about an hour. The kitchen fills with an incredible chocolate aroma as it bakes!
When the time is up, I turn off the oven and let the cheesecake sit in there for about an hour to prevent cracking. Once cooled, I refrigerate it for at least four hours—or overnight for the best texture. The hardest part is the waiting!
Pro Tips for Best Results
First and foremost, I highly suggest letting your cream cheese soften at room temperature before mixing. I learned the hard way that cold cream cheese doesn’t blend smoothly and can lead to lumps in your cheesecake. Also, when mixing in the eggs, try not to overbeat. Incorporating too much air can result in cracks while cooling, which we all want to avoid.
Another tip from my kitchen: make sure to use high-quality chocolate. I’ve tested this recipe with various brands, and trust me—using a good semisweet chocolate makes a noticeable difference in flavor and texture. Your taste buds will thank you!
Lastly, patience is key! Letting your cheesecake cool down slowly inside the oven before transferring it to the fridge can work wonders on its final texture. I’ve tried rushing this cooling process before and ended up with cracks all over—definitely not the look I aim for!
Common Mistakes to Avoid
First, be careful not to skip the water bath! I once thought I could just bake my cheesecake without it, and while it was still delicious, the texture was nowhere near as creamy. The steam helps to keep the air moisture high, preventing the cheesecake from cracking.
Another rookie mistake is trying to slice your cheesecake too soon. I get it; the anticipation can be torturous! But trust me, if you cut into it before it’s fully chilled, you’ll end up with a gooey, messy slice. It’s best to wait the full time for that perfect, clean slice.
If you find cracks forming while baking, don’t fret too much. I’ve been there too! Just remember that garnishing with chocolate shavings or fresh berries can help distract from any imperfections. And as they say, it’s what’s inside that counts more than looks!
Serving Suggestions
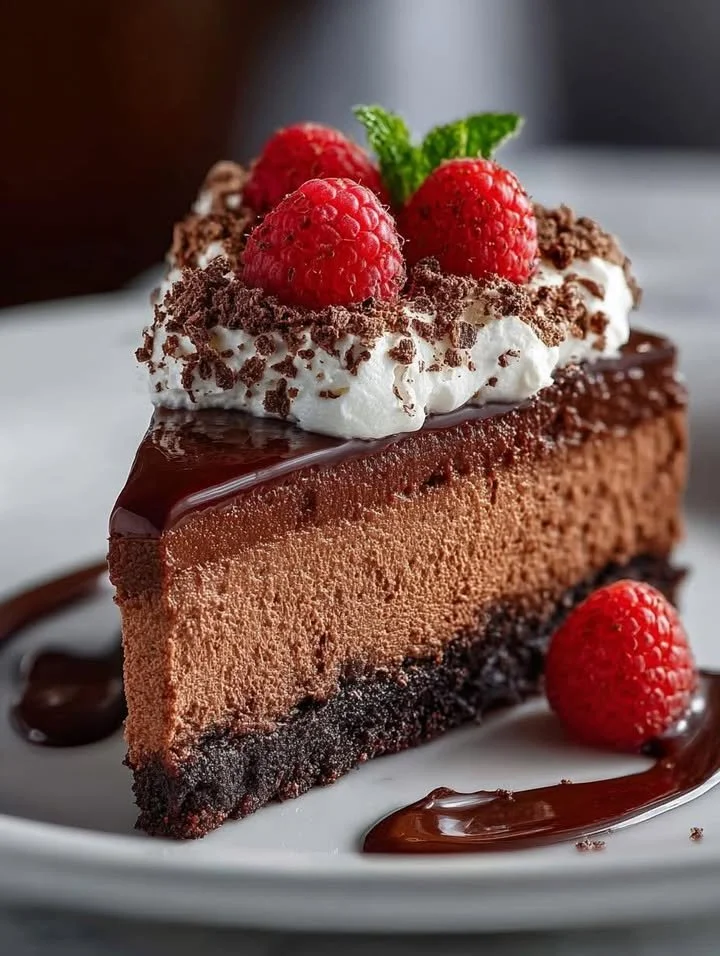
When it comes to serving this Chocolate Valentine’s Day Cheesecake, I like to keep it simple yet elegant. Presentation matters, and I usually dust a little cocoa powder on top and sprinkle some chocolate shavings for that gourmet touch. Fresh raspberries or strawberries not only add a pop of color but also a fresh burst of flavor that pairs beautifully with the rich chocolate.
I also love serving this cheesecake with a dollop of whipped cream—it adds just the right touch of fluffiness to balance out all that creaminess! It’s like a marriage of textures that my friends can’t resist.
For a cozy night in, I recommend serving it with a warm cup of coffee or tea. The combination of chocolate and coffee is heavenly and definitely enhances that romantic feel. Just imagine dipping your fork into that velvety slice while savoring a warm drink!
Variations & Customizations
Love a touch of mint? You can certainly add a few drops of peppermint extract to the cheesecake batter for a delightful mint chocolate experience. I’ve tried it, and it’s incredibly refreshing!
If you want to swap things up, consider using a different crust. A chocolate cookie crust instead of graham crackers can add a unique twist that chocolate lovers will rave about. It’s another way to play with flavors and give your cheesecake a distinctive flair.
Lastly, for those who prefer a lighter version, you can substitute some of the cream cheese with Greek yogurt. It keeps the tangy goodness while reducing some of the richness, which is perfect if you’re serving this after a big meal.
How to Store, Freeze & Reheat
Storing your leftover cheesecake is a breeze! I keep any leftovers covered tightly in the fridge, and it lasts for about 5–7 days. I often find myself sneaking a slice here and there—we all know it gets better with time!
If you want to make this cheesecake ahead of time, freezing is a fantastic option. Just wrap it tightly in plastic wrap and then in aluminum foil before popping it into the freezer. It can last for up to three months. When it’s time to enjoy, simply transfer it to the fridge to thaw overnight—and voilà!
Reheating isn’t necessary for this dessert, but if you prefer it slightly warm, I recommend warming individual slices in the microwave for about 10-15 seconds. Just be careful not to overdo it; we’re looking for cozy warmth, not melted cheesecake!
Conclusion
I hope you feel inspired to make this Chocolate Valentine’s Day Cheesecake! It’s a delightful blend of rich chocolate and creamy filling that’s sure to impress your loved one or simply treat yourself. Baking this recipe is not just about the end result; it’s also about the joy of creating something sweet in your kitchen. Happy baking, and enjoy every delicious bite!