Equipment Needed
- 9-inch springform pan
- Medium saucepan
- Mixing bowls (various sizes)
- Whisk
- Fine-mesh sieve
- Electric hand mixer or stand mixer
- Rubber spatula
- Baking sheet
- Kitchen torch (a culinary must-have for this!)
- Plastic wrap
Step-by-Step Instructions
First, we start with our base. I bake my vanilla sponge cake in the same 9-inch springform pan I’ll assemble everything in, so it fits perfectly. Once it’s completely cool, I don’t even remove it from the pan bottom. This is your foundation, so if it domes a bit, I gently level the top with a serrated knife to create a flat, even surface for the custard. I’ve learned the hard way that a sloped cake leads to a lopsided, leaky custard layer. While the cake cools, I begin the custard. In a saucepan, I heat the heavy cream with the scraped seeds and the empty vanilla bean pod until it just begins to simmer. That slow heat coaxes every last bit of flavor from the bean. I turn off the heat, cover it, and let it steep for 30 minutes—this patience builds an incredible depth of flavor.
Next, in a separate bowl, I whisk the egg yolks, 1/2 cup of sugar, and that pinch of salt until the mixture is pale yellow and slightly thickened. This is called “blanching,” and it helps create a smoother final custard. Now, the crucial part: tempering the eggs. I slowly drizzle the warm vanilla cream into the yolk mixture while whisking constantly. If you pour too fast, you’ll scramble the yolks. I speak from a mildly tragic, lumpy experience! Once combined, I pour everything back into the saucepan through a fine-mesh sieve. This catches the vanilla pod and any curdled bits, ensuring our custard is flawlessly silky.
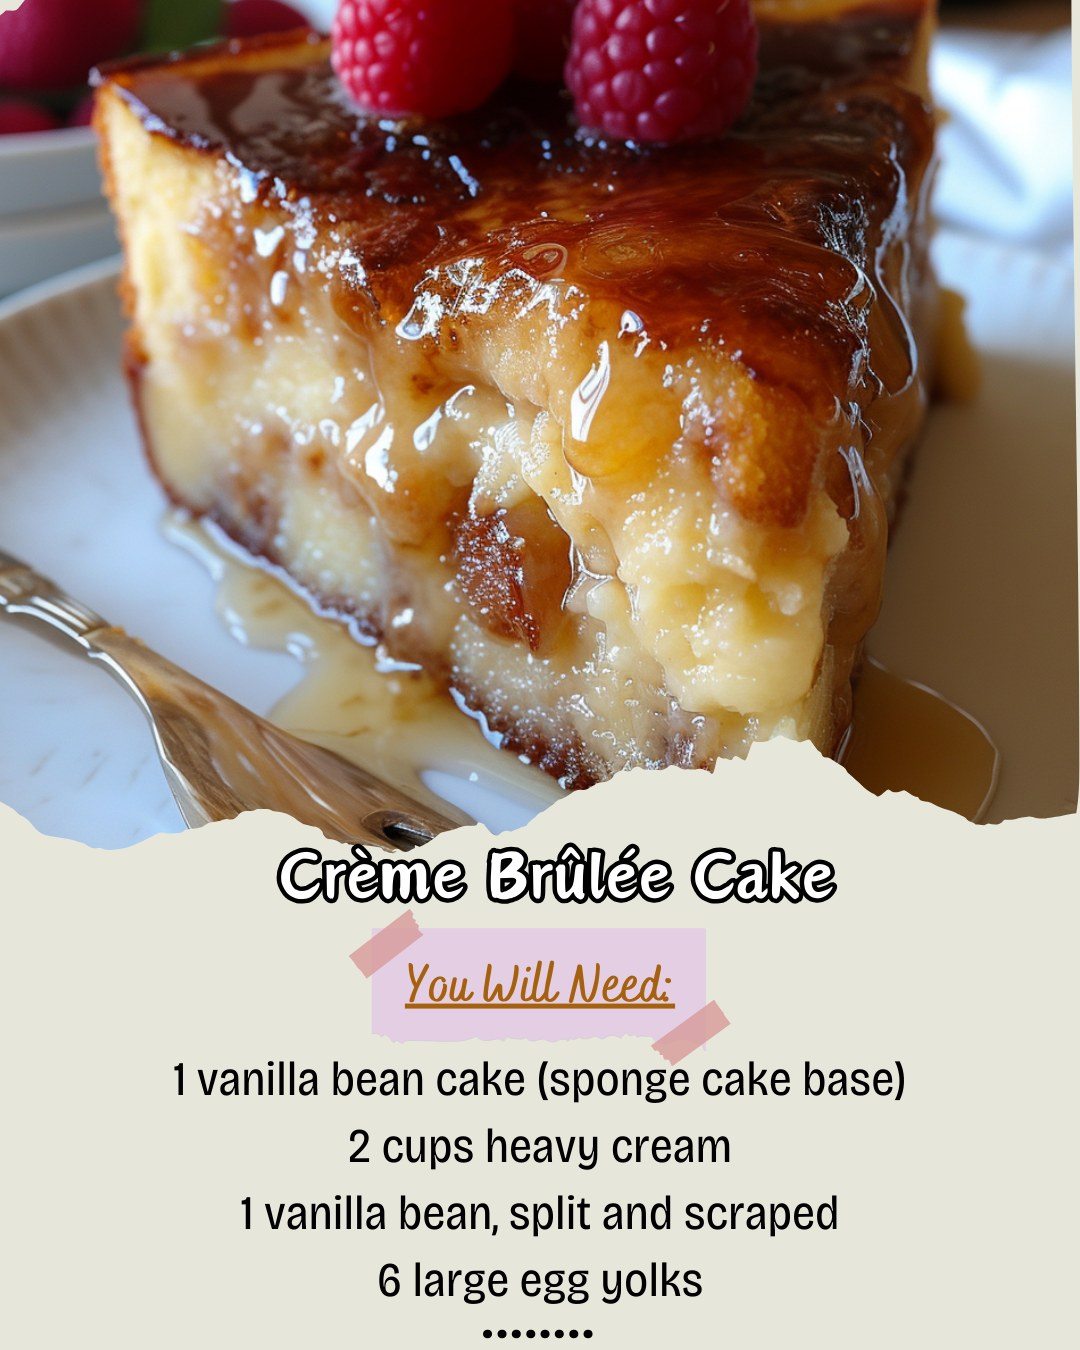
I cook the custard over medium-low heat, stirring constantly with a spatula. You must watch it like a hawk. It’s ready when it coats the back of the spatula and you can run your finger through it, leaving a clean path. This can take 5-8 minutes. Do not let it boil. I immediately pour the hot custard over the waiting cake layer in the springform pan. Then, I tap the pan gently on the counter to release air bubbles, cover the surface directly with plastic wrap (to prevent a skin), and chill it for at least 6 hours, but overnight is truly best. The long chill firms everything up beautifully.
Finally, the grand finale: the brûlée top. I remove the chilled cake from the springform and place it on a baking sheet. I sprinkle the remaining 1/3 cup of sugar in a perfectly even layer over the entire custard surface. This is key for an even crack. Using my kitchen torch, I move in slow, circular motions about 3-4 inches from the surface, caramelizing the sugar until it’s a deep, bubbling amber. I let it sit for a minute to harden into that glorious glass-like shell. That first crack with your spoon is the most satisfying sound in dessert world.(See the next page below to continue…)