Pro Tips for Best Results
I tested the custard thickness three different ways, and here’s what I learned: the “clean path on the spatula” test is foolproof. If you think it’s thick enough, cook it for one more minute while stirring. A slightly undercooked custard will never set firmly, leading to a delicious but messy slice. That extra minute of vigilance is the difference between good and perfect. Also, when torching, patience is your friend. Don’t hold the flame in one spot trying to rush it, or you’ll burn the sugar and create a bitter taste. Slow, even circles are the way.
My biggest “aha!” moment was regarding the chill time. The first time I made this, I was too excited and only chilled it for 3 hours. When I torched it, the custard softened and the cake layer was still too firm. Overnight chilling allows the cake to absorb some of the custard’s moisture, making the entire slice impossibly tender and cohesive. It also gives the custard unshakable structural integrity. Plan for this—it’s not a dessert you can rush, and it’s so worth the wait.
For a professional touch, run a thin, hot knife under water and wipe it dry between each slice. This will give you beautifully clean cuts through the hard sugar top. The warm blade glides right through without shattering the caramel. I serve each slice with the knife’s flat side against the custard to help transfer it neatly to the plate. These little acts of service make presenting the cake feel so elegant.
Common Mistakes to Avoid
My first attempt was a lesson in sugar distribution. I just dumped the sugar on top for the brûlée and started torching. The result? Patchy, thick caramel next to bare, burnt spots. Don’t do what I did! Take the extra 30 seconds to sprinkle the sugar evenly from a height, then gently tilt the cake to spread it into one uniform, thin layer. Every grain should have a neighbor. This ensures the entire top caramelizes at the same rate for that perfect, consistent snap.
Another critical mistake is using a cold cake base. If your sponge cake isn’t completely cooled to room temperature before adding the warm custard, the residual heat will continue to cook the eggs from below, potentially causing the custard to curdle or weep. I let my cake cool in the pan on a wire rack for a solid two hours. Touch the center—it should feel absolutely neutral, not warm at all. This simple patience step guarantees a pristine, creamy layer.
Serving Suggestions
I like serving this cake slightly chilled, about 15 minutes after it comes out of the fridge post-torching. That brief rest takes the fridge-chill off the cake layer but keeps the custard perfectly firm. I place each slice on a simple white plate to let the gorgeous caramel top be the star. A tiny sprinkle of flaky sea salt on the plate’s edge is a beautiful, modern touch that complements the sweetness brilliantly.
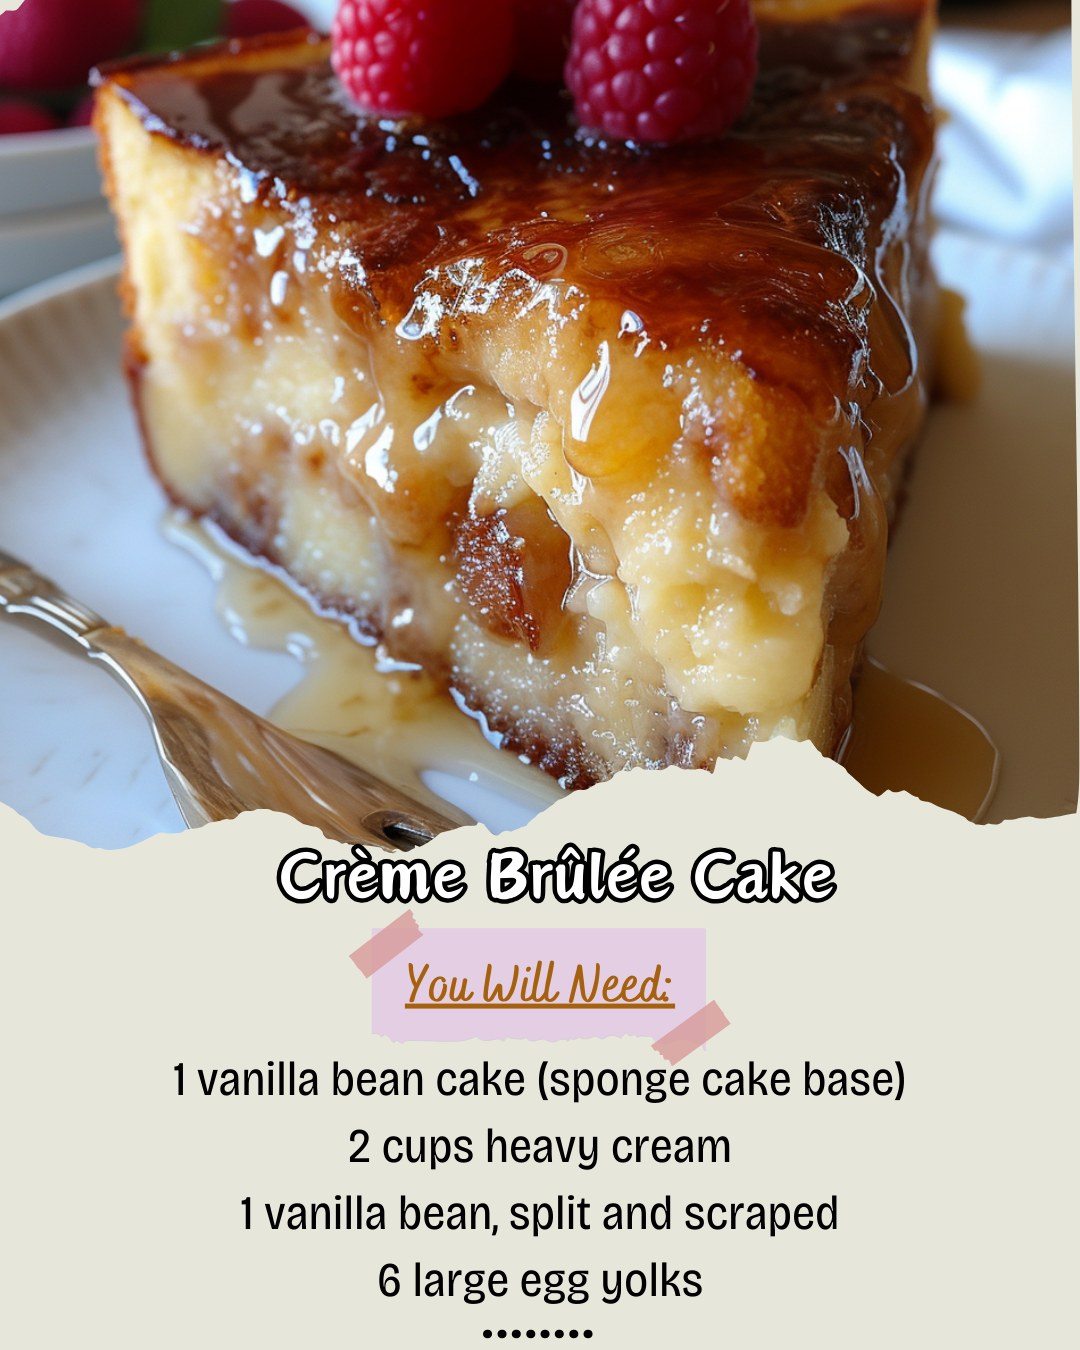
For accompaniments, less is more. A few fresh raspberries or a single perfect strawberry on the side adds a pop of color and a touch of acidity that cuts the richness. I avoid heavy sauces or whipped cream—it competes with the delicate custard. However, a small cup of strong, hot coffee or a glass of dessert wine like a Sauternes alongside is absolute perfection. The bitterness of the coffee or the honeyed notes of the wine create a wonderful balance.
When I bring this to the table, I always make sure everyone has their spoon ready. There’s a shared, anticipatory moment as I press my spoon into the sugar crust for that first serving. It’s part of the experience! Encourage your guests to tap their own slices to hear that signature crack. It turns eating into a delightful, interactive event.
Variations & Customizations
Once you’ve mastered the classic, playing with flavors is so much fun. I’ve tried a version where I infused the cream with the zest of two oranges and a cinnamon stick instead of vanilla, creating a sort of “creamsicle” brûlée cake. It was fantastic. Just remember to strain it well. For a chocolate twist, you can add 3 ounces of melted, cooled bittersweet chocolate to the custard after tempering the eggs, but before returning it to the stove. Whisk vigorously to combine—it creates a rich chocolate custard layer that’s divine.
You can also play with the cake base. A light almond flour sponge or a brown sugar pound cake make wonderful, flavorful foundations. I once used a leftover slice of gingerbread cake, and the spiced molasses paired with the vanilla custard was a surprising winter hit. Just ensure your alternative cake isn’t too crumbly or porous, or it will soak up the custard unevenly.
For individual servings, this recipe adapts beautifully to ramekins. Bake or cut small cake rounds to fit in the bottom, pour the custard over, and chill. Then, torch each one individually for personal desserts. It’s a fabulous dinner party option. I’ve also seen friends add a thin layer of fruit preserves between the cake and custard—a raspberry or passion fruit layer adds a lovely tangy surprise in the middle.
How to Store, Freeze & Reheat
Storing this cake is straightforward, but with one major rule: do not torch the top until you are ready to serve. The caramel topping will soften and dissolve into the custard after a few hours in the fridge due to moisture. So, store the fully assembled but un-torched cake, tightly wrapped in plastic, in the refrigerator for up to 2 days. Sprinkle and torch the sugar topping just before your guests arrive. Any leftover torched cake is best eaten within 24 hours, though the sugar will lose its perfect snap.
I do not recommend freezing the fully assembled cake. The custard can become grainy and separate upon thawing. However, you can absolutely freeze the vanilla sponge cake layer on its own, well-wrapped, for up to a month. Thaw it in the refrigerator before assembling. This is a great make-ahead strategy for busy weeks. If you have a leftover torched slice (a rarity!), enjoy it cold from the fridge the next day—it’s still delicious, just with a softer top. Reheating is not advisable, as it will melt the custard.
Conclusion
This Crème Brûlée Cake is more than just a recipe; it’s a little edible adventure that always feels celebratory. From the scent of vanilla filling your kitchen to the final, satisfying crack of caramel, the entire process is a joy. It has become my go-to dessert for birthdays, anniversaries, or any day that needs a touch of magic. I hope it finds a special place in your recipe collection and creates as many happy memories for you as it has for me. Now, go preheat your oven and get that vanilla bean splitting—your own magical moment is just a few steps away.