Variations & Customizations
Once you master the base, the fun begins! For a delightful crunch and flavor contrast, I’ve folded in 1/3 cup of finely chopped toasted nuts (pecans are a dream with maple) or even a handful of crushed, freeze-dried raspberries after mixing. The tart fruitiness plays off the dark chocolate so well. You could also add a tablespoon of bourbon or rum along with the vanilla for a wonderful grown-up twist—just know it might soften the set a tiny bit.
Feeling adventurous with flavors? Try substituting the vanilla extract for orange or peppermint extract. A teaspoon of instant espresso powder dissolved in the maple syrup will create a stunning mocha version. The base recipe is incredibly forgiving and welcoming to your own creativity. I once made a batch with almond extract and chopped maraschino cherries, and it felt like a whole new candy.
How to Store, Freeze & Reheat
Because of the butter and fresh ingredients, these candies must be stored in the refrigerator. I keep them in a single layer in a tightly sealed container, with parchment between layers if I stack them. They’ll stay perfect in texture and flavor for up to 10 days this way. I don’t recommend leaving them out at room temperature for more than an hour or two, especially in a warm kitchen, as they can become too soft.
They freeze spectacularly well! For long-term storage, I arrange the set candies on a parchment-lined baking sheet and flash-freeze them until solid (about 2 hours). Then, I transfer them to a freezer bag or container. They’ll keep for up to 3 months. To serve, I simply move a few to the fridge to thaw overnight. There’s no need to reheat them at all—they are meant to be enjoyed cool and firm.
FAQ Section
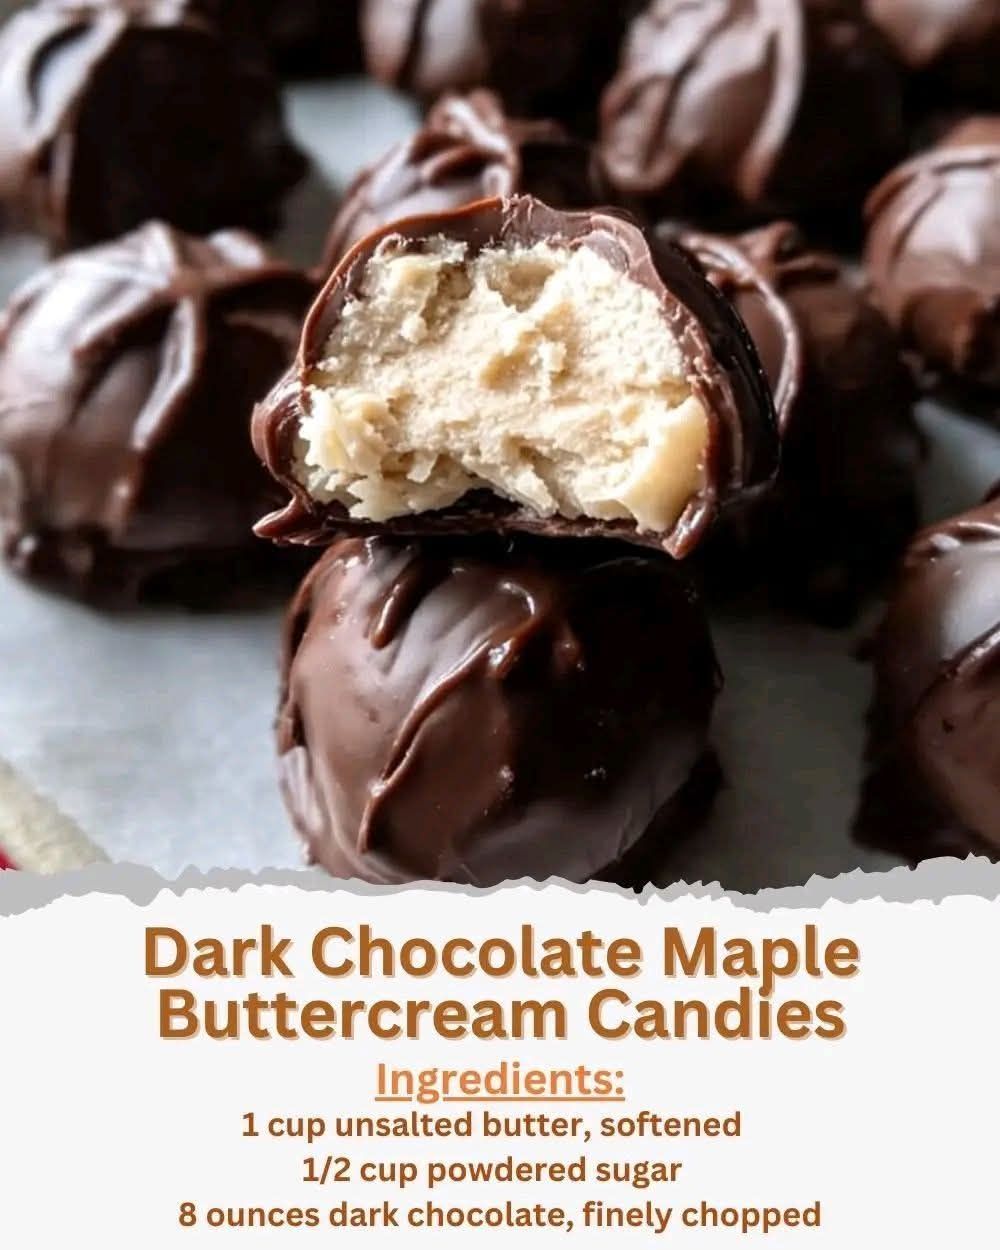
Can I use milk chocolate instead of dark chocolate?
You absolutely can, but be prepared for a much sweeter, less complex candy. I tried a batch with milk chocolate, and while it was delicious, it lost that sophisticated, slightly bitter depth that makes the original so special. If you do switch, I’d recommend reducing the maple syrup by a tablespoon to balance the added sweetness.
My mixture seemed too soft to pipe or set. What happened?
This usually points to two issues: either your butter was too warm/soft to begin with, or your chocolate was still too hot when you added it, slightly melting the buttercream base. Don’t worry! Pop the whole bowl of mixture into the fridge for 20-30 minutes, stirring every 10 minutes, until it firms up to a piping consistency. It’s a perfect fix.
Why not just use all powdered sugar and skip the maple syrup?
The maple syrup isn’t just a sweetener; it’s a primary flavor. It adds a distinct, woody sweetness and a touch of moisture that pure powdered sugar can’t replicate. A buttercream made with only powdered sugar would be stiffer and have a one-note sweetness. The maple gives it its soul, in my opinion.
Conclusion
Making these Dark Chocolate Maple Buttercream Candies has become one of my favorite kitchen rituals. It’s a process that feels both indulgent and deeply satisfying, resulting in a treat that never fails to impress. I hope you’ll give them a try, embracing the simple steps and trusting the process. There’s nothing quite like the joy of sharing something homemade that’s crafted with a little extra care and love. Happy cooking, and I hope your kitchen smells as wonderful as mine does every time I make these