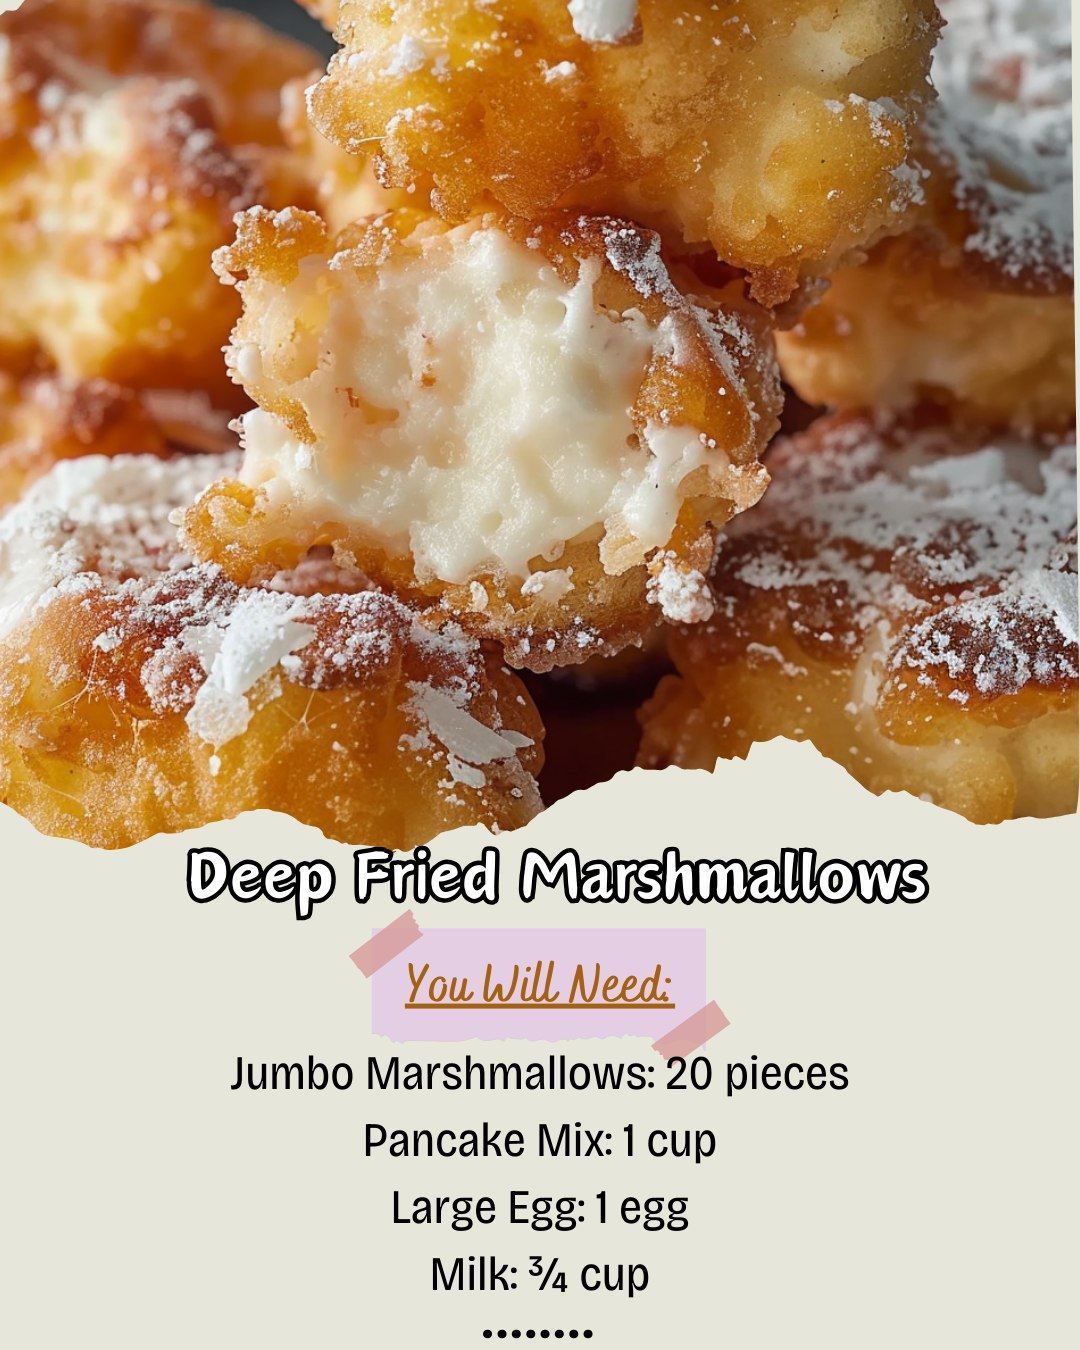
Pro Tips for Best Results
I tested this three different ways: with a thin batter, a thick batter, and this batter. The consistency here is key. If it’s too thin, it slides right off; too thick, and you get a doughy shell. The batter should lovingly cling to the marshmallow. Also, don’t over-mix! A few lumps in the batter are perfectly fine and actually lead to a lighter texture.
Here’s what I learned the hard way about temperature control. After adding a batch of cold, batter-coated marshmallows, the oil temp will plummet. I always wait a full minute or two, letting the thermometer climb back to 375°F, before adding the next batch. It feels like it slows you down, but it’s the secret to non-greasy, perfectly crisp results every single time.
For the ultimate experience, serve them immediately. The contrast between the hot, liquid center and the crisp shell is everything. I set up my frying station close to the table so I can bring them over within a minute of frying. That first bite is a sensory experience you simply cannot replicate if they’ve been sitting for even ten minutes.
Common Mistakes to Avoid
My biggest first-time mistake was not freezing the marshmallows first. I tried it with room-temperature ones, and while they worked, they became almost too molten and threatened to burst. Freezing them for at least 30 minutes (or even overnight) is a game-changer. It gives you a firmer base to work with and ensures the center stays contained, melting into a perfect lava flow instead of leaking out.
Another pitfall is crowding the pot. I know it’s tempting to fry more at once, but trust me, do not do what I did. Adding too many at once causes the oil temperature to crash and stay down, leading to uneven cooking and oily marshmallows. Four to five at a time is the sweet spot for a standard Dutch oven. Patience here rewards you with perfect puffs.
Serving Suggestions
I like serving these on a large platter with extra powdered sugar for dipping. The simplicity is elegant. For a real party, I set up a DIY dipping station with bowls of melted chocolate, caramel sauce, and crushed graham crackers. Letting guests drizzle and dunk their own creates such a fun, interactive dessert moment.
For a more composed plate, I’ll place two fried marshmallows alongside a small scoop of vanilla ice cream and a drizzle of raspberry coulis. The hot-and-cold, sweet-and-tart combination is restaurant-worthy. The ice cream also helps temper the sweetness if you’re serving to someone who prefers less sugar.
On a cozy night in, I keep it super simple. I serve them in a bowl with spoons, maybe with a mug of dark coffee or a glass of cold milk on the side. There’s no wrong way to enjoy them, but I find a bitter drink balances the decadence beautifully and makes the whole experience feel complete.
Variations & Customizations
One of my favorite twists is adding a teaspoon of cinnamon or pumpkin pie spice to the dry pancake mix. It gives the batter a warm, aromatic flavor that’s perfect for fall. I’ve also seen friends roll the finished puffs in a cinnamon-sugar mixture instead of powdered sugar for a churro-like effect—it’s fantastic.
For a next-level s’mores experience, try stuffing the marshmallows before freezing and frying. I’ve carefully used a paring knife to make a small slit and inserted a tiny piece of a Hershey’s chocolate bar inside the marshmallow. Once fried, you get a pocket of melted chocolate in the center. Just be gentle so the marshmallow doesn’t split.
You can also play with coatings. After dusting with powdered sugar, a light drizzle of chocolate syrup or salted caramel takes it over the top. For a nutty crunch, try rolling them in finely chopped toasted pecans or walnuts right after frying, while the exterior is still slightly sticky. The texture contrast is unbelievable.
How to Store, Freeze & Reheat
I’ll be honest: these are truly meant to be eaten right away. The texture is at its peak within minutes of frying. However, if you have leftovers, let them cool completely on a rack (not a towel, to prevent sogginess) and store them in a single layer in an airtight container at room temperature for a day. They’ll soften but are still tasty.
I do not recommend reheating them in the traditional sense, as they will likely become very chewy. However, if you must, place them on a wire rack over a baking sheet in a 350°F oven for just 3-4 minutes to re-crisp the exterior slightly. They won’t be the same, but they’ll be pleasant. I do not recommend freezing the fried product, as the texture will suffer greatly. Your best bet is to freeze the unfried batter-coated marshmallows on a parchment-lined sheet, then fry them straight from frozen, adding an extra 15-20 seconds to the fry time.
Conclusion
Deep Fried Marshmallows are more than just a recipe; they’re a little edible adventure that never fails to delight. From the sizzle in the pot to that first magical bite, the whole process is a joy. I hope you give them a try in your own kitchen and experience that same moment of sweet, crispy, gooey happiness. Trust me, once you make them, they’ll become your secret weapon for creating unforgettable dessert moments. Happy frying