Now that your batter is ready, pour it into the greased baking pan and gently spread it evenly. Bake the cake for about 30-35 minutes or until a toothpick inserted into the center comes out clean. While it’s baking, I take that time to prepare my frosting. In a medium bowl, beat together the softened butter, powdered sugar, crushed pineapple, and vanilla extract. This frosting is creamy and has a lovely tropical touch that enhances the cake’s flavors.
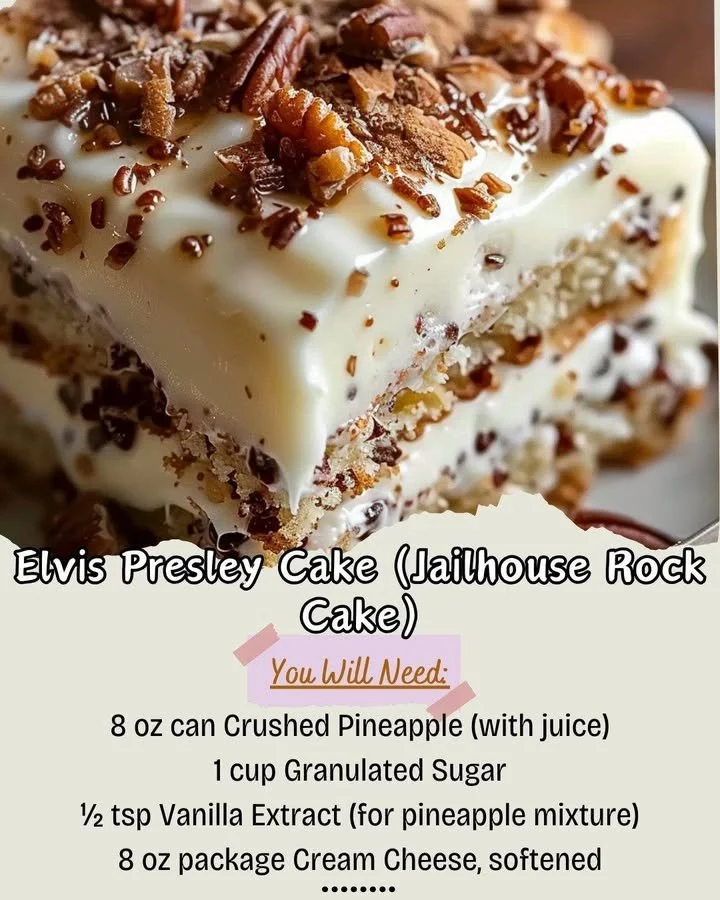
Once your cake is out of the oven and cooled completely on a wire rack, it’s time to frost it. Spread the frosting generously over the top of the cake. If you want to add a little crunch and texture, sprinkle some chopped pecans or walnuts over the frosting; they add a nice nutty contrast to the sweetness. Now, let it sit for a bit to set before slicing into it. The combination of flavors is incredibly pleasing, and I often find myself grabbing an extra piece for snack time.
Pro Tips for Best Results
I tested this recipe a couple of ways to find the perfect balance. One thing I discovered is that using room temperature eggs helps create a lighter texture, so don’t skip this step. I also tried adding a bit more coconut than the recipe calls for, and I loved the extra flavor it brought—just a touch more makes a delightful difference!
Also, don’t rush the cooling process. Allowing the cake to cool completely before frosting is crucial; otherwise, the frosting will melt right off and won’t hold. Trust me; patience is key when it comes to achieving that beautiful, creamy topping.
Lastly, for a touch of elegance, use a fine sifter to dust some powdered sugar on top just before serving. It enhances the visual appeal and gives the cake a luxurious finish that always impresses guests!
Common Mistakes to Avoid
One of the biggest pitfalls I encountered when I first made this cake was overmixing the batter. It’s tempting to keep going, but overmixing can lead to a tough cake. Mix just until you see the ingredients blended; a few lumps are perfectly fine. (See the next page below to continue…)
Another mistake is using too much frosting. While it sounds impossible, you really don’t need an overwhelming amount. A cleaner, thinner layer allows the cake’s flavor to shine through, and it won’t be overly sweet. Trust me; I learned this the hard way during my first baking attempt!
Also, be cautious when adding the crushed pineapple. Make sure it is well-drained; excess moisture can soak into the cake, making it dense instead of light and fluffy. I always place mine in a colander for a while before adding it to the batter.
Serving Suggestions
When serving this Elvis Presley Cake, I love to pair it with a scoop of vanilla ice cream on the side. The creamy ice cream perfectly complements the sweetness of the cake and balances the flavors beautifully. If you want to add a touch more flair, drizzle some chocolate syrup over the top just before serving—it’s a sweet indulgence that’s hard to resist!
For gatherings, I often cut the cake into smaller squares and serve them on colorful plates. It’s a delightful way to share a piece of nostalgia and a bite of sweetness with friends. Plus, it makes the cake feel extra special and festive!
If you want to make your serving a little more authentic to Elvis’s style, consider serving slices with a side of bananas. The combination of cake, ice cream, and bananas would surely be something the King would approve of, and it adds a unique twist to an already fantastic dessert.
Variations & Customizations
One of the great things about this Elvis Presley Cake is its versatility. You can swap the yellow cake mix for a chocolate cake mix for a chocolaty twist that truly enhances the flavors. Chocolate and pineapple together may sound unusual, but it’s a delicious pairing that surprises many.
Another fun variation is to play around with the nuts you use. If pecans aren’t your favorite, walnuts work beautifully too, or you can even leave them out entirely for a nut-free version. I’ve even thought about adding crushed pretzels for a salty crunch; it could be a fun and unique contrast to the sweet flavors of the cake.
If you’re feeling adventurous, add a splash of coconut extract along with the vanilla to ramp up that tropical flavor even further. It’s always nice to give a classic recipe a personal touch, and these variations let you express your culinary creativity!
How to Store, Freeze & Reheat
To store your Elvis Presley Cake, place any leftovers in an airtight container in the refrigerator. It will keep well for up to a week, but I bet it won’t last that long! Just make sure to let it come to room temperature before serving, as the flavors really shine when it’s not served cold.
If you want to plan ahead, this cake freezes beautifully. I recommend slicing the cake into portions and wrapping each piece tightly in plastic wrap before placing them in a freezer-safe bag. You can keep it in the freezer for up to three months, making it perfect for when you need a quick treat on hand.
To reheat your cake, simply take a slice out of the freezer, remove the wrapping, and let it thaw in the refrigerator overnight. If you’re in a hurry, a quick blast in the microwave for about 15-20 seconds will do the trick, but be careful not to overdo it — you want it sweet and warm, not hot and dry!
Conclusion
Baking Elvis Presley Cake has become a joyous ritual in my kitchen, one that’s filled with sweet scents and delicious memories. Whether I’m preparing it for a special occasion or just because, it always brings smiles all around. I hope you’ll give this recipe a try and enjoy the wonderful flavors that make it a timeless classic—after all, who doesn’t love a cake that truly rocks?