Pro Tips for Best Results
My number one pro tip is to religiously monitor your oil temperature. I tested this three different ways: letting it get too hot, letting it get too cool, and keeping it steady. Too hot (above 385°F), and the outside burns before the inside cooks. Too cool (below 365°F), and they absorb way too much oil and become greasy. That sweet spot of 375°F is key for a crisp exterior and a cooked-through, fluffy interior. Keep your thermometer clipped to the pot and adjust the burner as needed between batches.
Second, resist the urge to make them bigger. I know a heaping tablespoon of batter seems tempting, but these cook best when they’re truly bite-sized. A small teaspoon scoop creates the perfect ratio of crispy outside to soft inside and ensures they cook through quickly and evenly. Larger blobs often end up with a doughy, undercooked center, which is a real letdown after that perfect golden fry.
Finally, don’t skip the wire rack. I used to drain everything on paper towels, but for these bites, it makes a world of difference. Paper towels trap heat and steam, which leads to a loss of that delicate crispiness on the bottom. Letting them drain on a rack allows air to circulate all around them, keeping every surface as perfectly crisp as possible until you’re ready to devour them.
Common Mistakes to Avoid
The first time I made these, I made the classic mistake of dumping all my batter into the oil at once in my excitement. Don’t do what I did! Overcrowding the pot is a recipe for disaster. It causes the oil temperature to plummet, resulting in uneven, oil-logged bites that stick together in a clumpy mess. Give each bite some space to dance and fry independently. It feels like it takes longer, but you’ll get perfect results in the same amount of time, I promise.
Another big one is skipping the rest time for the batter. I know, waiting is hard when you’re excited. But those 5 minutes allow the flour to fully hydrate and the baking powder to start working its magic, which translates to a lighter, more tender texture. Rushing this step means your bites might be a bit dense. Just use the time to set up your draining station and do a final check on your oil temperature—it’s time well spent.
Serving Suggestions
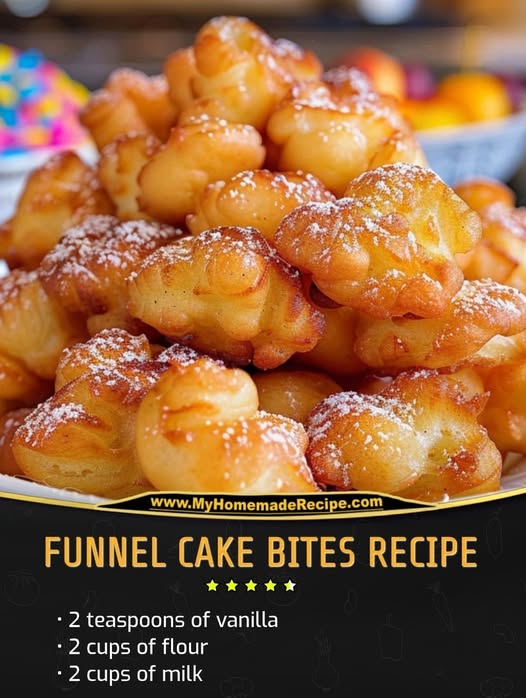
I love serving these bites piled high on a big platter right as my guests arrive. The warm, welcoming smell is part of the experience! I always put out a few small bowls of different toppings so everyone can customize their own. A bowl of classic powdered sugar is mandatory, of course, but I also love offering cinnamon sugar for that churro-like twist, and a side of warm chocolate sauce or raspberry jam for dipping.
For a next-level dessert spread, I’ll pair them with fresh fruit. The tartness of strawberries or raspberries cuts through the sweetness beautifully. Sometimes, I’ll even set up a DIY “funnel cake bite sundae” bar with vanilla ice cream, hot fudge, caramel sauce, whipped cream, and sprinkles. It’s a guaranteed hit with kids and adults alike and makes any night feel like a celebration.
On a quieter night, just for me and my family, we keep it simple. A dusting of powdered sugar eaten straight off the rack while they’re still almost too warm to handle is my personal favorite way to enjoy them. They’re perfect with a cold glass of milk, a hot coffee, or even a scoop of ice cream melting right on top. There’s no wrong way to serve them.
Variations & Customizations
Once you’ve mastered the classic version, it’s so fun to play around! One of my favorite variations is adding a teaspoon of ground cinnamon or apple pie spice to the dry ingredients. It fills your kitchen with the most amazing aroma and gives the bites a wonderfully warm, spiced flavor that’s perfect for fall. I’ve also zested a lemon or an orange right into the batter for a bright, citrusy note that’s unexpectedly refreshing.
For a fun mix-in, try folding a handful of mini chocolate chips or finely chopped apples into the batter right before frying. Just be aware that chocolate chips can sometimes sink, so fold them in gently and fry a test bite first. I’ve also seen friends dust them with matcha powder for a unique twist, or drizzle them with a simple glaze made of powdered sugar and a little lemon juice instead of the dry sugar.
If you’re feeling adventurous with toppings, think beyond sugar. A drizzle of salted caramel sauce with a flake of sea salt is absolutely divine. For a more savory-sweet profile, a light brush of melted butter followed by a sprinkle of everything bagel seasoning is a wild and delicious contrast that I highly recommend trying at least once. The basic batter is your blank canvas!
How to Store, Freeze & Reheat
Let’s be real, these are best fresh. But if you have leftovers (a rare occurrence in my house!), let them cool completely and store them in a single layer in an airtight container at room temperature for up to a day. They will lose their crispness but are still tasty. Do not store them in the fridge, as the moisture will make them soggy.
For longer storage, you can freeze them. I place the cooled, unfrosted bites in a single layer on a parchment-lined baking sheet and freeze until solid (about 2 hours). Then, I transfer them to a freezer bag, pressing out all the air. They’ll keep for about a month. To reheat, I don’t even thaw them. I spread them on a baking sheet and pop them in a 375°F oven for 5-8 minutes until they’re hot and re-crisped. The microwave will make them soft and chewy, so the oven or even an air fryer is the way to go for that just-fried texture.
Conclusion
Making these Funnel Cake Bites has become one of my favorite ways to create a little bit of everyday magic. They’re more than just a recipe; they’re a passport to happy memories, a project that’s fun to make, and a treat that’s utterly impossible to resist. I hope you’ll gather your ingredients, heat up that oil, and fill your own kitchen with that incredible, joyful smell. Trust me, once you’ve made them, you’ll understand why they’ve earned a permanent spot in my recipe box. Now, go make some memories—and don’t forget the powdered sugar.