Pro Tips for Best Results
I tested this recipe three different ways regarding butter temperature, and here’s what I learned the hard way: properly softened butter is the goldilocks zone. Melted butter makes cookies greasy and thin; cold butter won’t cream properly. To quickly soften cold butter, I sometimes cut it into tablespoons and let it sit on the counter for 15-20 minutes. It should be pliable but not shiny or melting.
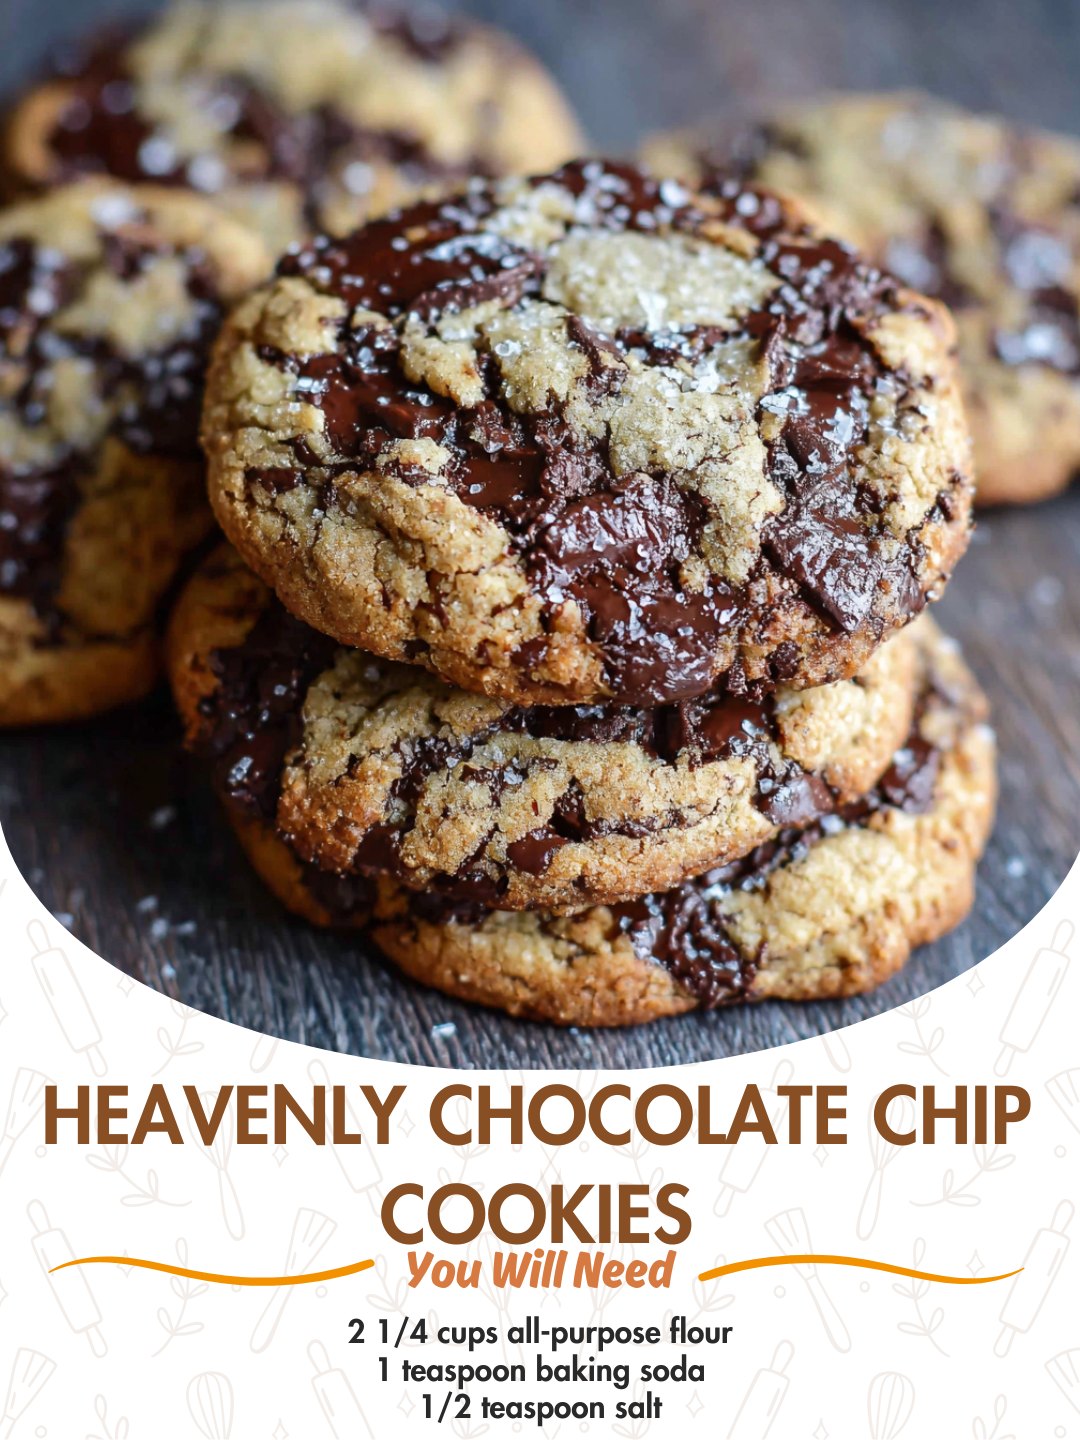
The bake time is more of a visual cue than a strict rule. I start checking at 9 minutes. You want the edges just beginning to brown and the tops look matte and no longer wet. The centers will look puffy and soft—they will set up as they cool. I pull them out even if I think they need another minute, because they continue to bake on the hot tray. This is the secret to a soft, chewy center.
For a truly professional look, I do a little trick right when they come out of the oven. I take a handful of extra chocolate chips and gently press them onto the tops of the warm cookies. This makes them look abundantly loaded and photogenic. Also, let them cool on the baking sheet for 5 full minutes before transferring to a wire rack. They are too fragile to move right away, and this allows them to finish setting without becoming hard.
Common Mistakes to Avoid
My biggest first-time mistake was using hot, melted butter because I was impatient. The result was a cookie that spread way too thin, with almost lace-like edges and a greasy feel. The butter pooled on the baking sheet! Don’t do what I did. Properly creaming room-temperature butter and sugar is the foundation of this entire recipe. It creates tiny air pockets that give the cookie its lift and texture.
Another classic error is overbaking. We’ve all been trained to bake things until they “look done,” but with these cookies, that’s a trap. If you wait until the center looks fully set in the oven, they will be crisp and hard once cooled. Trust your nose and the edges. When your kitchen smells amazing and the edges have a light gold color, it’s time to take them out. The residual heat will finish the job perfectly.
Serving Suggestions
I like serving these cookies still slightly warm, preferably with a cold glass of milk. There’s something timeless and deeply satisfying about that combination. For a more decadent treat, I’ll sometimes sandwich a small scoop of vanilla ice cream between two cookies for an instant, melty ice cream sandwich. It’s messy in the best possible way.
For a casual gathering, I pile them high on a rustic plate or in a simple basket. They are a crowd-pleaser on their own. If I’m feeling fancy, I might drizzle a little melted chocolate and a sprinkle of sea salt over the top once they’ve cooled. The salt makes the chocolate flavor pop in the most incredible way.
They also make a wonderful gift. I’ll let them cool completely, then stack them in a cellophane bag or a cute tin. I’ve found they travel beautifully and have never failed to bring a smile. Honestly, a gift of homemade cookies says “I care about you” more than almost anything else I can think of.
Variations & Customizations
This recipe is a fantastic canvas. One of my favorite variations is to add 1 teaspoon of instant espresso powder to the dry ingredients. It doesn’t make the cookies taste like coffee; instead, it deepens and intensifies the chocolate flavor in a magical way. I’ve also swapped out half the chocolate chips for white chocolate chunks and dried cranberries around the holidays for a festive, sweet-and-tart twist.
For a textural adventure, try replacing the nuts with a cup of toasted coconut or pretzel pieces. The salty crunch of pretzels with the sweet chocolate is an addictive combination. If you’re a purist who believes in all chocolate, go for it! Use a mix of milk, dark, and semi-sweet chips for a complex chocolate experience in every bite.
If you need to accommodate dietary needs, this recipe is flexible. I’ve successfully used a 1:1 gluten-free flour blend with great results. For a dairy-free version, a high-quality plant-based butter works well, though the flavor profile will shift slightly. The key is to keep the rest of the ratios and steps the same.
How to Store, Freeze & Reheat
To store, I keep them in an airtight container at room temperature for up to 5 days. I’ll often add a piece of bread to the container—it sounds odd, but the cookies absorb just enough moisture from the bread to stay beautifully soft. Just replace the bread every other day. They never last a full week in my house, but they certainly could!
For long-term storage, the dough freezes beautifully. I scoop the dough balls onto a parchment-lined tray, freeze them solid, then transfer them to a freezer bag. You can bake them straight from the freezer; just add 1-2 minutes to the bake time. To reheat a baked cookie, a 10-second zap in the microwave returns it to that just-baked, warm, and gooey state. You can also warm them in a 300°F oven for 5 minutes.
Conclusion
These Heavenly Chocolate Chip Cookies are more than a recipe to me; they’re a little piece of kitchen joy I love to share. I hope they bring as much comfort and happiness to your home as they have to mine. Remember, baking is about love as much as it is about ingredients, so don’t stress over perfection. Now, go preheat that oven, and get ready to make your kitchen smell like heaven. Happy baking