Serving Suggestions
When serving these delightful homemade chocolate-covered ice cream bars, I love to place them on a pretty serving platter, garnished with a drizzle of chocolate sauce or a sprinkle of your favorite toppings. The presentation can elevate a simple dessert into something truly special. Plus, it becomes a wonderful conversation piece among family and friends!
If I’m serving them at a gathering, I sometimes create a sundae bar alongside the ice cream bars. I set out various toppings like whipped cream, cherries, or more nuts for everyone to customize their desserts. It’s a hit, and everyone loves the chance to mix and match their favorite flavors!
If I’m simply enjoying one at home, nothing beats a little mini party for myself. I grab a plate, throw on some fresh fruit, and sip on an iced coffee while watching my favorite show. It’s my guilty pleasure moment that I absolutely cherish.
Variations & Customizations
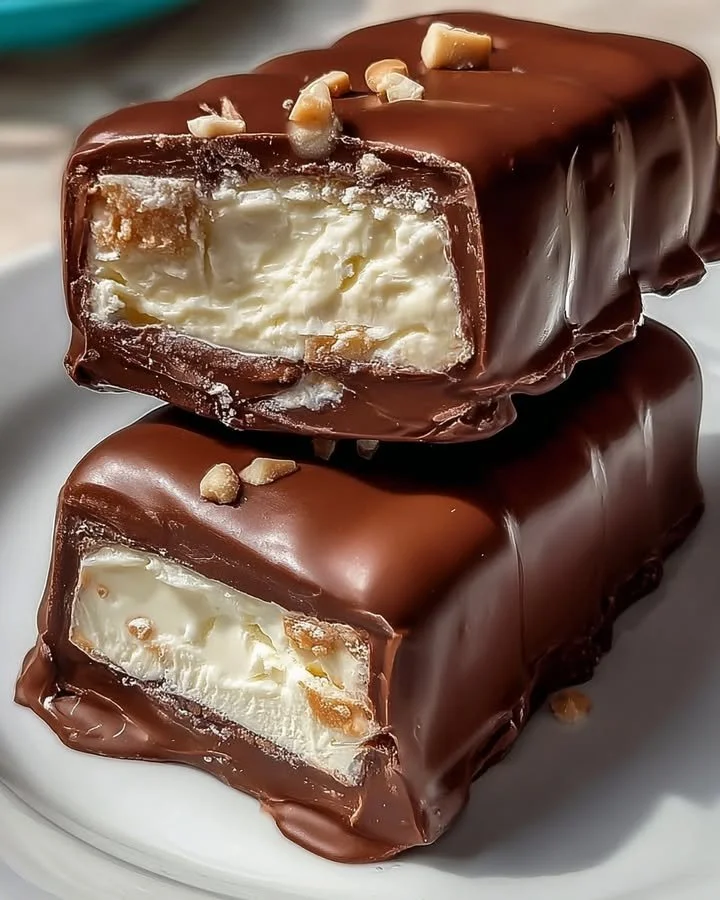
One of the best parts about making these chocolate-covered ice cream bars at home is the endless possibilities for variations! You can easily switch up the flavors of ice cream based on your mood. Whether it’s cookies and cream, strawberry, or mint chocolate chip, each choice adds a unique twist to the classic recipe.
You can also experiment with different coatings beyond chocolate. For example, I’ve tried using a mixture of crushed cookies and melted chocolate for an even more decadent treat. You can roll the bars in crushed Oreos, toffee bits, or even colorful candies for a fun, whimsical touch.
For an added health-benefit twist, consider using yogurt or a dairy-free ice cream alternative instead of traditional ice cream. It still hardens nicely in the freezer and offers a lighter option without compromising on flavor. I’ve been enjoying coconut or almond milk-based ice creams that turn out just as delicious!
How to Store, Freeze & Reheat
Storing these homemade chocolate-covered ice cream bars is easy! Just wrap each bar individually in wax paper or plastic wrap, then place them in a freezer-safe bag or container to keep them fresh. This way, they won’t stick together, and you can pull one out at a moment’s notice.
If you want to keep them for longer, they can last in the freezer for up to a month. Just remember to check for any freezer burn if you’re storing them for an extended period. I’ve had a couple of bars that didn’t taste as fresh due to ice crystals, and I learned to keep them well protected in wraps and bags.
Reheating isn’t necessary for these treats, as they are best enjoyed frozen! However, if you want a softer texture, I recommend letting them sit out for just a couple of minutes to warm slightly. It enhances the creaminess and makes them extra enjoyable, especially if you’re sharing them with someone special.
Conclusion
In closing, making homemade chocolate-covered ice cream bars has brought a lot of joy and deliciousness to my kitchen. They’re a bit of a labor of love, but the results are so rewarding! I hope you feel inspired to give this tasty treat a try and create your own memories in the process. Enjoy every luscious bite—because you absolutely deserve it!