Pro Tips for Best Results
Room temperature ingredients are your best friend here. I cannot overstate this. Cold cream cheese will never become smooth, and cold eggs or sour cream can re-solidify the fat in the cheese, leading to a chunky batter. I set everything out on the counter about 2 hours before I start baking. It’s the single biggest factor between a good cheesecake and a spectacularly creamy one.
When mixing the cheesecake filling, low and slow wins the race. After the initial creaming of the cheese, keep your mixer on low speed once the eggs are added. I’ve tested this three different ways: high speed creates too many air bubbles, which rise and collapse during baking, leading to a cracked surface and a less dense texture. Mixing on low gives you that iconic, velvety, New York-style consistency we’re after.
Water baths are intimidating, but I have a foolproof cheat. Instead of wrestling with foil and a roasting pan, I place a large, oven-safe dish filled with hot water on the rack below the cheesecake. This creates a steamy environment in the oven that drastically reduces the chance of cracking. It’s the method I always use now, and my cheesecakes come out perfectly level and crack-free nearly every single time.
Common Mistakes to Avoid
The first time I made this, I was so excited that I tried to rush the cooling process. I took the cheesecake out of the oven and plopped it straight onto the cold stovetop. The result? A dramatic crack right down the center from the thermal shock. Don’t do what I did! That gradual cool-down in the turned-off oven is not a suggestion—it’s a mandatory step for a beautiful, smooth top. Your future self, proudly presenting a flawless dessert, will thank you.
Another classic mistake is over-baking. We’re used to cakes where a clean toothpick means “done.” For cheesecake, that means “overdone and potentially dry.” You want the center to still have a slight wobble when you jiggle the pan; it will firm up dramatically as it chills. I set my timer for 50 minutes and start checking. If the outer ring looks set but a 3-inch circle in the center jiggles like soft pudding, it’s perfect. Take it out and let the residual heat finish the job.
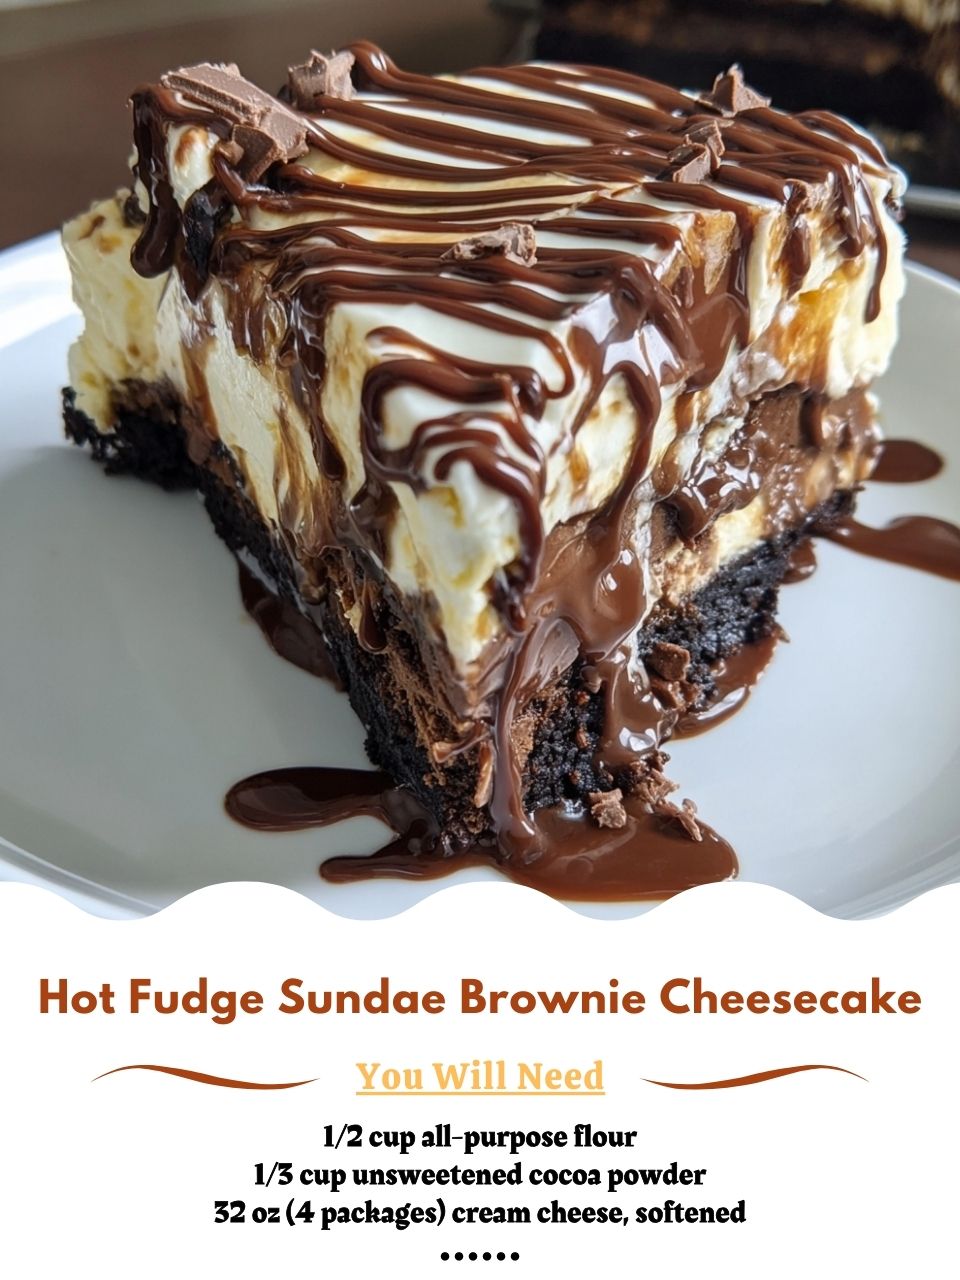
Serving Suggestions
I like serving this cheesecake straight from the fridge, cold and firm. Warm your hot fudge sauce just until it’s pourable but not scalding hot. Drizzle it generously over each slice right before serving. That contrast of cold cheesecake and warm fudge is simply divine. Then, I add a small scoop of really good vanilla ice cream on the side—the classic sundae pairing is non-negotiable for me.
For the full diner-style experience, I go all out with the toppings. A dollop of homemade whipped cream, a sprinkle of chopped salty peanuts for that fantastic crunch and contrast, and of course, the iconic maraschino cherry on top. I put all the topping options in little bowls and let everyone build their own masterpiece. It turns dessert into a fun, interactive event.
If you’re feeling fancy, a drizzle of caramel sauce alongside the hot fudge is a game-changer. A dusting of flaky sea salt on the fudge drizzle also elevates the flavors incredibly, balancing the sweetness. For a simpler presentation, just the warm fudge and maybe a few fresh berries make it elegant and stunning.
Variations & Customizations
One of my favorite twists is adding a layer of peanut butter. After spreading the par-baked brownie layer, I’ll dollop and gently swirl 1/2 cup of warm peanut butter before pouring the cheesecake batter on top. The result is a fantastic peanut butter cup flavor profile that pairs unbelievably well with the hot fudge and peanuts on top.
For a mint-chocolate chip version, which is always a hit, I add 1 teaspoon of peppermint extract to the cheesecake filling and fold in 3/4 cup of mini chocolate chips. I top it with a chocolate ganache instead of hot fudge and crushed Andes mints. It tastes like a luxurious, frozen dessert but in cheesecake form.
You can also play with the brownie base. I’ve stirred in a handful of chocolate chunks or toasted walnuts for extra texture. For a Mocha version, add 1-2 tablespoons of instant espresso powder to the brownie’s dry ingredients. The coffee enhances the chocolate flavor beautifully without making it taste like coffee.
How to Store, Freeze & Reheat
To store, keep the cheesecake covered tightly with plastic wrap or in an airtight cake carrier in the refrigerator. It will stay fresh and delicious for up to 5 days. I do not recommend adding the hot fudge topping to the whole cake before storing, as it can make the texture soggy. Instead, top individual slices just before serving.
This cheesecake freezes wonderfully for longer storage. Wrap the completely chilled, ungarnished cheesecake tightly in two layers of plastic wrap, then a layer of heavy-duty foil. Freeze for up to 2 months. To thaw, transfer it to the refrigerator and let it defrost slowly overnight. This preserves the perfect creamy texture. I do not recommend freezing slices that have already been topped with fudge or ice cream.
Conclusion
Baking this Hot Fudge Sundae Brownie Cheesecake is more than following a recipe; it’s creating a moment of pure, shared delight. From that first heavenly smell filling your kitchen to the last satisfying scrape of the fork on the plate, it’s a journey worth taking. It has become my signature “special occasion” dessert, and I hope it finds a cherished place in your recipe collection, too. Give it a try, share it with people you love, and savor every decadent bite. Happy baking