Pro Tips for Best Results
I tested the flour measurement three different ways: scoop-and-sweep, spoon-and-level, and even weighing it. Spooning and leveling gave me the absolute best, most consistent texture. If you have a scale, 6 cups is about 720 grams. It seems like a lot of flour, but it’s correct for this type of dough.
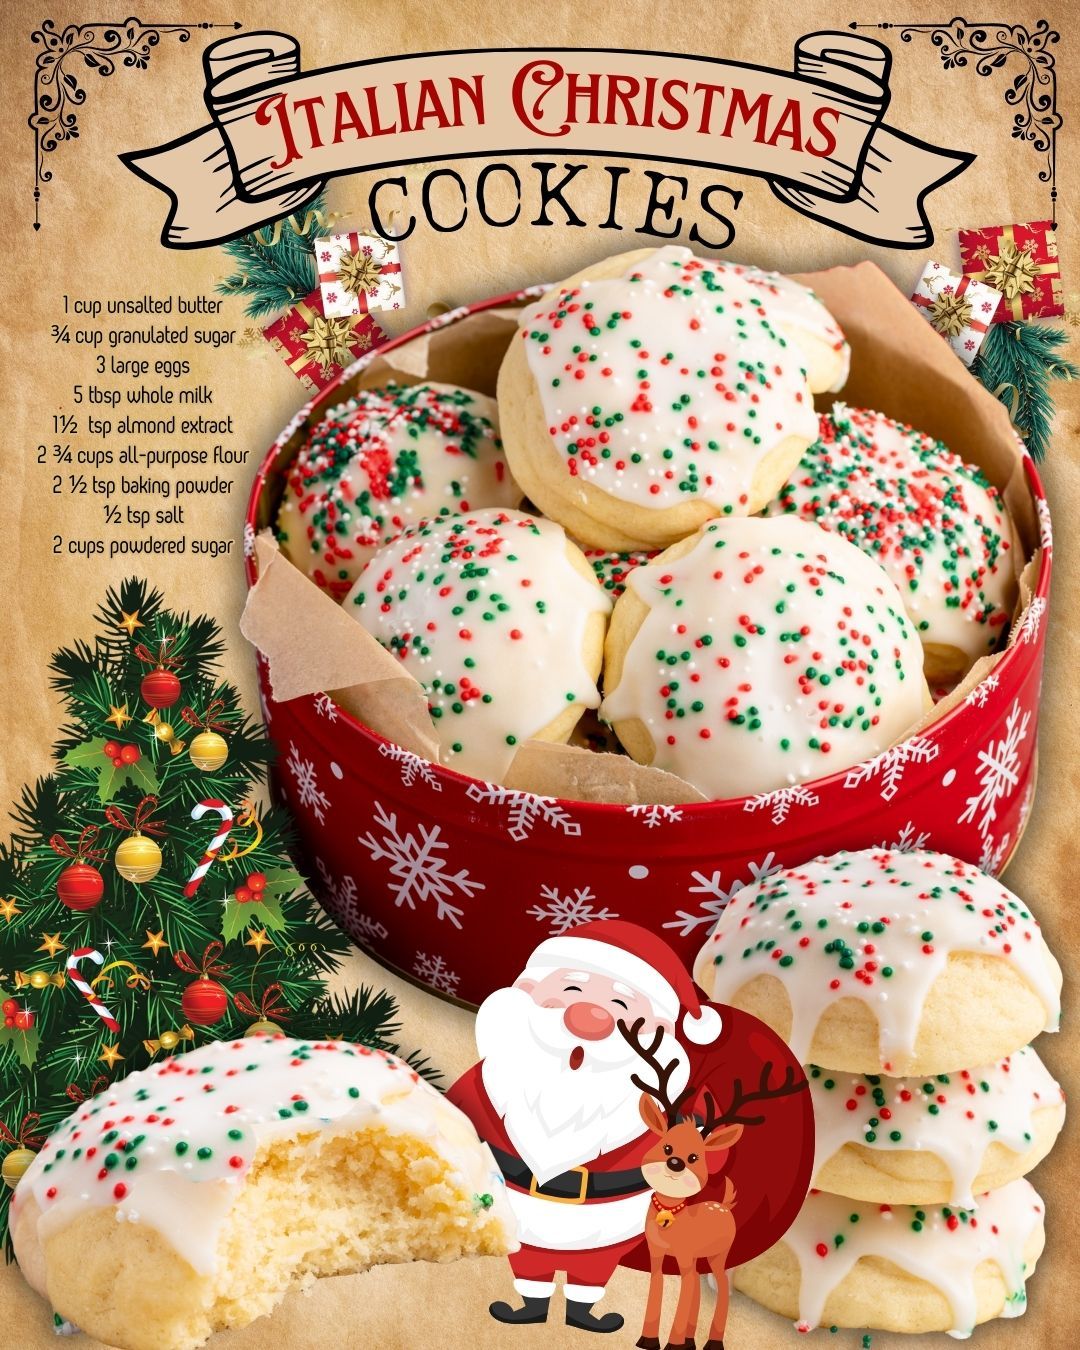
Here’s what I learned the hard way about the glaze: if it’s too thin, it will just run off the cookie and create a sugary puddle on your rack. If it’s too thick, it will dry with ugly cracks. You want a consistency similar to heavy cream or a runny honey. I always do a test glaze on one cookie first to check. And have your sprinkles ready in a shallow bowl before you start glazing!
Patience is the ultimate pro tip. Let the cookies cool completely before glazing, and then let the glaze set fully before stacking or storing them. I usually give them a good 2-3 hours. I know it’s tempting to try one right away, but the flavors settle and the texture perfects itself as they rest. They truly taste better the next day.
Common Mistakes to Avoid
The first time I made these, I was impatient and used cold butter straight from the fridge. My mixer struggled, the dough was lumpy, and my cookies spread into weird shapes in the oven. Don’t do what I did! Properly softened butter is key for creating the air pockets that lead to a soft, cakey cookie. Leave it out until you can easily press your finger into it and leave an indentation.
Another big one is over-mixing the dough once the flour is added. As soon as you no longer see dry streaks of flour, stop the mixer. Overworking the dough develops the gluten in the flour, which can make your cookies tough and dense instead of tender and light. It’s okay if the dough looks a bit shaggy before you bring it together with your hands.
Serving Suggestions
I love serving these cookies piled high on my favorite vintage Christmas platter. They look so cheerful and abundant that way. A dusting of edible gold glitter over the glaze before it sets makes them feel extra festive for a party. They are the perfect cookie to pair with a strong espresso or a cup of dark roast coffee in the afternoon—the bitterness of the coffee cuts through the sweetness of the glaze beautifully.
For a holiday cookie swap, these are my go-to. I package them in clear cellophane bags tied with a red ribbon. Because they’re not overly fragile and the glaze sets hard, they travel and gift extremely well. I always include a little note that they’re best enjoyed with a hot beverage.
On Christmas morning, I put them out with a spread of pastries and fruit. They’re a sweet little treat that doesn’t feel too heavy. Sometimes, I’ll even crumble one over a bowl of vanilla ice cream for a simple, decadent dessert. They add the most wonderful almond crunch.
Variations & Customizations
While I adore the classic almond version, I’ve played around with other extracts. A teaspoon of anise extract gives you that classic Italian pizzelle flavor profile, which is wonderful. For a citrus twist, swap the almond extract for lemon or orange extract, and add a teaspoon of zest to the dough. The glaze can also be customized—a little lemon juice instead of milk in the glaze with the lemon cookies is divine.
You can also have fun with the shapes! Instead of balls, I sometimes roll the dough into small logs to make “ knots,” or press it into a crescent shape. Just keep the size consistent so the baking time remains the same. For my chocolate-loving friends, I’ll stir a half-cup of mini chocolate chips into the dough. They add little pockets of melty goodness.
The decorating possibilities are endless. Instead of multi-colored sprinkles, try chopped pistachios, crushed candy canes, or even a drizzle of dark chocolate over the white glaze. I once made a batch with just red sanding sugar for a more elegant, monochromatic look. Let your kids or guests decorate their own—it’s a fantastic holiday activity.
How to Store, Freeze & Reheat
To store, I place the completely set cookies in a single layer in an airtight container. I separate layers with parchment paper. They keep beautifully at room temperature for up to a week. I find the texture actually improves after a day or two as the cookie softens slightly from the glaze. Do not refrigerate them, as the fridge will dry them out.
These cookies freeze exceptionally well, which is a lifesaver during the busy holidays. I freeze them unglazed. After baking and cooling, I flash-freeze the plain cookies on a baking sheet for an hour, then transfer them to a freezer bag. They’ll keep for up to 3 months. When you’re ready, let them thaw at room temperature, then glaze and decorate as usual. You can also freeze them already glazed, but be prepared for the sprinkles to bleed color a tiny bit. To refresh cookies that have been sitting out, a quick 5-second zap in the microwave makes them taste freshly baked and soft.
Conclusion
Making these Italian Christmas cookies has become one of my most cherished holiday traditions. It connects me to memories of my family, fills my home with incredible smells, and gives me the joy of sharing something made with love. I hope this recipe finds its way into your kitchen and becomes a part of your own celebrations. Gather your ingredients, put on some festive music, and enjoy the simple, sweet process. I’m confident you—and everyone you share them with—will absolutely adore them. Happy baking!