Pro Tips for Best Results
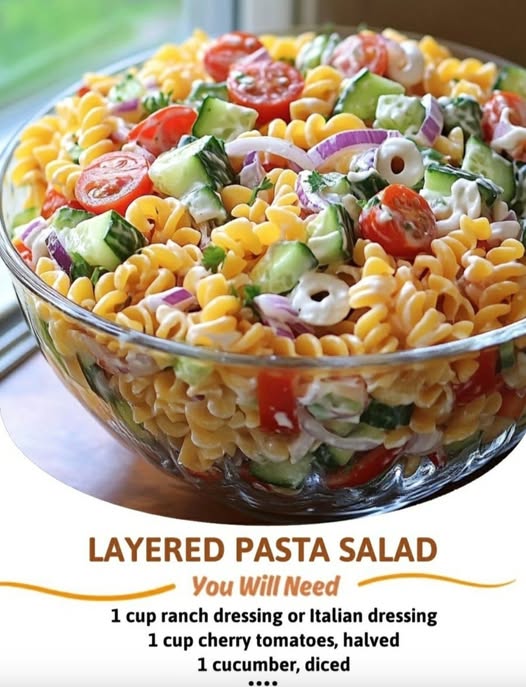
I tested the pasta type three different ways. Rotini or fusilli are the absolute champions because all those nooks and crannies trap the dressing and little bits of veggies. Avoid long pasta like spaghetti or even penne, which don’t layer or hold the dressing as well. Also, after rinsing, let your pasta sit in the colander and shake it a few times. I’ll even pat it gently with a paper towel to ensure it’s bone-dry. Any extra water will dilute your dressing and make the whole salad weep.
The order of your layers is a strategic game. Always start with pasta and end with sturdier, less-soggy-prone ingredients like cheese and meat on the very top. I place the spinach in the middle, cushioned between other veggies, so it doesn’t get crushed and wilted at the bottom. And remember that poke-with-the-spoon-handle trick? I’ve tried this step both ways—just pouring dressing on top versus poking—and trust me, this one works better. It distributes the creaminess throughout without disturbing the beautiful layers you just built.
For the best flavor, treat this like a good soup or stew—it needs time. Making it the night before is not just a convenience; it’s a requirement for the best possible outcome. The dressing mellows, the onions soften, and every ingredient relaxes into its neighbor. Pull it out of the fridge about 20 minutes before serving to take the extreme chill off, then give it one very gentle toss from the top down just before serving, or let everyone dig down through the layers with a large spoon.
Common Mistakes to Avoid
The first time I made this, I was in a hurry and tossed everything together in a big bowl like a traditional pasta salad. Don’t do what I did! You lose the stunning visual appeal and the textural surprise of the layers. The joy is in discovering a chickpea, a piece of ham, and a tomato all in one forkful. Layering might seem like an extra step, but it transforms the experience completely.
Another classic mistake is skipping the chill time. I know it’s tempting to serve it right away, especially when you’re hungry, but patience is key. If you serve it immediately, the flavors will feel separate and the pasta will still be bland in the middle. The waiting period is when the alchemy happens. Trust the process and plan ahead—your future self at mealtime will thank you.
Serving Suggestions
I love serving this salad as the undisputed centerpiece of a casual spread. It’s hearty enough to be a main course on a hot summer day, especially with a crusty baguette or some garlic breadsticks on the side for scooping up any runaway bits. The cool, creamy richness pairs perfectly with the crunch of the bread.
For a full barbecue or picnic, I place it right next to the grilled classics. It’s the perfect cool counterpoint to smoky burgers, juicy grilled chicken, or spicy sausages. The freshness of the veggies cuts through the char and fat beautifully, making your whole plate feel balanced and complete.
If I’m bringing it to a potluck, I always carry the garnish (the fresh parsley or chives) separately in a small bag. Right before setting it on the table, I’ll sprinkle it over the top. That final hit of fresh green makes it look restaurant-worthy and shows you cared about the details. It’s a tiny step that earns big compliments.
Variations & Customizations
This recipe is a fantastic canvas. For a vegetarian version, I simply swap the ham for more chickpeas or a can of rinsed kidney beans, and it’s just as satisfying. My friend who loves Greek flavors once made a version using Italian dressing, adding chopped pepperoncini, kalamata olives, crumbled feta cheese, and skipping the cheddar and ham. She said it was incredible, and I believe her—I’m trying that next.
If you’re a protein lover, feel free to switch it up. Diced grilled chicken, crispy bacon bits, or even small shrimp are all amazing substitutes for the ham. I’ve also seen a “taco” version where someone used a southwest ranch dressing, added black beans and corn, and used a Mexican cheese blend. The basic layering principle holds strong, no matter the flavor profile you choose.
For a lighter touch, you can use a Greek yogurt-based ranch dressing or even a vinaigrette. You can also add other crunchy veggies you have on hand—blanched broccoli florets, shredded carrots, or thinly sliced radishes would all be wonderful additions. The recipe is wonderfully forgiving, so make it your own.
How to Store, Freeze & Reheat
From my experience, this salad stores brilliantly. Kept covered tightly in the refrigerator, it stays fresh and delicious for 3-4 days. In fact, I think it’s often best on day two! The flavors continue to deepen. If you see a little liquid pooling at the bottom after a day or two, just give it a gentle stir to reincorporate it.
I do not recommend freezing this salad. The creamy dressing will separate, the vegetables (especially the cucumber and spinach) will become watery and mushy upon thawing, and the texture will be irreparably damaged. This is a make-and-eat-within-a-few-days kind of joy. There’s no need to reheat it—it’s designed to be served cold or cool. If it seems too cold straight from the fridge, that brief 20-minute counter rest is all it needs.
Conclusion
This Layered Pasta Salad has earned a permanent spot in my summer recipe rotation and in my heart. It’s more than just a dish; it’s a promise of good times, shared meals, and happy, full bellies. It represents the kind of cooking I love most—approachable, flavorful, and made with a little bit of love and a lot of smart prep. I hope it becomes a trusted favorite in your kitchen, too, creating its own memories at your sunny tables. Now, go grab that clear bowl and start layering. Your new signature dish awaits.