Next, I take a small scoop of the mixture and form it into bite-sized balls, about the size of a golf ball. If the mixture seems too sticky, I simply moisten my hands with a little water or oil to help shape them. Once formed, I roll each ball in the additional breadcrumbs to ensure they’re nice and crispy on the outside. Prepping these little guys might seem like a bit of work, but it’s so worth it!
Now that my cheese puffs are ready, it’s time to decide how to cook them. I can either fry them or bake them, depending on my mood. If I decide to fry, I heat oil in a frying pan over medium heat until it’s hot enough for a breadcrumb to sizzle when dropped in. I then carefully place the puffs in the hot oil, cooking them until they’re golden brown and crispy, about 3 to 4 minutes per side. If baking, I preheat the oven to 400°F (200°C) and place the cheese puffs on a parchment-lined cookie sheet, spritzing them with non-stick spray. They’ll bake for about 20 minutes until golden.
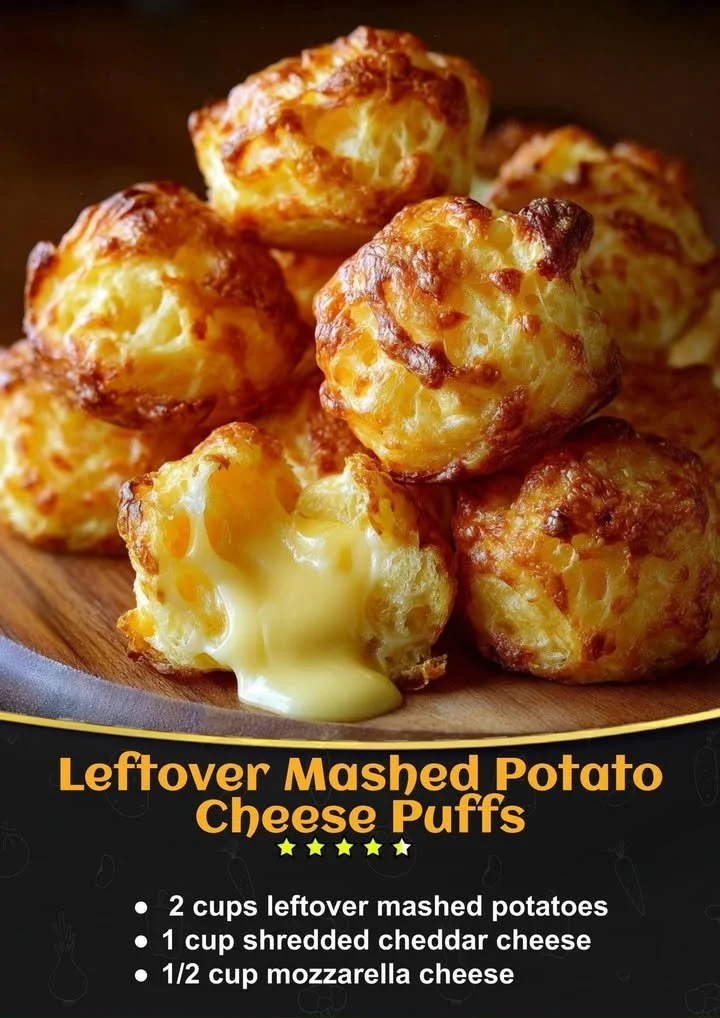
Finally, whether I’m frying or baking, I let the cheese puffs cool for a few minutes on a paper towel-lined plate so any excess oil can drain off. The aroma of the golden exterior and melted cheese can really fill my kitchen with enticing smells—it’s hard to resist sneaking a taste right away!
Pro Tips for Best Results
I found that using a mix of cheeses can really elevate the flavor of these cheese puffs. I tested them with just cheddar, then swapped in some pepper jack for an extra kick. The combination was a hit! I also discovered that mixing in some finely chopped herbs like parsley or thyme gives a fresh note that enhances the cheesy goodness.
When frying, it’s important not to overcrowd the pan. I learned this the hard way when my first batch turned out a bit soggy. Frying in smaller batches not only gives them more space to crisp up but also ensures even cooking. If I’m baking, I make sure to leave enough space between each puff so that they can expand and get that crispy outer shell I love.
Lastly, I always serve these cheese puffs with a few different dipping sauces—honey mustard, ranch, or spicy aioli. Not only does it entice a variety of flavors, but it also presents them nicely at gatherings, which is totally a win in my book!
Common Mistakes to Avoid
One common mistake I’ve made in the past is not cool enough the leftover mashed potatoes before mixing them with the other ingredients. Warm potatoes can lead to a gooey mixture that’s hard to work with, and they may fall apart during cooking. I recommend letting them sit at room temperature for a while before diving into this recipe. (See the next page below to continue…)