Pro Tips for Best Results
I tested the chip situation three different ways: all crushed on the bottom, all whole, and a mix. The hybrid method is the winner. A solid base of crushed chips absorbs moisture and provides structure, while leaving some sturdier pieces for the top layer (under the cheese) gives you that essential, satisfying crunch in every bite. It creates the perfect textural contrast that makes this casserole so addictive.
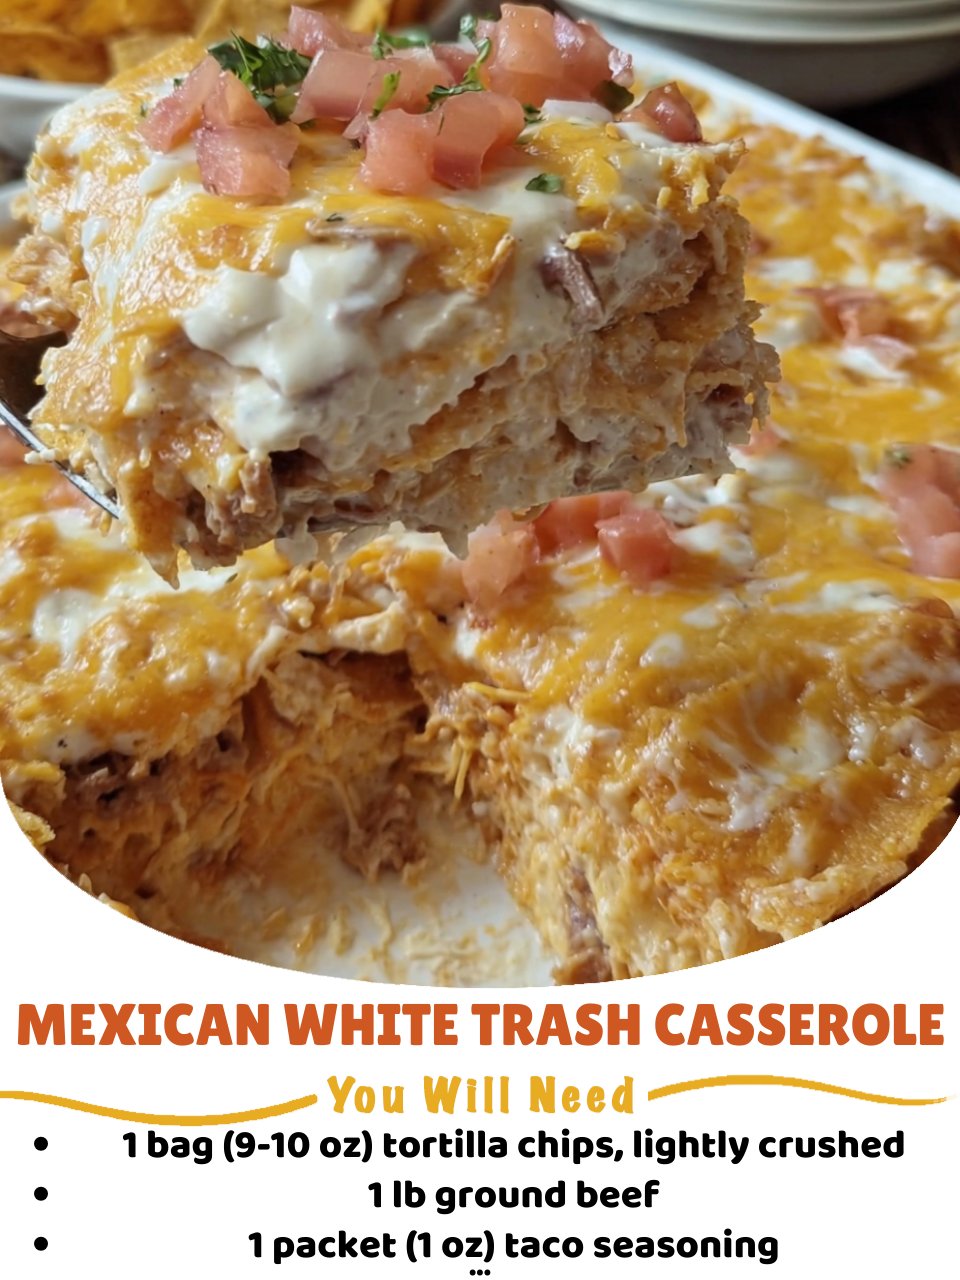
Here’s what I learned the hard way about layering: do not mix the chips into the filling. I tried it once thinking it would distribute the crunch, but it just made the entire dish uniformly soft and mushy. The distinct layers are key. The bottom chips soften into almost a flavorful masa-like layer, the middle is the rich, creamy filling, and the top gets that glorious cheese-and-crispy-chip crown. Trust the process.
For the best flavor meld, let the casserole sit for about 8-10 minutes after you pull it out of the oven. I know it’s hard to wait when it smells that good, but this rest time allows the filling to set just enough so you get clean slices. It also lets the flavors settle and intensify. Rushing in with a spoon will give you a delicious but soupy first serving.
Common Mistakes to Avoid
The biggest mistake, and I made it the first time, is forgetting to drain your canned vegetables. That liquid from the corn and Ro-Tel has nowhere to go but into your chips, turning your crunchy masterpiece into a wet, disappointing mess. It seems like a small step, but it’s the single most important one for texture. Take the extra minute to drain them well—I promise you’ll taste and feel the difference.
Another pitfall is overbaking. You’re not trying to cook the ingredients; they’re already cooked. You’re just heating everything through and melting the cheese. Once you see active, lively bubbles around the edges and the cheese is fully melted, it’s done. Leaving it in too long will dry out the edges and can make the sour cream in the filling separate slightly. Set a timer and peek at the 25-minute mark. Perfectly gooey is the goal.
Serving Suggestions
I love serving this casserole straight from the dish with a lineup of fresh, cool toppings on the side. It’s like a baked taco bar! I set out bowls of diced avocado, extra sour cream, pickled jalapeño slices, fresh pico de gallo, and a big handful of chopped cilantro. Let everyone customize their own plate, which makes it fun and interactive. The cool, fresh toppings cut through the richness of the casserole perfectly.
For sides, you really don’t need much, but a simple, crisp green salad with a lime vinaigrette is my go-to. It adds a fresh element and makes the whole meal feel a bit more balanced. If I’m feeling indulgent, I’ll serve it with a side of Mexican rice or some creamy refried beans. Honestly, though, this casserole is so hearty and complete that it often stands proudly on its own.
Leftovers are a dream, but presentation matters for the first serving. I use a large, sturdy spatula to scoop out full squares, getting all the layers in one go. I garnish my own plate with a dollop of sour cream and a sprinkle of cilantro right away because the visual is part of the joy. It looks as comforting as it tastes.
Variations & Customizations
This recipe is a fantastic canvas. For a lighter version, I’ve successfully used ground turkey or even shredded rotisserie chicken instead of beef. Just be sure to season the chicken well. If you’re vegetarian, swap the beef for a plant-based ground crumble and use cream of mushroom soup instead of chicken. I’ve done both, and they are fantastic. The core concept is incredibly adaptable.
You can also play with the beans and veggies. Sometimes I swap the black beans for pinto or kidney beans. I’ve added a cup of frozen spinach (thawed and squeezed dry) for some hidden greens, and my kids didn’t even notice. If you love heat, use hot Ro-Tel or add a diced fresh jalapeño to the beef while it cooks. Want it creamier? Stir an extra 1/2 cup of sour cream into the filling.
The cheese is another fun variable. A pepper jack cheese adds a wonderful kick. A Mexican blend with añejo cheese brings a sharper, saltier note. I’ve even done a “three-cheese” version with Colby Jack, cheddar, and a little bit of crumbled cotija on top after baking. Don’t be afraid to use what you have or love—melty cheese is always the right answer.
How to Store, Freeze & Reheat
For storage, I let the casserole cool completely, then cover the baking dish tightly with foil or transfer portions to airtight containers. It keeps beautifully in the fridge for 3-4 days. The flavors actually meld and get even better on the second day, though the chips will continue to soften. It’s a different, but still delicious, texture.
To freeze, I assemble the casserole right up to the point of baking in a disposable aluminum pan, cover it tightly with a layer of plastic wrap and then foil. It freezes well for up to 2 months. When ready to eat, I thaw it overnight in the fridge and bake as directed, adding maybe 10-15 extra minutes since it’s starting cold. Reheating individual portions is best done in the oven or air fryer (at 375°F until hot) to recrisp the top. The microwave works in a pinch but will make it soft.
Conclusion
At the end of the day, the Mexican White Trash Casserole is more than the sum of its simple parts. It’s a testament to how a few pantry staples, layered with love and a little know-how, can create something truly special and deeply satisfying. It’s the meal I make when I need a guaranteed win, when the week has been long, and when comfort is the only thing on the menu. I hope it finds a spot in your recipe rotation and brings as much joy and full bellies to your table as it has to mine. Now, go preheat that oven—dinner awaits.