Now, it’s time to add the graham cracker crumbs to the mixture, stirring until they are fully incorporated. The crumbs not only enhance the flavor but also provide that lovely texture you expect in a cheesecake. I find it easiest to use my hands to form the mixture into small balls—about one inch in diameter is perfect. Once I’ve formed all my balls, I place them on a baking sheet lined with parchment paper to set in the fridge for about 30 minutes.
While the cheesecake balls chill, I prepare the chocolate coating. I melt the chocolate chips in a microwave-safe bowl, heating in 30-second intervals and stirring until smooth. As the chocolate melts, I can’t help but feel a sense of anticipation for those rich flavors. Once the cheesecake balls are firm enough, I dip each one into the melted chocolate using a toothpick or fork, making sure to coat them generously. It’s always a challenge not to eat them at this point!
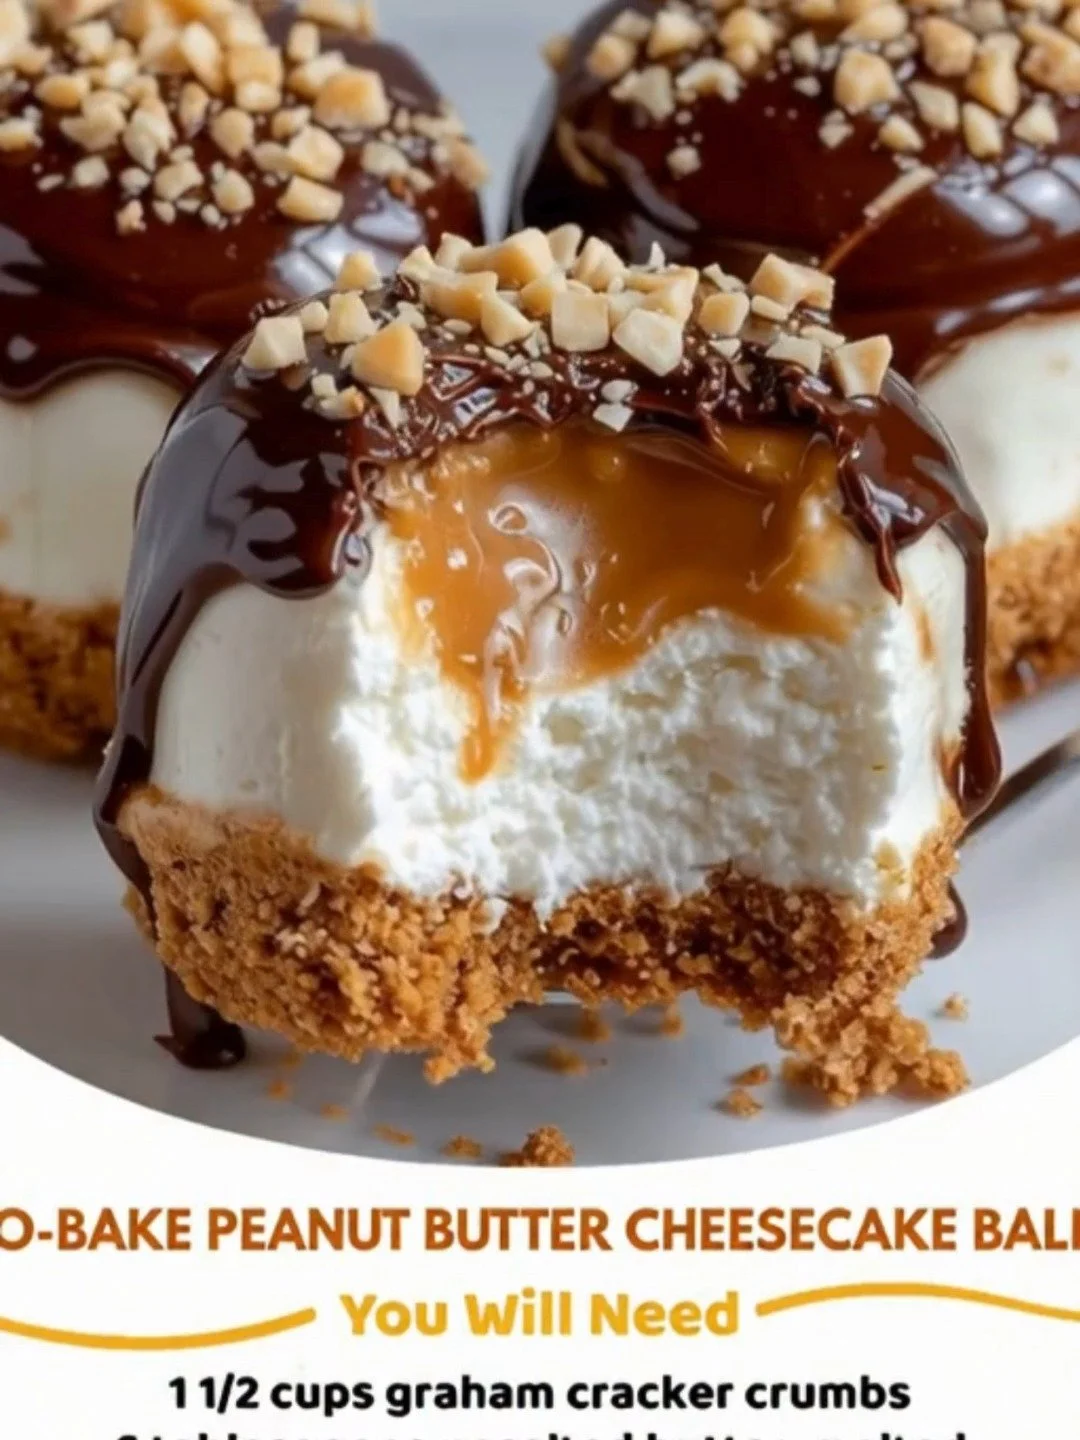
Finally, after dipping, I return the chocolate-covered balls to the baking sheet to cool. If you’re feeling a tad indulgent like I sometimes do, a sprinkle of sea salt on top adds the perfect contrast to the sweetness of the chocolate. Then, I let them set in the refrigerator for a little while longer until the chocolate hardens completely. And there you have it—their luscious look makes it hard to wait to dig in!
Pro Tips for Best Results
I’ve tested this No-Bake Peanut Butter Cheesecake Balls recipe in a few different ways, and I have to say, the key to my favorite version is using room-temperature cream cheese. This ensures that everything combines beautifully without lumps and ensures a silky smooth texture. Trust me; it’s worth the bit of patience!
Another tip I learned during my kitchen adventures is that letting your cheesecake balls chill is crucial. If you’re in a hurry, you might be tempted to skip this step, but chilling helps them firm up and makes coating them in chocolate much easier. Believe me, you’ll be thankful for that extra time when they’re perfectly round and easy to handle.
Lastly, don’t hesitate to get creative with your toppings! I love to roll some of my cheesecake balls in crushed nuts, sprinkles, or even more graham cracker crumbs before letting them set. It adds an extra flavor dimension and little crunch that contrasts beautifully with the smoothness of the cheesecake.
Common Mistakes to Avoid
I’ve had my fair share of blunders while making these delightful treats, and one of the biggest mistakes is using cold cream cheese. If it’s not softened first, you’ll end up with a lumpy filling instead of that dreamy, smooth texture we all want. Take that extra five minutes to let it come to room temperature! (See the next page below to continue…)
Another common pitfall is not allowing the cheesecake balls to chill long enough before coating them in chocolate. If they’re too soft, they can lose their shape during the dipping process, leading to more of a mess than a treat. Do yourself a favor and give them a solid half-hour in the fridge. Your future self will thank you!
Furthermore, make sure you’re not rushing the melting process of the chocolate. It’s tempting to blast it for a longer time in the microwave, but chocolate can burn quickly. Use short bursts of heat and stir frequently to keep your chocolate rich and silky. I learned this the hard way, turning a batch into a grainy disaster!
Serving Suggestions
These No-Bake Peanut Butter Cheesecake Balls are perfect for any occasion! I love to serve them at gatherings—they always disappear faster than I can say “dessert.” I often arrange them on a pretty platter alongside fresh fruit, like strawberries or sliced bananas, adding a splash of color to my dessert spread.
When I find myself having a movie night, I’ll pour some popcorn, grab a few of these cheesecake balls, and make a cozy evening out of it. Who needs traditional snacks when you have these delicious bites to munch on? They pair wonderfully with some hot cocoa or a creamy latte, too!
Also, don’t underestimate the power of gifting! These little balls make fantastic homemade gifts. I love packaging them in a cute box or glass jar tied with a ribbon; they always evoke smiles and appreciation from friends and family. It’s a little way to brighten someone else’s day.
Variations & Customizations
There are so many ways to customize these No-Bake Peanut Butter Cheesecake Balls to suit your taste! If you’re a fan of chocolate, consider mixing in mini chocolate chips to the filling for an extra burst of flavor. You can also use a combination of creamy peanut butter and crunchy peanut butter for a fun texture twist that I find particularly delightful.
You might want to experiment with different coatings as well. While I love the classic chocolate, you can also try using white chocolate or even a yogurt coating. It adds an entirely new flavor profile to your cheesecake balls and is always fun to try out in my kitchen.
Lastly, if you’re looking to make them more decadent, I sometimes add a drizzle of melted chocolate on top after they’ve set. It adds a gorgeous finish and elevates the presentation. Experimenting with different toppings and fillings is part of the fun, and I always find joy in discovering new combinations!
How to Store, Freeze & Reheat
Storing these No-Bake Peanut Butter Cheesecake Balls is super easy! I keep them in an airtight container in the refrigerator, where they can last for about a week—if they last that long! Their creamy texture holds up well, and I love that they’re always ready to satisfy my sweet cravings.
If you find yourself with a surplus (which I don’t recommend because they’re so good!), you can also freeze them. I usually freeze them on the baking sheet until solid, then transfer them to a freezer-safe container or bag. They can last for about three months in the freezer. Just thaw them overnight in the refrigerator before serving.
Reheating isn’t necessary since they are intended to be enjoyed cold. Just take them straight from the fridge or freezer, and you’re good to go! When they’re chilled, the flavors seem to meld together even more, making every bite a little piece of heaven.
Conclusion
I hope you enjoy making these No-Bake Peanut Butter Cheesecake Balls as much as I do! They’re an absolute treat that brings joy to any gathering or quiet evening at home. With their creamy texture and delightful flavor, they are bound to become a favorite in your kitchen as they have in mine. Happy baking—I mean, mixing! Enjoy your delicious treats!