Common Mistakes to Avoid
The first time I made this, I used a store-bought graham cracker crust. I thought I was saving time, but it was a disaster. The filling is so rich and heavy that it completely overwhelmed the thin, often overly-sweet pre-made shell. The crust got soggy and collapsed when sliced. Making your own crust is simple, sturdier, and tastes infinitely better. It provides the essential textural contrast to the creamy filling. Don’t cut this corner—I promise it’s worth the 5 minutes of active effort.
Another pitfall is not whipping the cream enough. You want truly stiff peaks. If your whipped cream is still soft and poufy when you stop, the pie filling won’t have enough structure to set firmly. It will still taste amazing, but you’ll need to serve it with a spoon rather than a slice. I judge it by tipping the bowl slightly—if the cream moves or slides, I keep whipping. When it holds its position firmly, it’s ready.
Serving Suggestions
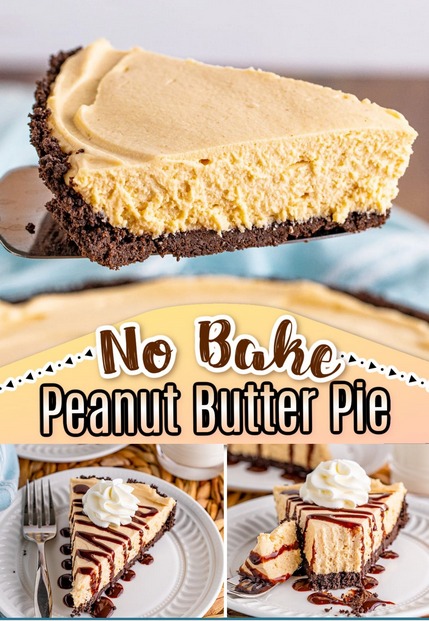
I like serving this pie straight from the fridge, chilled cold. For a gorgeous presentation, I pipe a border of extra whipped cream around the edge using a star tip and then shower the top with a flurry of finely chopped salted peanuts and a drizzle of melted chocolate or chocolate syrup. The salt from the peanuts cuts through the sweetness beautifully. Sometimes, for a simpler treat, I just add a dollop of whipped cream and a single mini peanut butter cup on each slice.
For a real showstopper, I’ll warm a little hot fudge sauce to serve on the side. The contrast of the cold, creamy pie with a warm, rich sauce is heavenly. A cup of strong black coffee or a glass of cold milk are my absolute favorite beverage pairings. They balance the richness and make the whole experience feel complete.
Variations & Customizations
This pie is a wonderful canvas. For a chocolate-peanut butter twist, I’ll sometimes mix ½ cup of mini chocolate chips into the filling right before I pour it into the crust. They add little bursts of texture. You can also swap the chocolate graham crackers for regular ones, or even use Oreo crumbs (leave the filling in!) for a cookies-and-cream vibe. Just use the same butter ratio for the crust.
For my friends who aren’t big on peanut butter (rare, but they exist!), I’ve successfully made a version with Nutella. Simply replace the peanut butter with an equal amount of the chocolate-hazelnut spread and use a plain graham cracker crust. It’s divine. You can also fold in crushed pretzels for a sweet-and-salty crunch, or swirl in some raspberry jam after you’ve poured the filling for a PB&J effect.
How to Store, Freeze & Reheat
This pie stores beautifully. Covered tightly with plastic wrap or in an airtight container, it will keep in the refrigerator for 4-5 days. The crust may soften slightly on the very bottom by day four, but it’s still delicious. I do not recommend leaving it out at room temperature for more than an hour or so, as the filling can start to soften and lose its shape.
Yes, you can freeze it! I wrap the whole pie (or individual slices) tightly in a layer of plastic wrap and then a layer of aluminum foil. It will keep for up to 2 months. To serve, I transfer it to the refrigerator to thaw overnight. The texture is slightly denser after freezing, but still incredibly tasty. I would not recommend trying to reheat it—this is a proudly chilled dessert.
FAQ Section
Can I use reduced-fat cream cheese or whipped topping?
I’ve tried the reduced-fat cream cheese, and while it works, the filling is less rich and can be a bit gummier in texture. For the best mouthfeel, stick with full-fat. As for whipped topping (like Cool Whip), you can substitute it for the whipped heavy cream in a pinch. The flavor will be sweeter and less nuanced, and the texture a bit airier, but it will set.
My filling is too soft after chilling. What happened?
This usually means the cream was under-whipped, or the ingredients were too warm when combined. It also happens if you try to slice it before it’s fully set. Give it more time in the fridge, up to 8 hours or overnight. For next time, ensure your cream is at stiff peaks and that your filled pie chills for the full, recommended time.
Can I make this gluten-free?
Absolutely! Simply use your favorite gluten-free graham-style crackers or gluten-free chocolate cookies for the crust. Ensure your other ingredients (like peanut butter) are certified gluten-free. The filling is naturally gluten-free, so it’s a very easy swap.
Conclusion
This No-Bake Peanut Butter Pie has become my go-to dessert for potlucks, birthdays, and those “I just need something wonderful” days. It’s the recipe friends and family ask me for by name. There’s something so satisfying about creating something this impressive with such ease and without ever heating up the kitchen. I hope it brings as much joy to your table as it has to mine. Give it a try, and don’t forget to come back and tell me all about it! Happy no-baking