Freezing is a fantastic option. Freeze the baked and iced rolls individually on a parchment-lined sheet until solid, then transfer them to a freezer bag. They’ll keep for up to 2 months. This is my secret for having impressive treats on hand for unexpected guests. Don’t freeze them before baking—the leavening in the dough won’t survive the freeze-thaw cycle well.
To reheat, my preferred method is the microwave. For a room-temperature roll, 10-15 seconds is perfect. For a frozen roll, microwave it for about 30-45 seconds. You can also use a toaster oven or conventional oven at 300°F for 5-10 minutes if you want to recrisp the exterior. I’ve tried the microwave, oven, and air fryer, and for reviving that soft, gooey, just-baked texture quickly, the microwave works surprisingly well.
Nutrition Information
Let’s be real—this is a celebratory treat, not an everyday health food. Each roll is a hearty, indulgent combination of refined carbohydrates, sugars, and fats from the dough, filling, and icing. It’s designed for pure enjoyment and sharing. I make no claims about these being “light,” but when you want a special dessert, going all-in on something this delicious is part of the joy.
That said, being aware can help with portion control. One of these stuffed rolls is incredibly satisfying. The Oreo and the extra filling make them more substantial than a regular canned cinnamon roll. I find that one, served with a cup of black coffee or a glass of milk, is the perfect amount to satisfy a serious sweet craving without feeling overly stuffed. Listen to your body—it’s rich!
If you’re looking for ways to slightly modify the profile, you could use a “sugar-free” canned cinnamon roll dough if available, or a reduced-fat cream cheese for a homemade icing. But in my experience, making swaps like that often compromises the texture and soul of the recipe. My philosophy is to enjoy treats like this mindfully and in moderation, savoring every glorious, messy bite.
FAQ Section
Can I make these ahead of time?
Yes, absolutely! You can assemble the rolls (seal the Oreo inside, place in the dish) the night before. Cover the dish tightly with plastic wrap and refrigerate. In the morning, let them sit on the counter while your oven preheats, then bake as directed. You may need to add 2-3 extra minutes to the bake time since they’ll be starting from cold.
My icing melted and disappeared into the rolls. Did I do something wrong?
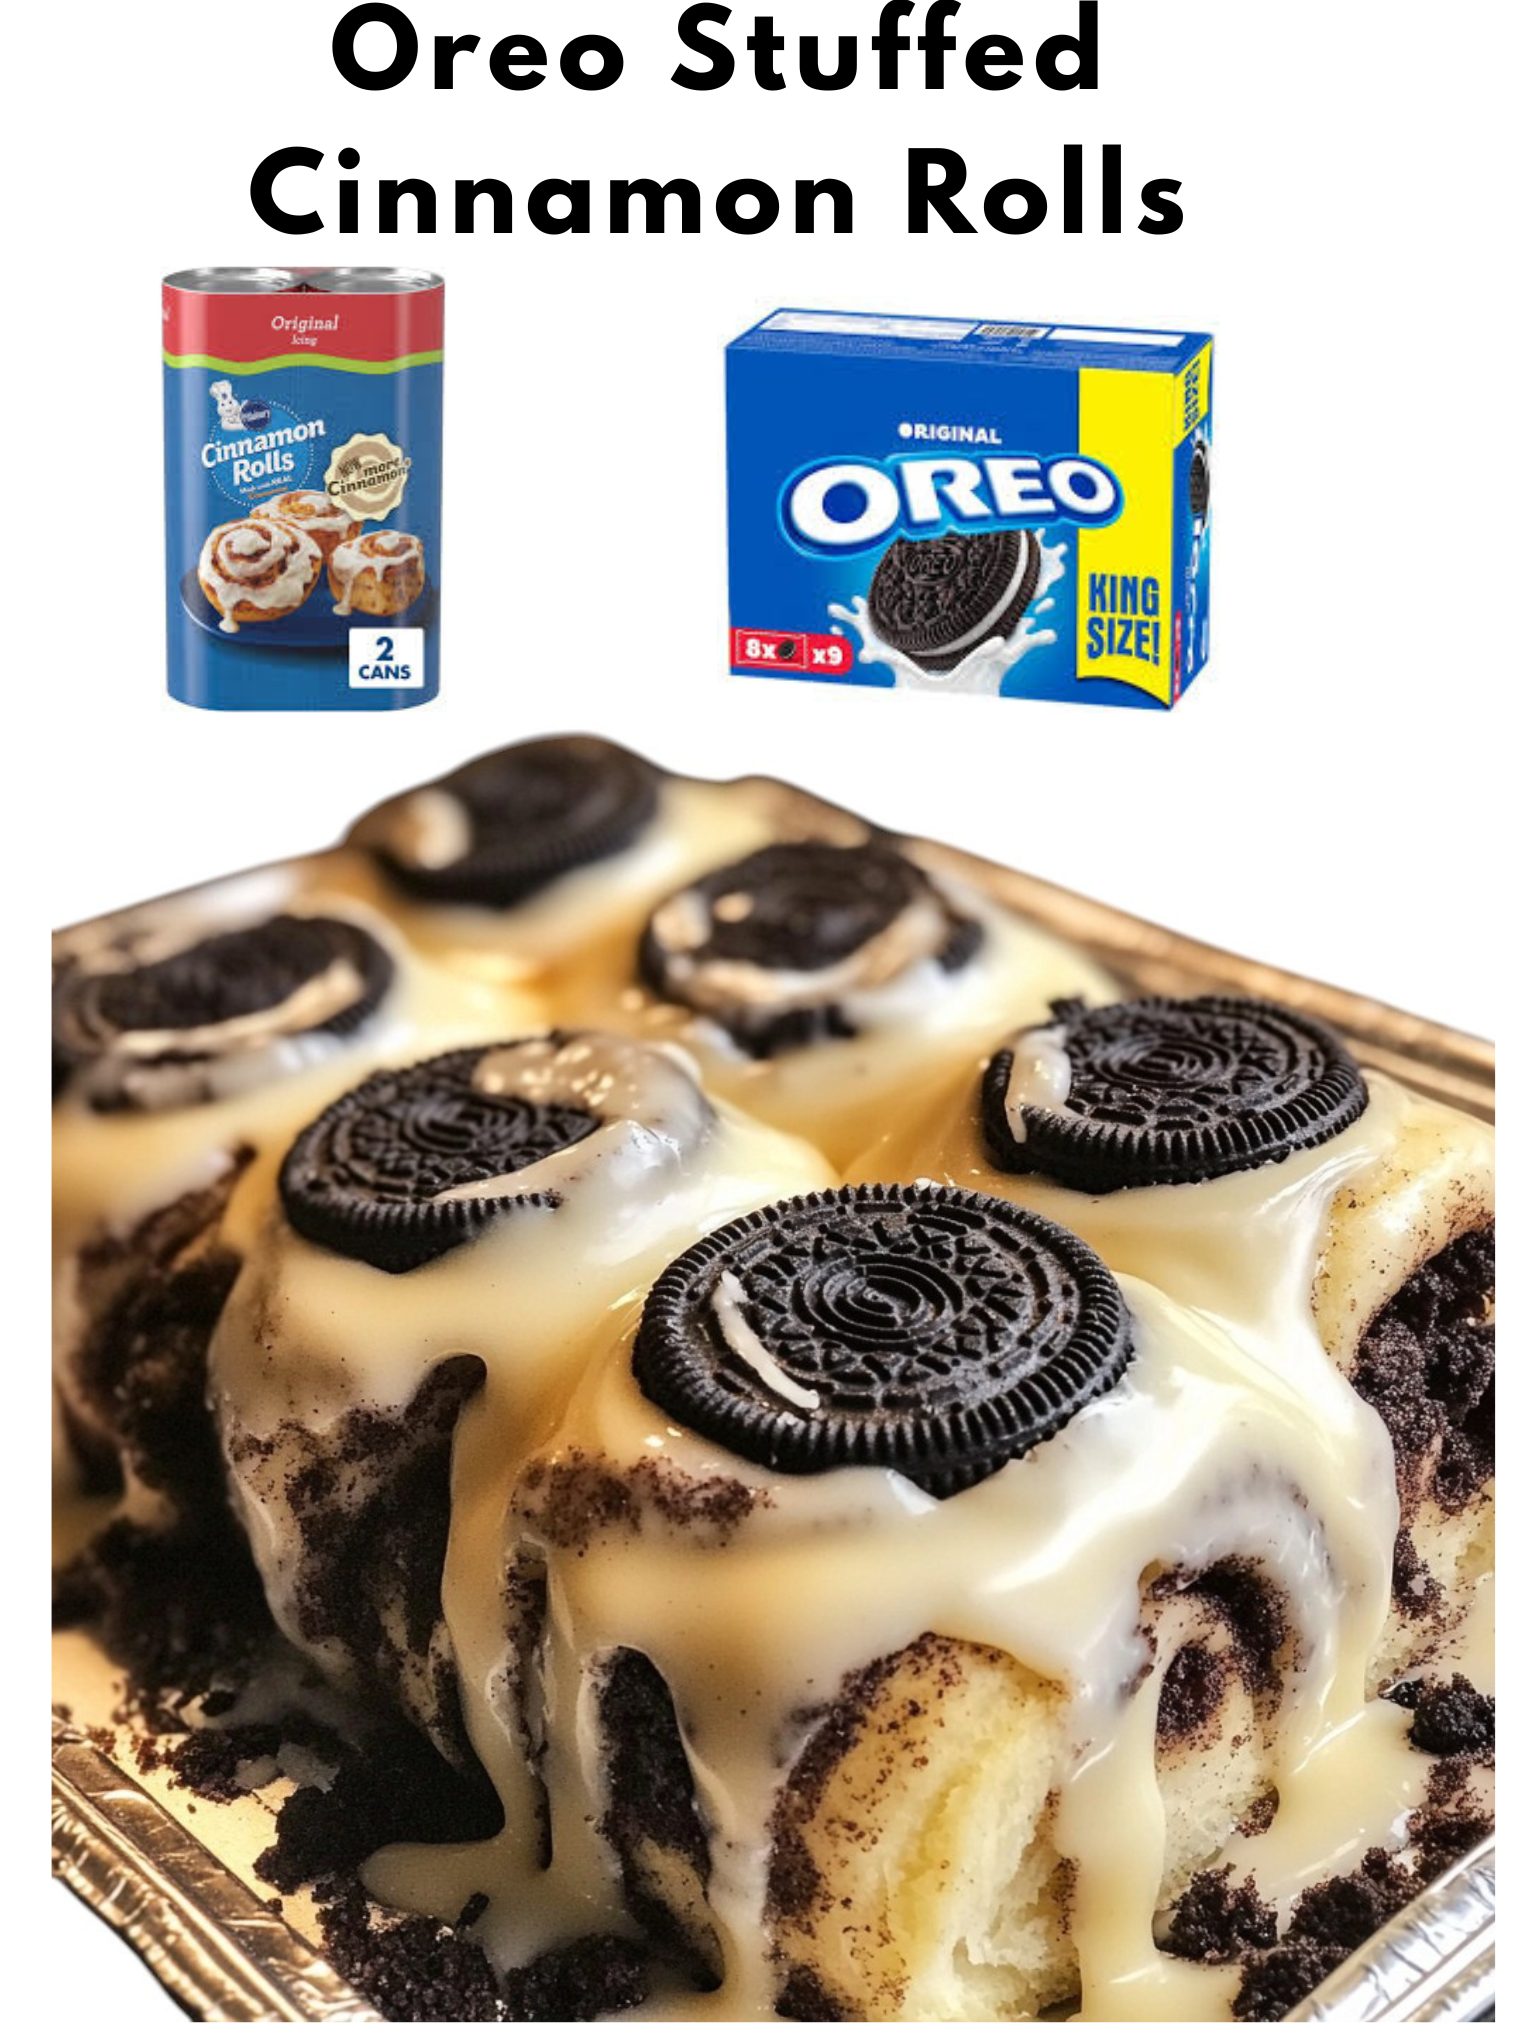
No, you did it perfectly! That’s exactly what you want to happen. The icing is meant to melt and seep into the nooks and crannies, creating a moist, glazed interior. If it sits on top in a thick layer, it means your rolls weren’t hot enough. The “disappearing” act is the sign of a pro.
Can I use homemade cinnamon roll dough?
Of course! If you have a favorite from-scratch dough recipe, by all means use it. Roll it out into a rectangle, sprinkle with the butter and cinnamon-sugar, then place Oreos in a row, roll it up, and slice. It will be phenomenal. The canned dough is just a fantastic, reliable shortcut for when you want magic with minimal fuss.
The chocolate from the Oreo got hard. How do I prevent that?
This can happen if you overbake them. The Oreo cookie itself can become quite firm. The key is to bake just until the dough is golden brown and cooked through. The residual heat will continue to soften the cookie slightly as the rolls cool. If you find it’s still too hard for your liking, try using a slightly underbaked Oreo—maybe one that’s been left out for a day—next time.
What’s the best way to get a neat, round shape?
After you pinch the dough sealed, roll it gently between your palms to form a smooth ball. This helps redistribute the dough evenly around the cookie and creates a tight seal. Placing them seam-side down in the dish also helps them hold their shape as they bake and puff up.
Conclusion
Baking these Oreo-Stuffed Cinnamon Rolls has become one of my favorite kitchen adventures. They’re a guaranteed smile-maker, a recipe that feels clever and indulgent at the same time. The process is simple enough for a beginner, but the result looks and tastes like you spent hours. So, gather your two cans of dough and a pack of Oreos, and give it a try. I promise the aroma filling your kitchen and the chorus of “mmm’s” from whoever you share them with will make it all worthwhile. Happy baking