Pro Tips for Best Results
I tested the rolling technique three different ways: cooling flat, rolling warm, and rolling after chilling. Rolling the warm cake in the towel is the undisputed winner. It seems counterintuitive to handle a hot cake, but that’s when it’s most pliable. The steam inside the roll keeps it moist, and as it cools in that shape, it “remembers” it, making the final roll with filling a breeze. The first time I tried letting it cool flat, it cracked disastrously when I tried to roll it with the filling. Lesson learned the hard way so you don’t have to!
The temperature of your ingredients is a silent game-changer. Cold cream whips up with more volume, giving the filling a mousse-like lightness instead of a dense, heavy feel. Room temperature cream cheese and eggs incorporate so much more smoothly, preventing a grainy filling or a deflated cake. I once tried to rush it with cold cream cheese, and I ended up with tiny lumps throughout my filling. It still tasted great, but the texture wasn’t that perfectly smooth, luxurious mouthfeel we’re after.
Finally, don’t skimp on the chilling time. I know you’ll be eager to slice into it, but that hour in the fridge (or even 30 minutes in the freezer in a pinch) allows the filling to firm up and the whole log to “settle.” When you go to slice it with a sharp, warm knife (run it under hot water and dry it between cuts), you’ll get those stunning, clean swirls in every piece. A cake that oozes everywhere when sliced still tastes good, but one that holds its shape looks and feels like a professional masterpiece.
Common Mistakes to Avoid
The biggest mistake I made the first time was overbaking the cake. I was so scared of it being underdone that I left it in for 16 minutes. The result was a cake that was dry around the edges and cracked immediately upon rolling. This is a thin sponge—it bakes fast! Set that timer for 12 minutes and check. It should look set and springy, and a toothpick will come out clean or with a few moist crumbs. Pull it then, even if you’re doubtful. A slightly underdone sponge is always more flexible than an overdone one.
Another classic pitfall is using the wrong peanut butter or not measuring your flour correctly. I made this mistake for a friend with dietary restrictions and used a natural, oily peanut butter. The filling never truly set; it was delicious but soupy. For flour, please spoon it into your measuring cup and level it off. Scooping directly from the bag packs in too much flour, leading to a dense, tough cake. These little details seem small, but they are the backbone of why this recipe works so beautifully every single time.
Serving Suggestions
I love serving this cake straight from the fridge, slightly chilled. It slices beautifully and the cool filling is such a lovely contrast to the rich cake. For a simple, elegant finish, I dust the top with a light snowfall of cocoa powder or a drift of powdered sugar just before bringing it to the table. It highlights the beautiful spiral and looks so professional with minimal effort.
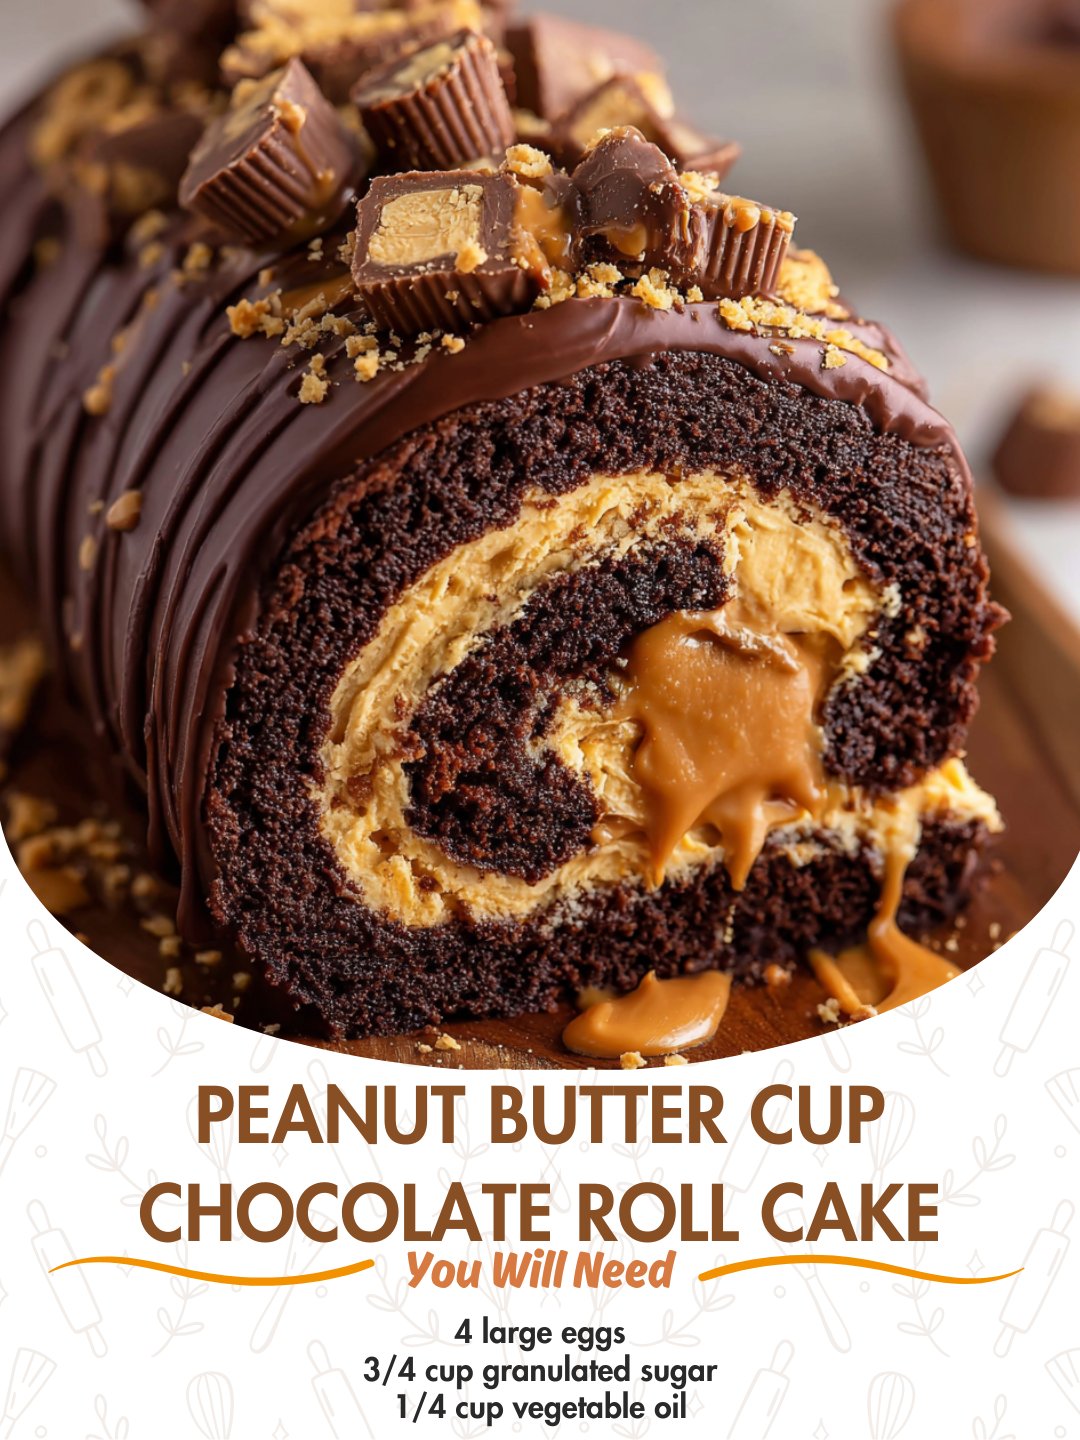
For a more decadent presentation, I’ll drizzle the whole log with a simple chocolate ganache (just warmed cream poured over chocolate chips) and then sprinkle a handful of chopped peanut butter cups along the top. The added crunch and extra peanut butter punch take it to party-level status. On a cozy night in, I’ll just slice a piece, maybe add a tiny dollop of extra whipped cream on the side, and call it heaven.
This cake is incredibly versatile for events. I’ve served it as the grand finale for dinner parties, taken it to potlucks where it’s always the first dessert to disappear, and even made it for birthday celebrations. It’s rich, so you can get a surprising number of slices from one roll, making it a fantastic choice for feeding a crowd without days of kitchen prep. It always, without fail, earns the highest compliment: “You made this?!”
Variations & Customizations
If you’re a fan of texture, try folding 1/2 cup of finely chopped peanut butter cups into the filling right before spreading it on the cake. The little bursts of chocolate and peanut butter throughout each slice are absolutely fantastic. I’ve done this for a kid’s birthday party, and it was a massive hit. You could even press whole mini peanut butter cups into the top of the filled log before chilling for a fun, chunky look.
For a nut-free version, I’ve successfully substituted the peanut butter with sunflower seed butter. The flavor profile changes, of course, but you still get that wonderful salty-sweet contrast and a beautifully creamy filling. I’d also recommend using a seed butter that’s stabilized, similar to conventional peanut butter, to avoid separation. Another fun twist is swapping the peanut butter filling for a Nutella-based mousse for a purely chocolate-hazelnut experience.
You can also play with the cake itself. Adding a 1/2 teaspoon of cinnamon to the dry ingredients gives it a warm, subtle note that’s really lovely. For a mint-chocolate version, you could replace the vanilla in the filling with a tiny drop of peppermint extract (be careful, it’s potent!) and maybe even add a few drops of green food coloring to the filling for a festive touch. The basic sponge recipe is your perfect, reliable canvas.
How to Store, Freeze & Reheat
To store, I keep the cake roll tightly wrapped in plastic wrap in the refrigerator. It stays perfectly fresh and delicious for up to 4 days. The filling actually helps keep the cake moist. I don’t recommend leaving it at room temperature for more than an hour or two because of the dairy in the filling. If you need to transport it, I chill it until it’s very firm, then wrap it well and place it in a cooler.
Yes, you can absolutely freeze this cake! I wrap the whole roll (or individual slices) tightly in a layer of plastic wrap followed by a layer of aluminum foil. It freezes beautifully for up to 2 months. To serve, I transfer it to the refrigerator to thaw overnight. You don’t need to reheat it—it’s meant to be enjoyed chilled. I’ve found that freezing actually doesn’t compromise the texture at all, making this a fantastic make-ahead dessert for busy holidays or unexpected guests.
Conclusion
This Peanut Butter Cup Chocolate Roll Cake has become my go-to recipe when I want to impress, comfort, or simply treat myself and the people I love. It’s a process that feels like a joyful kitchen project, with a result that never fails to bring smiles. I hope you’ll give it a try, trust in the process, and experience that same little thrill I get when I unveil the perfect swirl. Happy baking, my friend—I can’t wait for you to taste it