Pro Tips for Best Results
I tested the sweetener ratio three different ways, and the 1/3 cup measurement is the absolute sweet spot. A quarter cup left the balls a bit too savory and dry for my taste, and a half cup made them overly sweet and a bit too sticky. The 1/3 cup provides just enough sweetness to complement the peanut butter and chocolate without overwhelming them. It’s the perfect balance that keeps you coming back for more.
If your mixture seems too dry and won’t come together after thorough mixing, don’t panic. This can happen depending on the brand of peanut butter or how thick your honey is. Simply add an extra teaspoon of peanut butter or honey, one at a time, and mix again. Conversely, if it feels too wet and sticky to roll, a tablespoon of extra oats or ground flaxseed will absorb that excess moisture perfectly. It’s a very forgiving recipe.
For the ultimate flavor experience, I highly recommend toasting your rolled oats and shredded coconut before mixing them in. I spread them on a baking sheet and toast them in a 350°F oven for 5-7 minutes, just until fragrant and lightly golden. It adds a whole new dimension of nutty, toasty flavor that makes these balls taste truly gourmet. It’s an extra step, but one I now do every single time because the difference is that noticeable.
Common Mistakes to Avoid
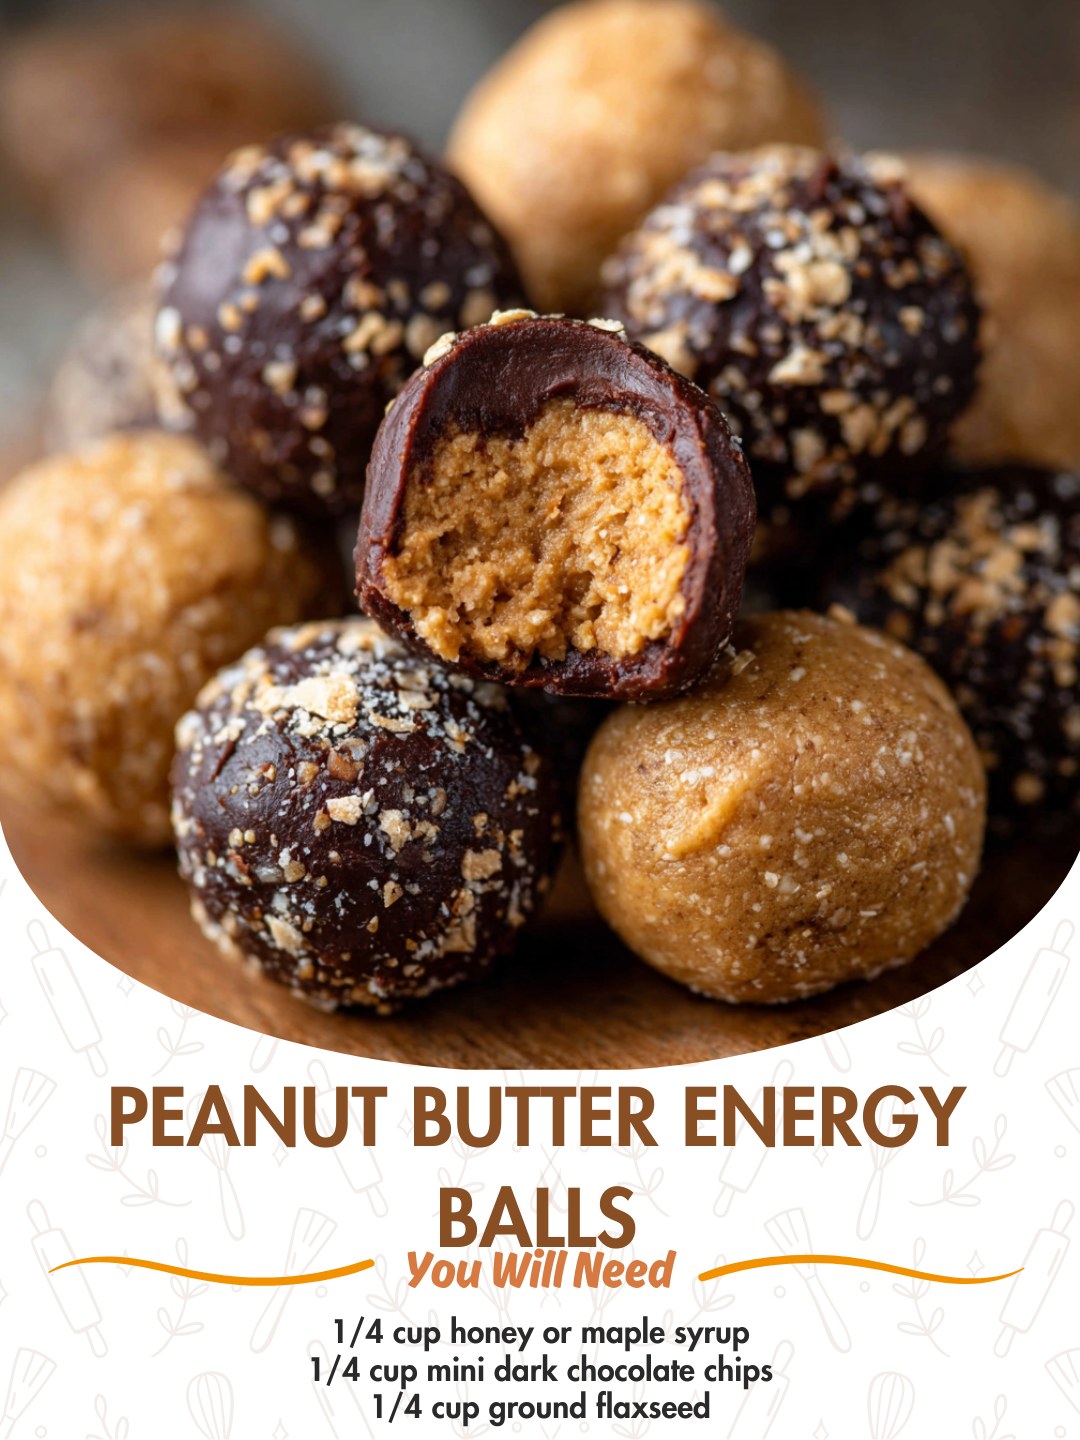
The most common mistake is using the wrong peanut butter. I made this error the first time—don’t do what I did! That standard, shelf-stable jar with added sugars and hydrogenated oils will give you a greasy, loose mixture that refuses to set properly. It might taste okay, but you’ll end up with a mess. Stick to natural, drippy, stir-it-yourself peanut butter. The only ingredients should be peanuts and maybe salt. This is non-negotiable for the right texture.
Another pitfall is skipping the chilling time. These are no-bake balls, so they need the fridge to become their best selves. Trying to eat them or pack them right away will lead to disappointment, as they’ll be soft and crumbly. Think of the chilling time as the “setting” phase, just like letting a sauce simmer or a cake cool. It’s an active part of the recipe, not a suggestion. Set a timer, walk away, and let the refrigerator do its magic.
Serving Suggestions
I love packing two of these in a small reusable container for my 3 p.m. desk snack. Paired with a cup of green tea or black coffee, they completely obliterate that afternoon craving for something sugary from the vending machine. The protein, fiber, and healthy fats keep me full and focused for hours, unlike a candy bar that would leave me crashing later.
For my kids, I sometimes serve one alongside apple slices and a glass of milk for an after-school power-up. They think they’re getting a chocolate treat (and they are!), but I know they’re also getting flaxseed, oats, and good fats. It’s a parenting win that feels easy and guilt-free. I just make sure to use mini chocolate chips so every bite has a little hint of sweetness.
On weekends, I’ve been known to place a few on a pretty plate alongside some fresh berries and call it a perfectly respectable, fuss-free dessert for guests. People are always delighted and ask for the recipe. It’s a wonderful way to end a casual dinner party, and since they’re already made, I get to relax and enjoy my company instead of fussing in the kitchen.
Variations & Customizations
The beauty of this base recipe is how endlessly adaptable it is. One of my favorite variations is a “Tropical” version: I use almond butter instead of peanut butter, swap the chocolate chips for chopped dried mango and pineapple, and add a teaspoon of orange zest. It’s like a little vacation in a bite. I also love a “Cookie Dough” style where I add a tablespoon of almond flour and use butterscotch chips instead of chocolate.
For a protein-packed version perfect for post-workout, I’ll stir in a scoop of vanilla or chocolate protein powder. You have to add an extra splash of milk (dairy or non-dairy) or honey to compensate for the dryness of the powder, but it creates a seriously filling snack. I’ve also successfully made these nut-free by using sunflower seed butter—just be aware it can sometimes give the mixture a slight green tint (it’s a harmless chemical reaction!), but the taste is fantastic.
If you’re not a chocolate person, try chopped dried cherries or cranberries, raisins, or even chopped nuts like pecans or almonds. A friend of mine swears by adding a tablespoon of espresso powder for a mocha kick. The point is, once you have the basic peanut butter-honey-oat base down, your pantry is the limit. I encourage you to play around and find your own signature combination.
How to Store, Freeze & Reheat
Storage is wonderfully simple. I keep my energy balls in a single layer in a sealed container in the refrigerator. They stay perfectly fresh and firm for up to two weeks this way, though they’ve never lasted that long in my house! If I’m stacking them, I put a small piece of parchment paper between layers to prevent any potential sticking. They are fine at room temperature for a few hours, making them perfect for packed lunches or hikes, but for long-term keeping, the fridge is your friend.
These freeze like a dream, which is great for making a double batch. I lay the rolled, unchilled balls on a parchment-lined baking sheet and “flash freeze” them for about an hour until they’re solid. Then, I transfer all the frozen balls to a freezer-safe bag or container. They’ll keep for up to three months. To enjoy, I just pull out as many as I need and let them thaw in the fridge overnight or for a few hours on the counter. No reheating is needed—they’re meant to be eaten cool or at room temperature.
Conclusion
These Peanut Butter Energy Balls have become more than just a recipe in my kitchen; they’re a reliable little joy, a burst of energy I can always count on. They remind me that the best foods are often the simplest ones, made with real ingredients and a bit of love. I hope this recipe finds its way into your routine, saving you from hunger crashes and bringing a moment of delicious satisfaction to your busy days. Now, go raid your pantry—I have a feeling your first batch is waiting to be made. Enjoy every bite