For the next step, add the heavy cream, whole milk, vanilla extract, lemon juice, and a pinch of salt to the cream cheese mixture. Using the hand mixer, beat everything together until the mixture is light and fluffy. I often find myself tasting it at this stage; it’s hard to resist! Once everything is combined, fold in those crushed raspberries using a rubber spatula, ensuring they are evenly distributed throughout the mixture. The gorgeous pink color at this point is simply amazing!
Now it’s time for the ice cream maker. Pour the creamy mixture into the ice cream maker and churn according to the manufacturer’s instructions. Typically, it’s about 20-30 minutes. You’ll know it’s ready when it resembles soft serve. To achieve that perfect ice cream texture, transfer the churned mixture into a freezer-safe container and press it down with the spatula to eliminate any air pockets. Cover it with a lid or plastic wrap, then freeze for at least 4 hours or until firm.
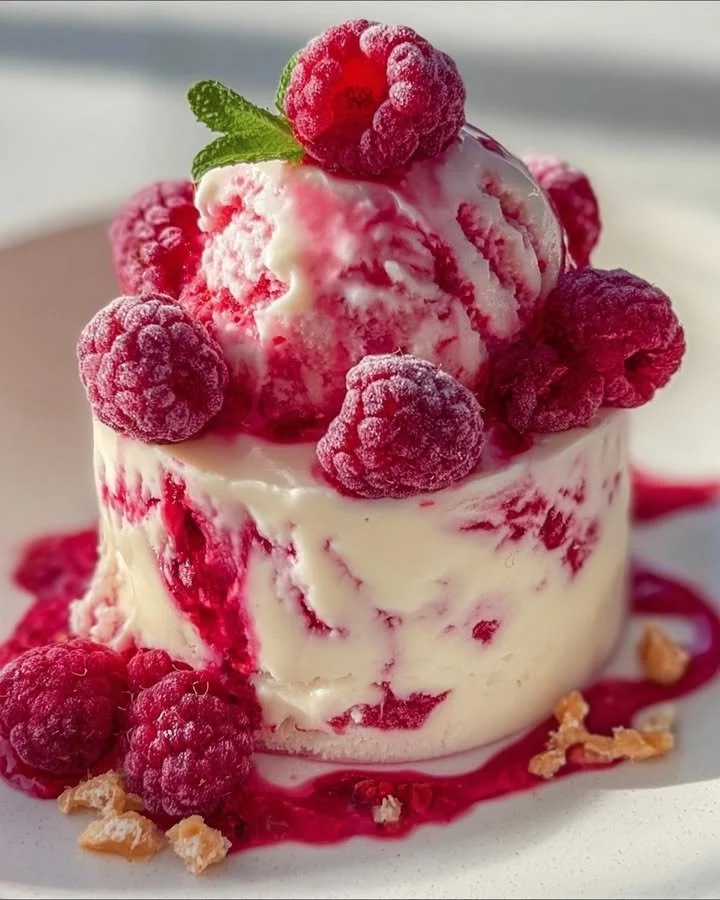
Finally, when you’re ready to serve, scoop the raspberry cheesecake ice cream into bowls and garnish with extra fresh raspberries for a lovely presentation. I love drizzling a bit of chocolate sauce over mine, but that’s just me! This delightful frozen treat will have you dreaming of summer long after the last bite.
Pro Tips for Best Results
I tested this raspberry cheesecake ice cream multiple times, and one major takeaway is to always use fresh raspberries. Frozen ones can work, but they tend to be mushy and won’t give that delightful swirl that fresh berries can provide. I also learned to chill your mixing bowl and beaters beforehand; it helps the heavy cream whip up better and gives you that nice fluffy texture!
If you live in a warmer climate, or if your kitchen tends to get a bit too warm, I suggest chilling the mixture for about an hour before churning. This extra step can make a difference, leading to a creamier finish. And let me tell you, one time I skipped this, and it came out a bit icy. Don’t make the same mistake I did!
Lastly, patience is key when it comes to freezing. While it might be tempting to dig in right after churning, letting it set in the freezer will give you that incredible ice cream scoop-ability. Trust me; the wait is worth it!
Common Mistakes to Avoid
First and foremost, do not skip the step of softening your cream cheese! I made that mistake once, and ended up with a lumpy mixture that didn’t taste half as good as it should have. Make sure to leave your cream cheese out for about 30 minutes before you start, so it blends easily.
Another mistake I’ve seen is people adding too much sugar. Don’t forget that the raspberries themselves can be quite sweet! Start with the suggested amount, and if necessary, adjust after tasting. I had a batch once that was downright too sweet—it was delicious in the first few bites but quickly became overwhelming.
Also, keep an eye on your ice cream maker’s instructions. Churning too long or too short can yield very different results; if you churn for too long, your ice cream may end up too hard. I’ve had a few batches where I was overly eager and they turned out more like a raspberry brick than soft ice cream. (See the next page below to continue…)