Pro Tips for Best Results
I tested the custard-dipping step three different ways: soaking the flattened bread before rolling, dipping the rolls, and pouring it over at the end. Dipping the assembled rolls is the winner. Soaking the flat bread makes it too fragile to handle, and just pouring doesn’t ensure even coverage. The quick dip gives you control and perfect saturation without a mess.
Here’s what I learned the hard way about the filling: more is not always better. My first attempt involved heaping the cinnamon sugar into the rolls, which led to a major syrup leak during baking, causing a sticky, burnt mess on the bottom of my oven. A thin, even layer is key. It melts and caramelizes into every layer without overflowing.
Don’t skip the resting time after assembly, before baking. I let the assembled wreath sit for about 10 minutes after adding the last of the custard. This lets the bread fully absorb the liquid, which means every single bite is consistently soft and custardy, instead of having dry patches. It’s a small step with a huge payoff in texture.
Common Mistakes to Avoid
I made a classic mistake the first time: I used cold butter for the filling. I was in a hurry and thought I could just smear it on. Big mistake. It tore the delicate rolled bread and created lumpy, uneven pockets. The wreath baked unevenly, and some rolls were dry where the butter hadn’t melted properly. Trust me, take the 30 minutes to let your butter truly soften on the counter. It makes the process smooth and seamless.
Another pitfall is overloading the pan. You want the rolls to be snug so they support each other as they bake, but if you force in too many, they’ll bake up into a dense, doughy mound instead of distinct, fluffy rolls. They need a little room to expand and puff up. If you have an extra roll or two that doesn’t quite fit, just bake it in a ramekin on the side—a lovely cook’s treat!
Serving Suggestions
I love serving this wreath straight from the pan while it’s still warm, letting everyone pull apart their own rolls. It creates such a fun, interactive experience. I place the pan on a trivet right in the middle of the table alongside the serving utensils. The sight of that glossy, glazed wreath always gets immediate applause. It feels communal and celebratory.
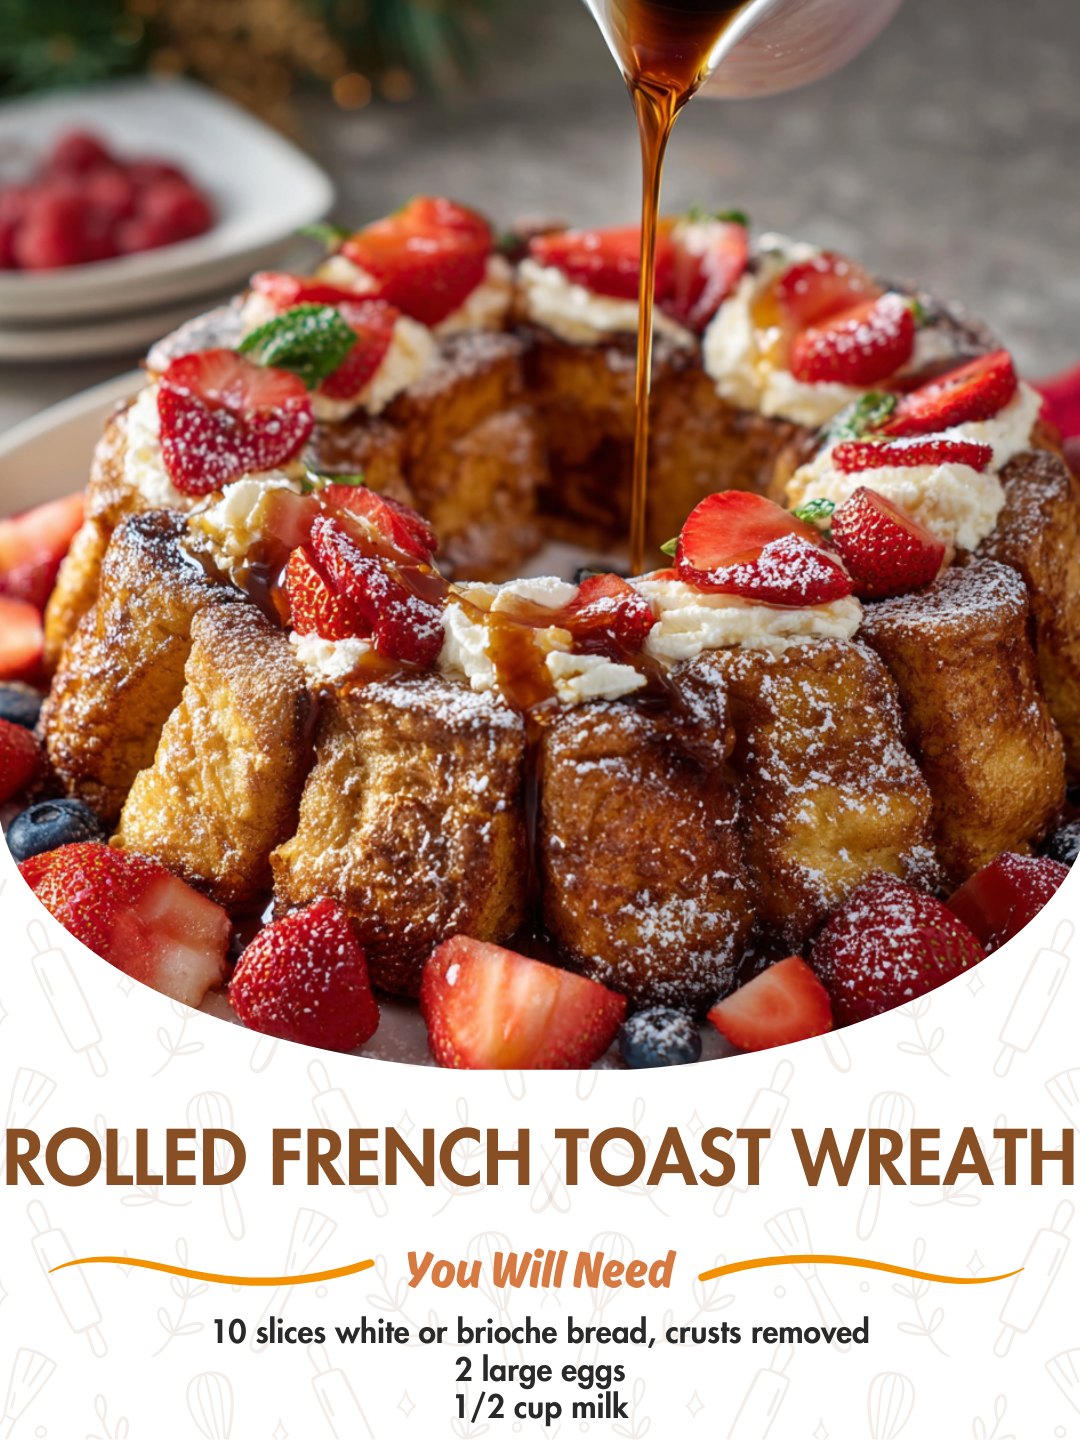
For accompaniments, I keep it simple to let the wreath shine. A big bowl of fresh berries—strawberries, blueberries, raspberries—adds a necessary pop of freshness and cuts through the sweetness. I also always have a dish of crispy bacon or maple sausage links on the side. The salty, savory contrast is absolutely perfect with the sweet, spiced bread.
If I really want to go all out, I’ll offer a few extra toppings. A small pitcher of warm pure maple syrup for the purists, a bowl of lightly sweetened whipped cream, and even a little dish of salted caramel sauce for the decadent souls at the table. But honestly, the wreath is so flavorful and moist from the glaze that it truly doesn’t need anything else.
Variations & Customizations
This recipe is a wonderful canvas. One of my favorite variations is an “Apple Pie” wreath. I add a layer of very finely diced, sautéed apples (cooked with a bit of butter and brown sugar until soft) over the cinnamon-butter spread before rolling. It bakes up with little pockets of soft, caramelized apple that are just incredible. You just need to be careful not to overfill.
For a nutty, crunchy twist, sprinkle a handful of finely chopped pecans or walnuts over the butter-sugar filling. The nuts toast up in the oven and add a fantastic textural contrast to the soft bread. I’ve also seen friends swirl a ribbon of cream cheese filling (cream cheese, a little sugar, and vanilla beaten together) with the cinnamon butter for a cheesecake-like flavor.
Feeling chocolatey? Swap the cinnamon sugar filling for a spread of Nutella or a mixture of melted chocolate and butter. It turns into the most indulgent chocolate-filled pastry. You can even add a handful of mini chocolate chips to the custard dip for double the chocolate. It’s a surefire hit with kids and adults alike.
How to Store, Freeze & Reheat
From experience, this wreath is best enjoyed the day it’s made, when the texture is at its peak. However, if you have leftovers, let them cool completely, then cover the pan tightly with plastic wrap or transfer slices to an airtight container. It will keep in the refrigerator for up to 2 days. To reheat, I strongly recommend using an oven or toaster oven (about 300°F for 10-15 minutes) to restore some crispness. The microwave will make it very soggy, very quickly—I learned that the hard way!
You can also freeze it successfully for up to a month. I wrap the entire cooled wreath (unglazed is best for freezing) tightly in plastic wrap, then in foil. To serve, I thaw it overnight in the fridge, then let it come to room temperature, warm it in a low oven, and then add the fresh glaze. Freezing with the glaze already on can make it weep and become unpleasantly sticky when thawed. This make-ahead trick has saved me on many a busy holiday morning.
Conclusion
This Rolled French Toast Wreath has become more than just a recipe in my home; it’s a tradition that signals celebration, togetherness, and the simple pleasure of a meal made with love. It has never failed to bring smiles to the table and that proud, cozy feeling to my heart. I hope it finds its way into your kitchen and becomes a cherished part of your own family’s story. Give it a try this weekend—I promise, the magic is in the making. Happy cooking