Let me tell you about the first time my kitchen smelled like a proper soft pretzel bakery. It was a chilly Sunday afternoon, and I was craving that unmistakable combination of a chewy, salty exterior and a soft, warm interior you can only get from a homemade pretzel. I was skeptical I could pull it off without a professional oven, but I took the plunge. The moment that iconic, almost nutty aroma from the baking soda bath hit the air, I was transported. That’s the magic I want to share with you—this recipe isn’t just about making a snack; it’s about creating a little bit of that joyful, comforting bakery atmosphere right in your own home.
Ingredients
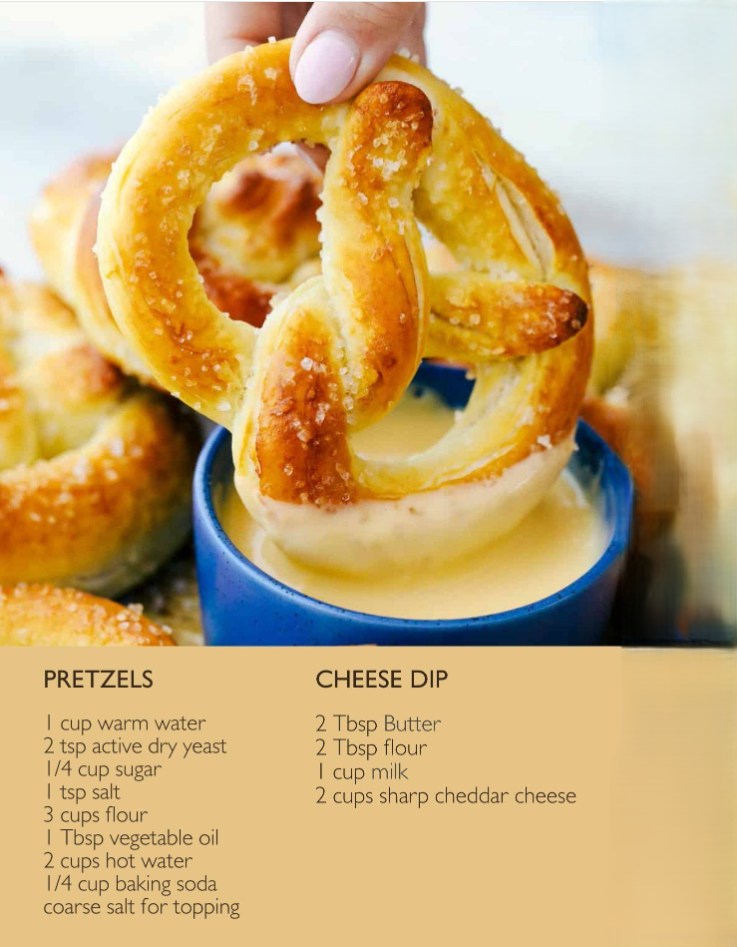
- 1 cup warm water (around 110°F)
- 2 tsp active dry yeast
- 1/4 cup sugar
- 1 tsp salt
- 3 cups all-purpose flour, plus more for dusting
- 1 Tbsp vegetable oil
- 2 cups hot water (for the bath)
- 1/4 cup baking soda
- Coarse salt (like kosher or pretzel salt) for topping
For the Cheese Dip:
- 2 Tbsp butter
- 2 Tbsp flour
- 1 cup milk
- 2 cups shredded sharp cheddar cheese
Don’t let the baking soda quantity scare you—it’s not a typo. This is the single most important step for achieving that classic pretzel flavor and deep golden-brown crust. Trust me, do not substitute baking powder or skip it; it makes a huge difference. For the yeast, make sure your water is truly just warm to the touch, not hot. I’ve killed yeast with overly eager water before, and your dough will just sit there, sad and unmoving. A good, sharp cheddar for the dip is non-negotiable in my book; mild cheddar just won’t give you that rich, tangy punch.
Equipment Needed
- Stand mixer with dough hook (or a large bowl and strong arms!)
- Large mixing bowls (two)
- Whisk
- Baking sheets (lined with parchment paper)
- Slotted spoon or spider strainer
- Small saucepan (for the cheese sauce)
- Sharp knife or bench scraper
- Clean kitchen towel
I’ll be honest: I make these by hand now, but I used my stand mixer the first few times, and it’s a wonderful helper if you have one. If you’re mixing by hand, just be prepared for a slightly sticky, firm dough that needs a good 8-10 minutes of kneading. The real equipment MVP here is the slotted spoon. Dipping the raw, proofed dough into the boiling baking soda water is a delicate operation, and a slotted spoon lets you lower and lift them gently without deflating your beautiful work. Don’t try to use tongs—I learned the hard way that they leave marks.
(See the next page below to continue…)