Step-by-Step Instructions
First, let’s build our incredible base. In my large bowl, I beat the softened cream cheese with the electric mixer until it’s completely smooth and creamy, with absolutely no lumps. This is the most important step for a silky texture! Then, I pour in the entire can of sweetened condensed milk and beat again until it’s fully incorporated and gloriously shiny. In a separate bowl, I whisk the instant pudding mix with the one cup of cold milk for exactly one minute—it will thicken quickly. Then, I scrape the pudding right into the cream cheese mixture and beat it all together. Finally, I fold in about two-thirds of the whipped topping with a spatula until no white streaks remain. The smell at this point is pure heaven.
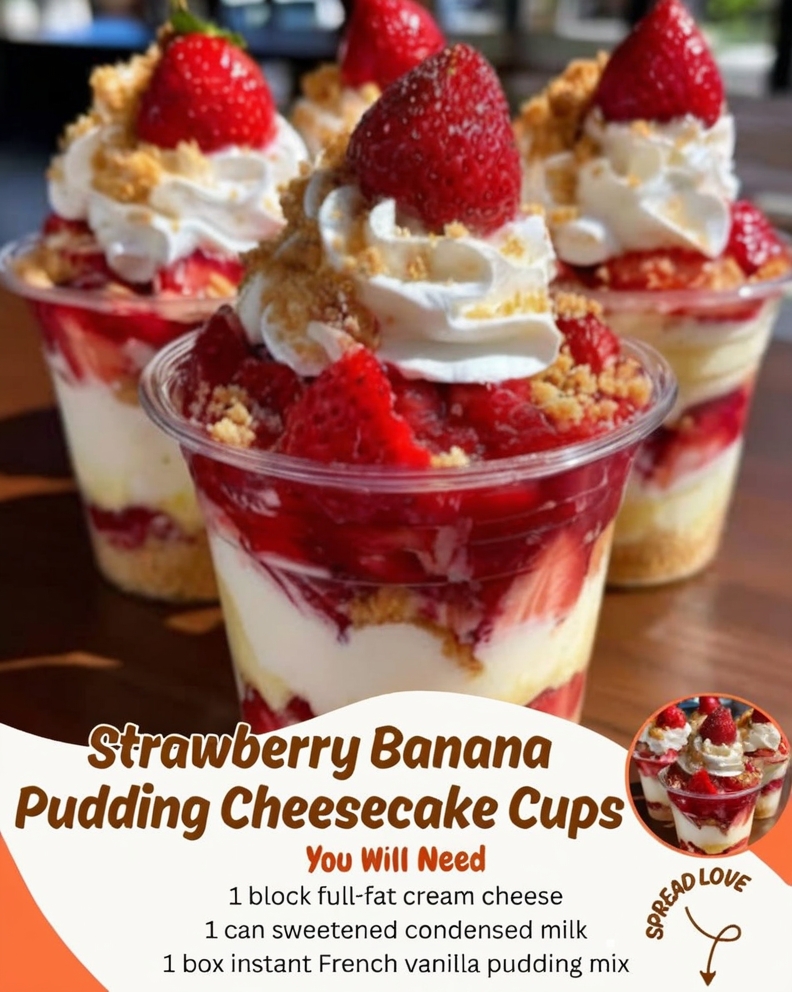
Now, for the fun layering part! I start by placing a few vanilla wafers at the bottom of each cup. Sometimes I give them a gentle press to break them up a bit. Then, I slice my speckled-ripe bananas and layer a few pieces over the wafers. Here’s a sensory tip I learned: immediately after adding the banana layer, I spoon a generous amount of the cheesecake filling right on top. This seals the bananas in and slows down the browning, keeping everything looking fresh.
Finally, I add a layer of sliced strawberries, then repeat: more filling, more fruit, and a final cookie on top for garnish. I reserved that last third of the whipped topping for a fluffy dollop on each cup right before serving. The first time I made these, I was too eager and assembled them four hours ahead—the wafers got a bit too soft. Now I know: for the perfect bite with a hint of crunch, I layer the cups about 1-2 hours before my guests arrive.
Pro Tips for Best Results
Let your cream cheese sit on the counter for a good hour or two before you start. I’ve tried microwaving it to soften it quickly, and it often gets too warm and can make your final filling a bit runny. Room-temperature cream cheese whips up dreamily smooth and is worth the tiny bit of planning. Also, make sure your milk is truly cold when you mix the pudding—it sets faster and firmer, giving the filling that perfect body.
When it comes to the fruit, I’ve tested this three different ways. Lightly mashing about a quarter of the strawberries with a fork (leaving the rest sliced) creates these incredible juicy bursts of flavor throughout the cups. It’s a game-changer. And for the bananas, slice them no more than 30 minutes before you assemble. I coat them very lightly with a squeeze of lemon juice if I’m prepping them early, but honestly, burying them under the filling immediately works just as well.
The whipped topping should be fully thawed but still cold. I take mine out of the freezer when I start softening the cream cheese. Folding it in gently with a spatula, instead of beating it, keeps the filling light and airy. One last thing: give the completed cups at least 30 minutes in the fridge before serving. That short chill lets the flavors really cozy up to each other and the texture to set perfectly.
Common Mistakes to Avoid
My biggest first-time mistake was using under-ripe bananas. I thought the bright yellow ones would hold their shape better, but they lacked sweetness and had an almost starchy taste that threw off the whole cup. The ripe, spotted bananas blend into the dessert seamlessly, adding the right amount of moisture and flavor. Don’t do what I did—embrace the brown spots!
(See the next page below to continue…)