Equipment Needed
- A heavy-bottomed, medium-sized saucepan or Dutch oven
- A wooden spoon or heatproof spatula
- A potato masher or fork
- A small plate (for the chill test)
- Clean glass jar(s) with lid
- A funnel (optional, but a lifesaver for neat pouring)
- A ladle
Step-by-Step Instructions
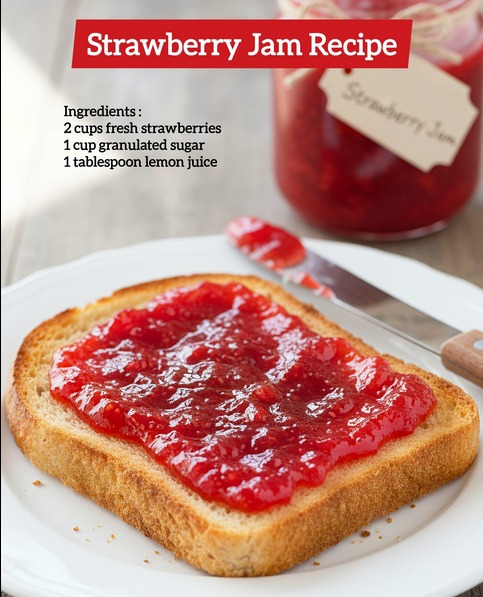
My process always starts with the prep. I take my hulled strawberries and gently crush them in a bowl with a potato masher. You’re aiming for a chunky pulp with some texture, not a complete puree. I used to get impatient and chop them finely, but I learned that crushing releases the natural juices in a way that creates a much better foundation for the jam. Once they’re crushed, I combine them with the sugar and lemon juice right in my heavy-bottomed pot. I give it a good stir and then let it sit for about 20-30 minutes. This maceration time is a secret weapon—it draws out even more juice from the berries and starts dissolving the sugar, which means less stirring and scorching later.
Then, it’s time for the fire. I place the pot over medium-high heat and bring the mixture to a full, rolling boil. This is where you need to be present. I made the mistake of walking away once to answer the door, and I came back to a volcanic, sticky eruption all over my stovetop. Stir it frequently with that wooden spoon, scraping the bottom to prevent any scorching. You’ll see it foam up vigorously—that’s normal. Let it boil hard like this for about 8-12 minutes. The mixture will begin to thicken noticeably, and the bubbles will become slower and glossier.
Knowing when the jam is done is the trickiest part, but I have a foolproof method. After about 8 minutes of boiling, I start testing. I place a small plate in the freezer when I begin cooking. Now, I spoon a tiny bit of the hot jam onto the chilled plate and let it sit for a minute. Push it with your finger; if it wrinkles and holds its line, it’s done. If it’s still runny, boil for another 2-3 minutes and test again. I’ve learned the hard way that undercooking leads to a syrup, and overcooking leads to candy. This chill test never lets me down.
Once it passes the test, I immediately remove the pot from the heat. I let the jam settle for just a minute or two; the bubbles will subside, and you’ll see the beautiful, clear red color emerge. Then, I carefully ladle it into my clean, warm jar. I always run my jar under hot water first—pouring hot jam into a cold jar is a great way to crack it. I leave about a quarter-inch of space at the top, wipe the rim meticulously with a damp cloth (any stickiness will prevent a seal), screw on the lid, and let it cool at room temperature. That satisfying pop as it cools and seals is my favorite sound.(See the next page below to continue…)