Another pitfall was forgetting to mix in the sugar with the raspberries—it’s easy to overlook in the excitement! The sugar is essential for drawing out the fruit’s natural sweetness, and skipping it can lead to a tart ice cream that doesn’t quite hit the right notes. I say, embrace the sweetness!
And be mindful of not letting your ice cream maker bowl get too warm before churning. If it’s not properly chilled, your ice cream may not firm up correctly, resulting in a texture that’s more akin to a milkshake. I always keep my bowl in the freezer for 24 hours in advance, ensuring it’s ready to go when I am!
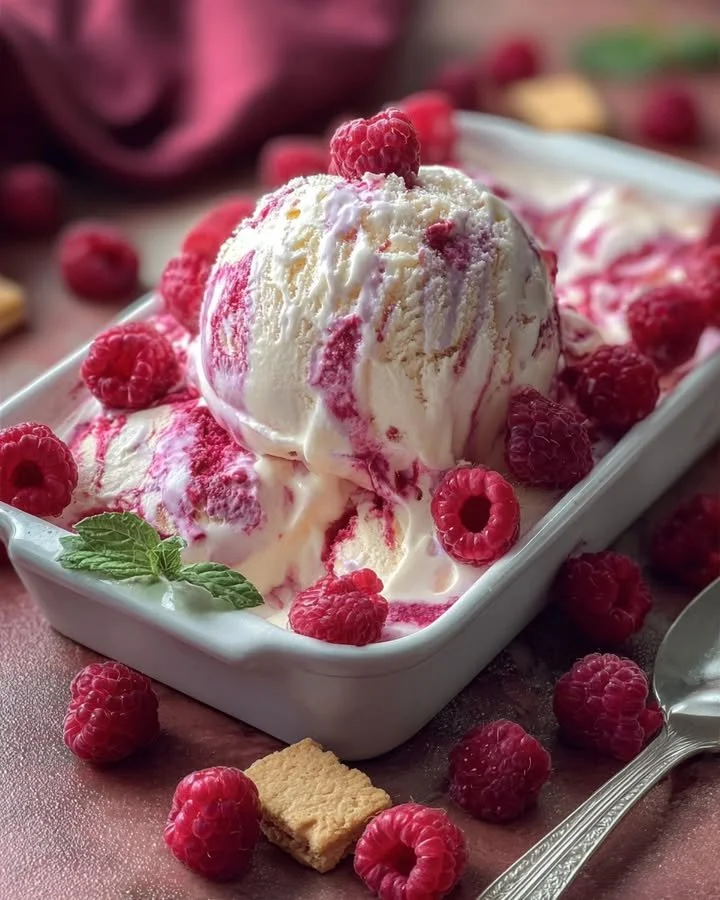
Serving Suggestions
When it comes to serving this luscious treat, I can’t resist a classic waffle cone—there’s something so nostalgic about it! I love scooping the ice cream right into a cone, adding a few more fresh raspberries on top for an extra pop of color and flavor. I can’t help but smile at how simple yet delightful it is, bringing that fun carnival feel right to my kitchen.
Another lovely idea is serving it in individual bowls, topped with a dollop of whipped cream and a sprinkle of crushed graham crackers. It gives the impression of a fancy dessert while still being easy to whip up for last-minute guests. Those little details make all the difference!
If I feel like going the extra mile, I like to drizzle a bit of homemade raspberry sauce on top of the ice cream. It’s super easy to make—just simmer some raspberries with sugar until thick—and adds an elegant touch that will impress anyone you serve it to.
Variations & Customizations
If you love a touch of chocolate, why not add some chocolate chips or swirl in some melted chocolate during the last few minutes of churning? The rich chocolate flavor complements the tangy raspberries beautifully—it’s like two desserts in one!
Another variation is to swap out raspberries for strawberries or blueberries—both fruits yield fantastic results, and you can even mix and match! I once made a mixed berry version during a garden party, and it was such a hit that everyone kept asking for the recipe!
For a little extra fun, I like to add a splash of lemon juice and zest to the mixture. It brightens up the flavors and gives that extra pop that pairs wonderfully with the creaminess of the cheesecake base. It’s a small change but adds such a delightful zing!
How to Store, Freeze & Reheat
Once your ice cream is fully chilled, store it in an airtight container. I always line the container with parchment paper to help maintain its texture and prevent ice crystals from forming—this keeps every scoop as smooth as the first. Be sure to press the parchment paper right down onto the ice cream as you store it to keep that creamy goodness intact.
It’s best to consume your homemade raspberry cheesecake ice cream within two weeks, although I doubt it will last that long! Just make sure to no double dip to keep things fresh. If you find yourself with leftovers, be sure to give it a little time at room temperature before scooping to ensure it softens a bit—this helps regain that beautiful texture after being stored in the freezer.
I wouldn’t recommend reheating ice cream, as it’s meant to be enjoyed in its cold, creamy state. Instead, if you’re feeling adventurous, try using any leftover ice cream in delicious desserts like milkshakes or even ice cream sandwiches—trust me, it adds a little magic to everything!
Conclusion
This Summer Raspberry Cheesecake Ice Cream is a true highlight of my summer cooking. From the easy preparation to the delightful taste, it embodies the essence of sunshine and celebration. I hope you enjoy making this recipe as much as I have, and that every scoop brings a little extra joy to your summer days. Happy ice cream making!