Pro Tips for Best Results
My first tip comes from direct, hungry experience: don’t skip the resting time. I was so eager to dig in the first time I made this that I served it immediately. The result was delicious but soupy on the plate. Letting it sit for those 5-10 minutes allows the creamy filling to thicken slightly and bind everything together, giving you that perfect casserole slice. It requires patience, but it’s worth every second.
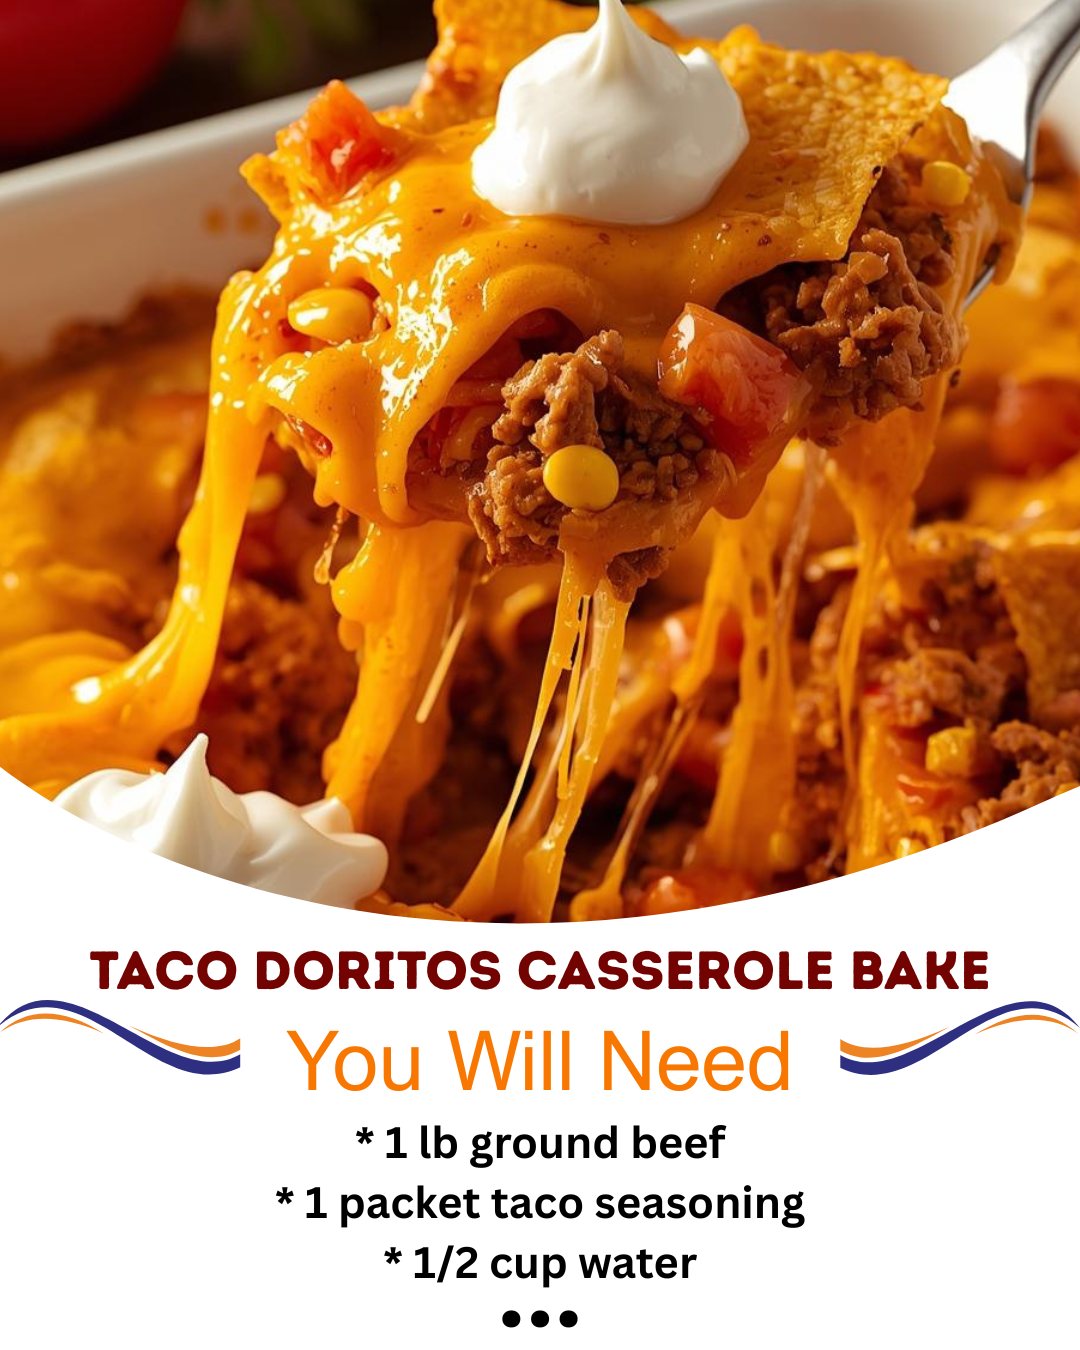
I’ve also tested the Dorito-crushing method three different ways: finely crushed in a bag, roughly hand-crushed, and leaving some whole chips on top. The winner is a rough hand-crush for the bottom layer, creating nooks for the filling to settle into, and a slightly finer crush mixed with a few bigger pieces for the top. This gives you structural integrity below and maximum crispy-to-soggy ratio on top. Trust me on this balance.
Finally, if you have an extra minute, toast your taco seasoning. After draining the beef, add the dry seasoning packet to the hot meat and fat and stir for 30 seconds before adding the water. This quick “blooming” of the spices in the heat unlocks a deeper, more rounded flavor compared to just simmering it in water. It’s a tiny step that makes a noticeable difference in the depth of your taco flavor.
Common Mistakes to Avoid
The most common pitfall, which I absolutely fell into on my first attempt, is over-mixing the Doritos into the filling. I thought, “More chips throughout means more crunch throughout!” I was so wrong. Stirring the chips into the wet filling before baking just turns them into a mushy, thick paste. The layered approach—chips on the bottom, filling in the middle, chips on top—is the sacred rule. Don’t do what I did.
Another mistake is using lean ground beef and not draining any fat. On the flip side, draining all the fat can leave the meat tasting dry. You want that happy medium. I use 80/20, cook it well, then tilt the skillet and use a spoon to remove the clear pooled grease, leaving behind just a sheen. This leaves you with flavorful, moist beef that isn’t swimming in oil, which would make the entire casserole greasy.
Serving Suggestions
I love serving this casserole right from the baking dish, family-style in the center of the table. The presentation with those flecks of red and green from the Rotel and the cheesy, chip-topped surface is just so inviting. I always put out a platter of “cool and crisp” toppings to balance the rich, warm flavors. My go-to’s are a big bowl of shredded iceberg lettuce for crunch, diced fresh tomatoes, and a dollop of extra sour cream.
For sides, I keep it simple. A quick, tangy side salad with a lime vinaigrette cuts through the richness perfectly. If I’m feeding a really hungry crowd, I’ll warm up some canned refried beans on the stovetop with a sprinkle of cheese. They’re the perfect creamy companion. And don’t forget the drinks! Ice-cold Mexican Coca-Cola or a light, citrusy beer are my personal pairing favorites.
The beauty of this dish is its complete flexibility. It’s a self-contained feast, so on a crazy night, I serve it with just those fresh toppings and call it a day. On a more relaxed weekend, I’ll go all out with the beans, rice, and salad. It never fails to satisfy, no matter the occasion.
Variations & Customizations
This recipe is a fantastic canvas for creativity. For a “Fiesta” version, I’ve stirred a drained can of black beans and a cup of frozen corn into the meat mixture along with the seasoning. It stretches the meal further and adds wonderful color and texture. My vegetarian friends love when I make it with a plant-based ground “meat” alternative and cream of celery soup—it’s just as hearty and flavorful.
You can also play with the chip flavor! Cool Ranch Doritos create a totally different, herbaceous flavor profile that’s equally delicious. For a serious kick, use Spicy Nacho Doritos. I’ve even seen a version using crushed tortilla chips and a homemade enchilada sauce base, but for me, the classic Nacho Cheese is still the champion.
The cheese is another easy swap. A sharp cheddar gives it a bolder bite, while a Pepper Jack blend weaves in a subtle heat. I once used a queso blanco cheese blend when I was in a hurry, and it created an incredibly creamy, mild melt. Don’t be afraid to use what you love or what you have on hand.
How to Store, Freeze & Reheat
Storing leftovers is easy, but there’s a trick to keeping some texture. Once completely cool, I cover the baking dish tightly with foil or transfer portions to an airtight container. It will keep in the fridge for 3-4 days. The chips will soften, but the flavor remains fantastic. To reheat, I strongly recommend the oven or toaster oven. I spread a single-serving portion in an oven-safe dish and warm it at 350°F until hot, which usually takes 10-15 minutes. The microwave is convenient but will make the remaining chips very soft.
Yes, you can freeze this! I let the entire baked casserole cool completely, then wrap the whole dish tightly in a layer of plastic wrap followed by a layer of heavy-duty foil. It freezes well for up to 2 months. To cook from frozen, I don’t even thaw it. I remove the plastic wrap, cover it with the foil, and bake it at 350°F for about 60-75 minutes, removing the foil for the last 15 minutes to re-crisp the top. It won’t be quite as perfect as fresh, but it’s a lifesaver for future busy nights.
Conclusion
This Taco Doritos Casserole Bake is more than just a recipe; it’s a little piece of kitchen joy, a guaranteed smile-maker, and my personal secret weapon for turning an ordinary Tuesday into something special. It’s the beautiful, messy, delicious proof that the best meals often come from simple ideas made with love. I hope it finds a cozy spot in your recipe rotation and brings as much happy chaos and satisfied sighs to your table as it has to mine. Now, go preheat that oven and get ready for the compliments!