Pro Tips for Best Results
My first test, I was impatient and added the cream cheese layer while the base was still warm. Big mistake. It turned into a melty, messy puddle. Letting the brownie base cool completely is the single most important step for clean slicing and perfect topping adherence. I now use this waiting time to organize all my toppings into little bowls, which makes the decorating process so much more fun and less chaotic.
I tested the melting process for the white chocolate in the “sauce” three different ways: a double boiler, microwave, and mixing unmelted chips directly into the warm cream cheese. The microwave method, done carefully with frequent stirring, is by far the easiest and most effective. Just be sure to let it cool for a minute before adding it to the cream cheese, or you’ll risk cooking the eggs in the cream cheese (if yours contains it) and creating a grainy texture.
For the ultimate flavor, don’t skip toasting your nuts if you’re using them. I scatter chopped pecans or almonds on a baking sheet and pop them in the oven for 5-7 minutes while the brownie base bakes. It fills your kitchen with an amazing aroma and adds a deep, nutty crunch that contrasts beautifully with the sweet, creamy toppings. It’s a small step that makes a huge difference.
Common Mistakes to Avoid
One mistake I made the first time was not lining the pan with parchment. I thought I could just grease it really well. I was wrong. Even with greasing, the fudgy brownie stuck terribly in spots, and my beautiful pizza tore when I tried to transfer it to a plate. Don’t do what I did! The parchment paper is your insurance policy for a flawless presentation. It peels away perfectly every single time.
Another easy pitfall is overmixing the batter once you add the flour. I get it—you want it to be smooth. But as soon as the last streaks of flour disappear, stop stirring. Overmixing develops the gluten in the flour, which can make your brownie base tough and chewy instead of tender and fudgy. Fold gently and trust the process. The batter is supposed to be thick.
Serving Suggestions
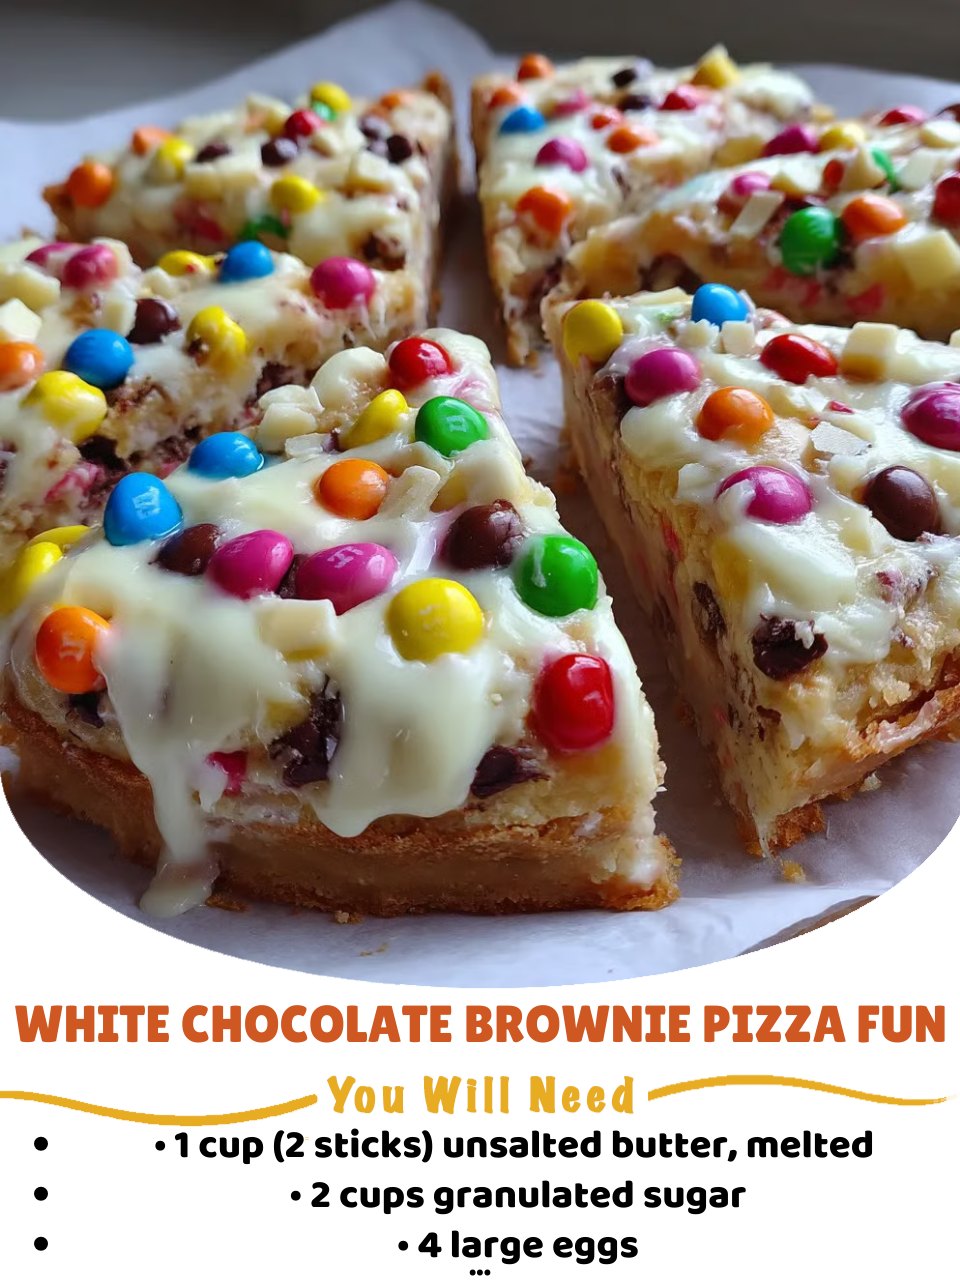
I love serving this pizza right on the pan at the center of the table with a pizza cutter alongside. It creates such a fun, interactive moment where everyone can choose their slice. For a dinner party, I sometimes pre-slice it and arrange the pieces on a large platter for easy grabbing. The visual of the colorful toppings against the white “sauce” and dark brownie crust is always a conversation starter.
For accompaniments, a scoop of vanilla ice cream or a dollop of freshly whipped cream on the side is absolutely divine. The cold, creamy ice cream melting into the rich, room-temperature brownie is a textural dream. If I’m serving it to adults, I’ll sometimes offer a small glass of cold milk, a rich stout beer, or even a cup of strong coffee to balance the sweetness.
When I make this for kids, I turn the decorating into an activity. I’ll set out bowls of different toppings and let them create their own designated “slice” or quadrant. It keeps them entertained and makes the dessert feel extra special and personal to them. They love being the chefs!
Variations & Customizations
The beauty of this concept is its versatility. For a seasonal twist, I’ve topped it with crushed peppermint candies and a drizzle of dark chocolate for Christmas, or pastel sprinkles and mini chocolate eggs for Easter. In the summer, a layer of sweetened whipped cream (instead of the cream cheese) topped with fresh strawberries, blueberries, and a kiwi “star” in the center is a stunning, lighter option.
If you’re a fan of contrasting flavors, try swapping the white chocolate chips in the batter for semisweet or dark chocolate chips. You can also mix a tablespoon of instant espresso powder into the batter with the dry ingredients—it won’t make it taste like coffee, but it will amplify the chocolate flavor incredibly. For the “sauce,” you could fold in a few tablespoons of peanut butter or Nutella for a different creamy element.
I’ve seen friends make a “s’mores” version that’s fantastic. They skip the white chocolate cream cheese and spread marshmallow fluff over the cooled base, then use a kitchen torch to toast it lightly before scattering with mini chocolate chips and crushed graham crackers. It’s messy, gooey, and absolutely incredible.
How to Store, Freeze & Reheat
From my experience, this dessert is best enjoyed the day it’s made, but it will keep beautifully covered tightly in plastic wrap or in an airtight container at room temperature for up to 2 days. The brownie base stays lovely and fudgy. If you’ve used fresh fruit toppings, you’ll want to store it in the fridge, but know that the cold will firm up the base significantly. I recommend bringing it to room temperature for about an hour before serving again.
You can freeze the undecorated, baked brownie base very successfully. Once it’s completely cool, wrap it tightly in a layer of plastic wrap and then a layer of foil. It will keep for up to 3 months. Thaw it overnight in the fridge, then bring it to room temperature on the counter before adding your “sauce” and toppings fresh. I don’t recommend freezing the fully assembled pizza, as the cream cheese layer and many toppings don’t freeze and thaw well texture-wise.
Conclusion
This White Chocolate Brownie Pizza has become my go-to recipe for turning an ordinary day into a small celebration. It’s a reminder that baking should be as much about the joy in the making as it is about the delicious result. I hope you gather your ingredients, embrace the fun, and create a dessert that brings as much laughter and satisfaction to your table as it has to mine. Happy baking