Once the mixture is firm, use a small cookie scoop or a tablespoon to portion it out. Roll them quickly between your palms into tight, smooth balls—the heat of your hands will start to soften them, so work with purpose. Place them on your parchment-lined sheet. Once all are rolled, I pop the whole tray back into the freezer for a solid 15-20 minutes. This second chill is my golden rule; a frozen ball is a dippable ball. Meanwhile, melt your white chocolate and coconut oil in short 30-second bursts in the microwave, stirring vigorously between each, until completely smooth.
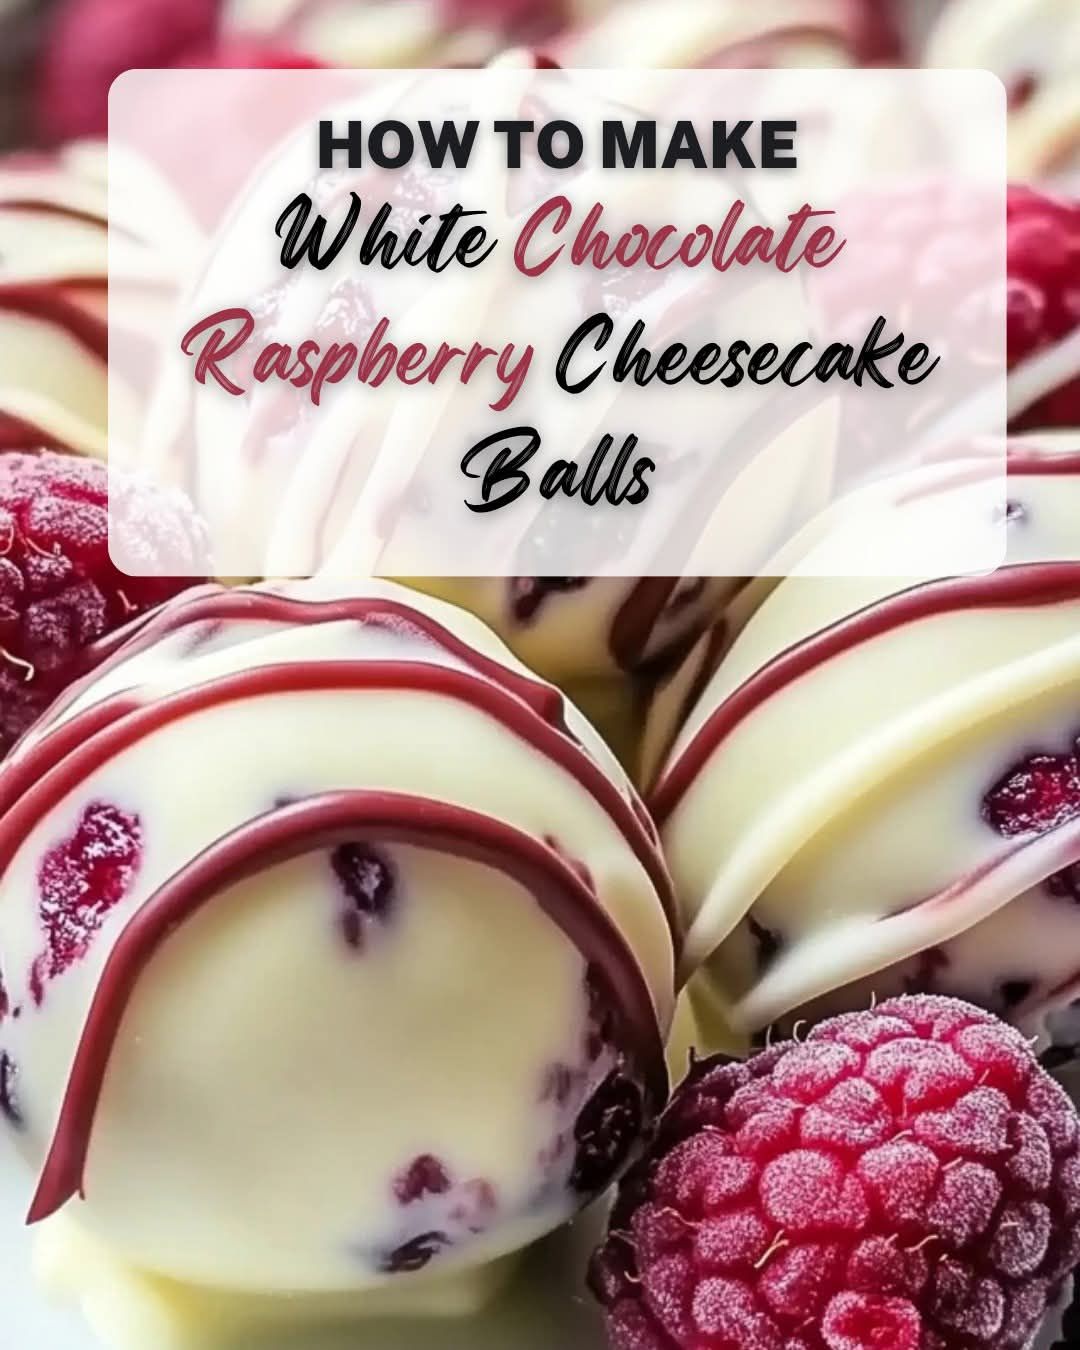
Now for the fun, messy part: dipping! Take only 3-4 balls out of the freezer at a time. Using a fork, lower a ball into the melted chocolate, tap it gently against the bowl’s edge to let the excess drip off, and then carefully slide it back onto the parchment. If you’re adding freeze-dried raspberry garnish, sprinkle it on immediately before the chocolate sets. The chocolate will set quickly because the centers are cold. Repeat in small batches, re-melting chocolate as needed. That first bite of the crisp white chocolate shell giving way to the creamy, tangy, raspberry-speckled center is pure bliss.
Pro Tips for Best Results
My biggest tip came from a messy trial run: temperature control is everything. If your cheesecake centers aren’t cold enough, they’ll slump and melt into the chocolate, creating a blobby mess. I tested this three different ways, and the winning method is the double-chill: one chill for the mix, and a second deep freeze for the shaped balls. They should be firm to the touch, almost like little marbles, before they meet the chocolate. This ensures a thin, even coating that snaps when you bite into it.
When melting the white chocolate, be gentle and patient. White chocolate is notorious for seizing (turning into a grainy lump) if it gets too hot or if even a drop of water gets in. I use a completely dry bowl and microwave in very short bursts, stirring well each time. Adding that tablespoon of coconut oil isn’t just for shine—it thinsthe chocolate to a perfect dipping consistency and makes it more stable. If your chocolate does get thick or clumpy, don’t panic! Stir in a tiny bit more oil (½ teaspoon at a time) to bring it back.
For the most beautiful presentation, don’t overlook the garnish. A light sprinkle of finely crushed freeze-dried raspberries does two things: it gives a stunning pop of color and a intense, tangy raspberry flavor that complements the sweet white chocolate perfectly. I’ve also rolled some in extra graham cracker crumbs for a “crust” effect. Let the finished balls set completely at room temperature—don’t refrigerate them until the chocolate is fully dry to the touch, or you might get condensation spots on the shell.
Common Mistakes to Avoid
The first time I made these, I was impatient and tried to roll the balls right after mixing. Big mistake. The soft mixture stuck to everything, and I ended up with lopsided, messy blobs that were impossible to coat neatly. Don’t do what I did—respect the chill time! That hour (or two) in the fridge transforms the mixture from a soft batter into a workable dough. It’s the difference between a frustrating kitchen experience and an enjoyable one.
Another classic mistake is over-stirring the raspberry jam. You want gentle, swirling folds to create marbling, not a complete mix-in. When you mix it in completely, the added moisture can make the dough too soft again, and you lose that beautiful visual contrast of creamy white and vibrant pink. Also, avoid using a double boiler for the white chocolate unless you’re very confident—it’s easy to accidentally steam the bowl and introduce moisture. The controlled, dry heat of the microwave, handled carefully, is actually more foolproof for this recipe.
(See the next page below to continue…)