Pro Tips for Best Results
Here’s what I learned after testing this three different ways: the oven temperature is crucial. I tried a higher temp for faster melting, but the bread burned before the interior was properly warmed through. 375°F is the perfect medium for a gentle, thorough heat that melts everything together without any burnt edges. It’s the difference between a good sandwich and a great one.
Another game-changer is to slightly toast the buttered rolls for about 3-4 minutes before adding the fillings. I tried this on my third attempt, and it created an even sturdier, crispier base that resisted sogginess from the juicy tomatoes and peppers. It’s an extra step, but if you have the time, it’s worth it for that perfect texture.
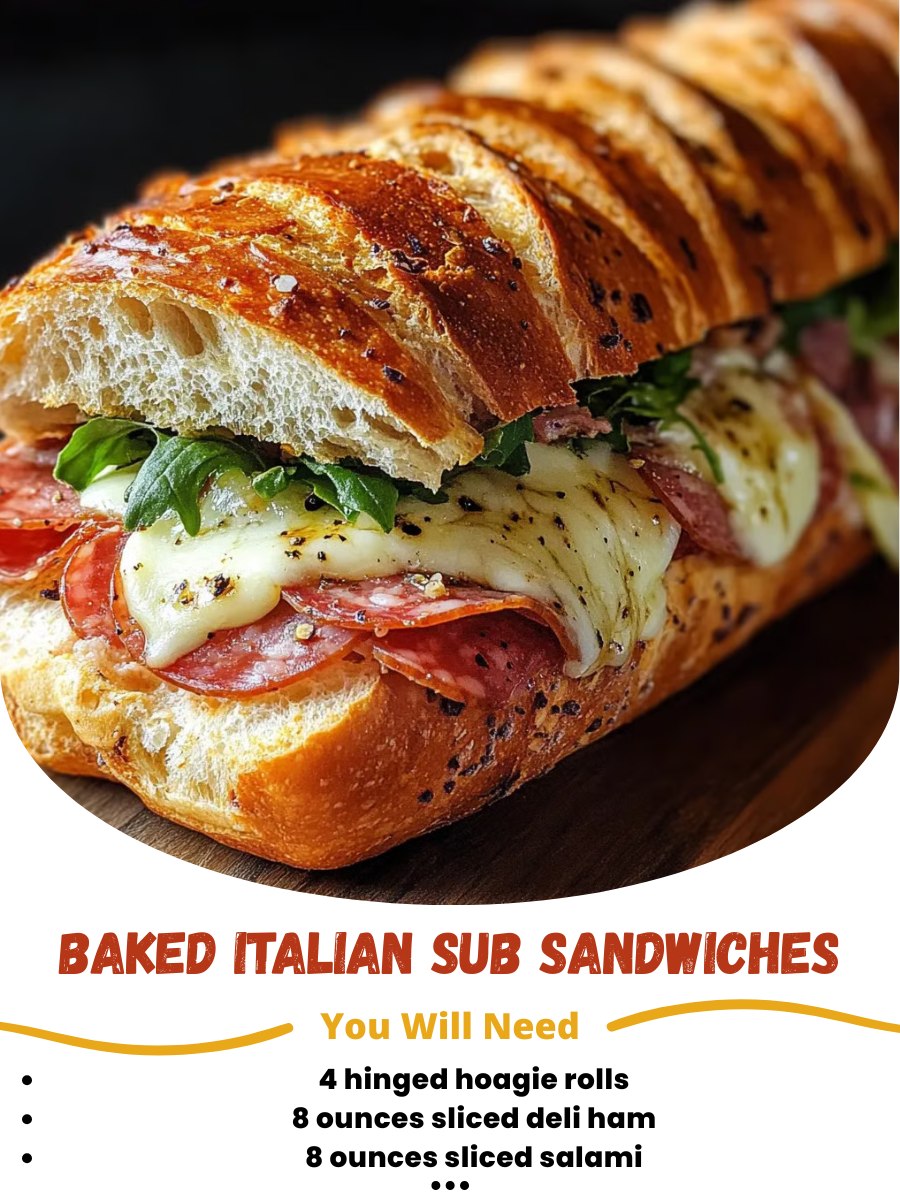
Finally, let’s talk cheese coverage. Make sure your slices of provolone are laid to cover the meat from edge to edge. This creates a delicious “seal” that holds all the other ingredients in place as it melts. I’ve been lazy and just tossed the cheese in the middle, and everything slides out in one messy bite. Full coverage is the way to go.
Common Mistakes to Avoid
My biggest mistake the first time? I put the lettuce on before baking. I thought it would wilt nicely like spinach. Oh, was I wrong. It turned into a soggy, bitter, warm mess that ruined the texture completely. Don’t do what I did! The lettuce must be added fresh at the end. It provides that essential cool crunch.
Another pitfall is overloading the sandwich. It’s tempting to add more of everything, but if you pile it too high, the roll can’t close properly, the ingredients don’t heat evenly, and you end up with a cold center. Stick to the recommended amounts—they are perfectly balanced. I also tried skipping the mayo layer once, thinking the butter was enough, and the bottom bread was a bit dry. That thin mayo layer is your insurance policy for a perfectly moist bite.
Serving Suggestions
I love serving these subs right on the parchment-lined baking sheet in the middle of the table for a fun, casual family-style meal. They are incredibly hearty on their own, but if I want to round things out, I always pair them with a simple, tangy side. My go-to is a basic vinaigrette-based pasta salad or a big bowl of crispy potato chips for that added salt and crunch.
For a more balanced plate, a light, acidic side is perfect to cut through the richness. I often whip up a quick Italian-inspired chopped salad with chickpeas, cucumbers, olives, and a lemon-oregano dressing. The freshness complements the warm, savory sandwich beautifully. It’s also what I serve if I have friends over—it feels more like a complete meal.
On game days or for bigger gatherings, I cut each baked sub into three or four diagonal pieces and arrange them on a platter. They become the perfect, mess-free finger food. I set out little bowls of extra banana peppers, marinara sauce for dipping, and pepperoncini. Letting people customize their dip makes it an interactive snack that’s always a hit.
Variations & Customizations
The beauty of this recipe is how easily it adapts. My husband isn’t a huge ham fan, so sometimes I make a version for him using all capicola and add a few slices of pepperoni for extra spice. It’s fantastic. You can really use any Italian meats you love—mortadella or soppressata would be wonderful here. For a spicy kick, I’ve also added a drizzle of hot honey over the meats before adding the cheese. Sweet, spicy, and salty—it’s incredible.
For a cheesier twist, I’ve swapped the provolone for a mix of mozzarella (for meltiness) and a little sharp Asiago (for flavor). I’ve even seen a friend make a “pizza sub” version by spreading a tablespoon of pizza sauce over the mayo layer and using only pepperoni and mozzarella. It was like a inside-out, deconstructed pizza and her kids devoured it.
If you’re watching carbs or just want to switch it up, this method works wonderfully on ciabatta rolls, or even as a bakeable filling for large portobello mushroom caps for a low-carb option. I’ve also made a “deconstructed” version for a crowd by chopping the rolls into cubes, tossing everything (except the lettuce) together in a baking dish, and baking it as a casserole. Serve it with forks—it’s gloriously messy and feeds a crowd easily.
How to Store, Freeze & Reheat
From experience, these sandwiches are best enjoyed fresh. However, if you have leftovers, let them cool completely, wrap each one tightly in aluminum foil, and store in the fridge for up to 2 days. Important: store them without the lettuce added. When you’re ready to eat, reheat the foil-wrapped sub in a 350°F oven for 10-15 minutes until hot all the way through. Do not microwave it if you can avoid it—the bread will become very tough and chewy. Then, add your fresh lettuce.
You can also assemble the sandwiches (without lettuce and without brushing the outside with butter), wrap them tightly in plastic wrap and then foil, and freeze for up to a month. When ready to bake, don’t thaw. Unwrap, brush the outside with the garlic butter, and bake from frozen, adding 5-8 extra minutes to the baking time. This is my secret for having an impressive last-minute meal always on hand.
Conclusion
This Baked Italian Sub Sandwich recipe is more than just a set of instructions—it’s a little piece of my kitchen life that I’m so happy to share with you. It represents those moments of simple, delicious triumph that make cooking at home so rewarding. I hope it brings as much warmth, flavor, and joy to your table as it has to mine. Give it a try, make it your own, and get ready for that incredible moment when you pull your own golden, cheesy, aromatic masterpiece from the oven. Happy baking