Pro Tips for Best Results
I tested the garlic cooking method three different ways: adding it with the raw chicken, adding it at the end, and sautéing it first in butter. Sautéing it first was the clear winner. It gently cooks the garlic, mellowing its bite and infusing the entire base of butter with its flavor, which then coats every piece of chicken. It creates a more rounded, deep garlic taste compared to the sharper, sometimes harsh flavor you get from adding it raw or at the last minute.
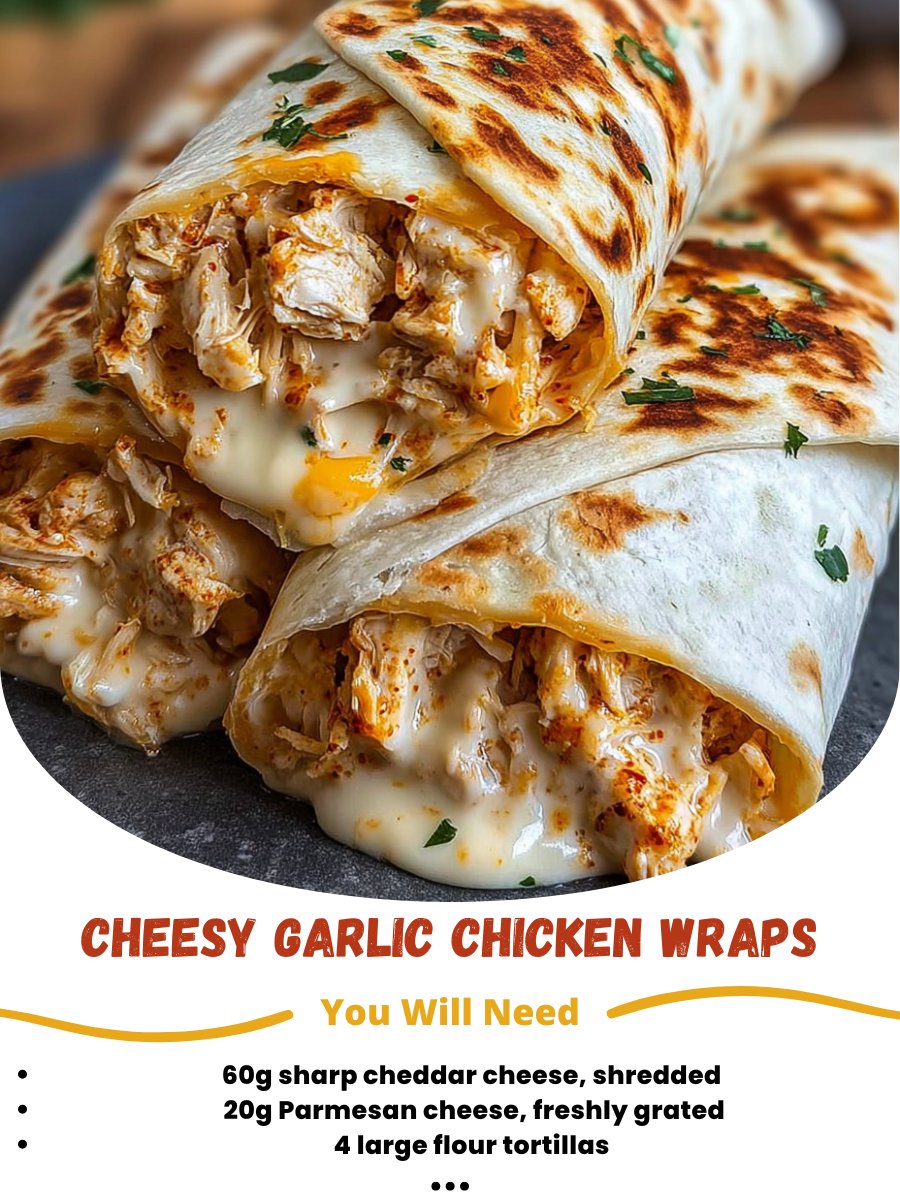
Here’s what I learned the hard way about the cheese: shred it yourself. I know it’s an extra step, but pre-shredded bagged cheese is coated to prevent clumping, which also prevents it from melting into that smooth, gooey, sauce-like consistency we crave. When you shred a block of cheddar and grate fresh Parmesan, they melt together seamlessly into the chicken, creating a creamy glue that holds everything together in the most delicious way possible.
Don’t skip the final pan-toasting of the wrapped tortilla. The first time I made these, I just assembled and served, and while they were good, the tortilla was a bit soft. Giving the sealed wrap a quick toast in the dry pan crisps the exterior beautifully, adds a lovely toasted flavor, and ensures the internal cheese is fully molten. It takes this from a “sloppy joe” texture to a neat, restaurant-style handheld meal.
Common Mistakes to Avoid
The biggest mistake I made the first time was overcrowding the skillet with chicken. I was in a rush and dumped it all in at once. The chicken steamed instead of seared, releasing liquid and making it harder to get those tasty browned bits. Don’t do what I did! If your skillet isn’t very large, cook the chicken in two batches. It feels like an extra step, but it guarantees that beautiful, flavorful sear on every piece and prevents a watery filling.
Another pitfall is using cold tortillas straight from the fridge. A cold tortilla is much more likely to crack and tear when you try to roll it. I always microwave my stack of tortillas for about 20 seconds wrapped in a damp paper towel, or I warm them briefly in a dry pan. They become pliable and soft, rolling around the filling without any frustrating splits. It’s a tiny act of preparation that makes the assembly process so much smoother.
Serving Suggestions
I like serving these wraps straight from the skillet, sliced in half on a diagonal to show off that cheesy interior. They are a complete meal on their own, but for a truly satisfying dinner, I always pair them with something cool and crisp to cut through the richness. A simple side salad with a lemony vinaigrette is my absolute go-to. The freshness is the perfect contrast to the warm, savory, cheesy wrap.
On weekends when I want to make more of an event out of it, I’ll set up a “wrap bar” with small bowls of extra toppings. Think dollops of cool sour cream or Greek yogurt, a quick pico de gallo, some sliced jalapeños for heat, or even a drizzle of ranch dressing. It’s a fun way to let everyone customize their second helping and makes the meal feel interactive and special.
For the kids (or the kid in you), don’t underestimate the power of a classic dipping sauce. I often serve these with a small bowl of warm marinara sauce on the side for dipping, almost like a cheesy chicken pizza wrap. A creamy cilantro-lime sauce or a chipotle mayo also works wonders. It adds another layer of flavor and makes the whole eating experience just a bit more fun.
Variations & Customizations
The beauty of this recipe is its adaptability. I’ve made a fantastic “Buffalo Blue” version by tossing the cooked chicken in a couple tablespoons of Buffalo sauce and swapping the cheddar for crumbled blue cheese. The Parmesan still works wonderfully here for a salty punch. Just be prepared for a messier, more flavor-packed wrap—have napkins ready!
For a veggie-packed twist, I love adding a handful of fresh spinach to the skillet right after the chicken is cooked. Let it wilt down in the garlic butter for just a minute before assembling. I’ve also stirred in finely chopped sun-dried tomatoes or roasted red peppers for a sweet, tangy burst. You can even swap the chicken for cauliflower florets for a vegetarian option; just roast them first until tender and golden.
If you’re watching carbs, this filling is just as amazing over a bed of crisp romaine lettuce as a warm chicken salad, or stuffed into a low-carb tortilla. I’ve also skipped the wrap entirely and served the cheesy garlic chicken mixture over a baked potato or tucked into bell pepper halves for a lighter take. The core flavors are so good, they work in almost any vessel.
How to Store, Freeze & Reheat
To store leftovers, I wrap each cooled wrap tightly in aluminum foil and place them in a sealed container in the fridge. They’ll keep well for up to 2 days. For reheating, the oven or air fryer is your best friend. Unwrap them, place on a baking sheet, and heat at 350°F (175°C) for 10-15 minutes until heated through and the tortilla is crispy again. The microwave will work in a pinch, but it will make the tortilla soft and soggy.
You can also freeze these before the final pan-toasting step. Wrap each assembled but uncooked wrap tightly in plastic wrap, then foil. Freeze for up to 2 months. To cook from frozen, I unwrap them, discard the plastic, re-wrap in the foil, and bake at 375°F (190°C) for 25-30 minutes. Then, for the best texture, I unwrap them and give them a quick sear in a hot pan to crisp up the tortilla. It’s like having a fantastic freezer meal ready to go!
Conclusion
These Cheesy Garlic Chicken Wraps have saved more of my weeknights than I can count. They’re proof that with a few good ingredients and a trusty skillet, you can create something truly special without any stress. I hope this recipe brings as much warmth, cheesy joy, and happy, full bellies to your table as it has to mine. Now, go forth and get that garlic sizzling—your perfect weeknight dinner is just a wrap away.